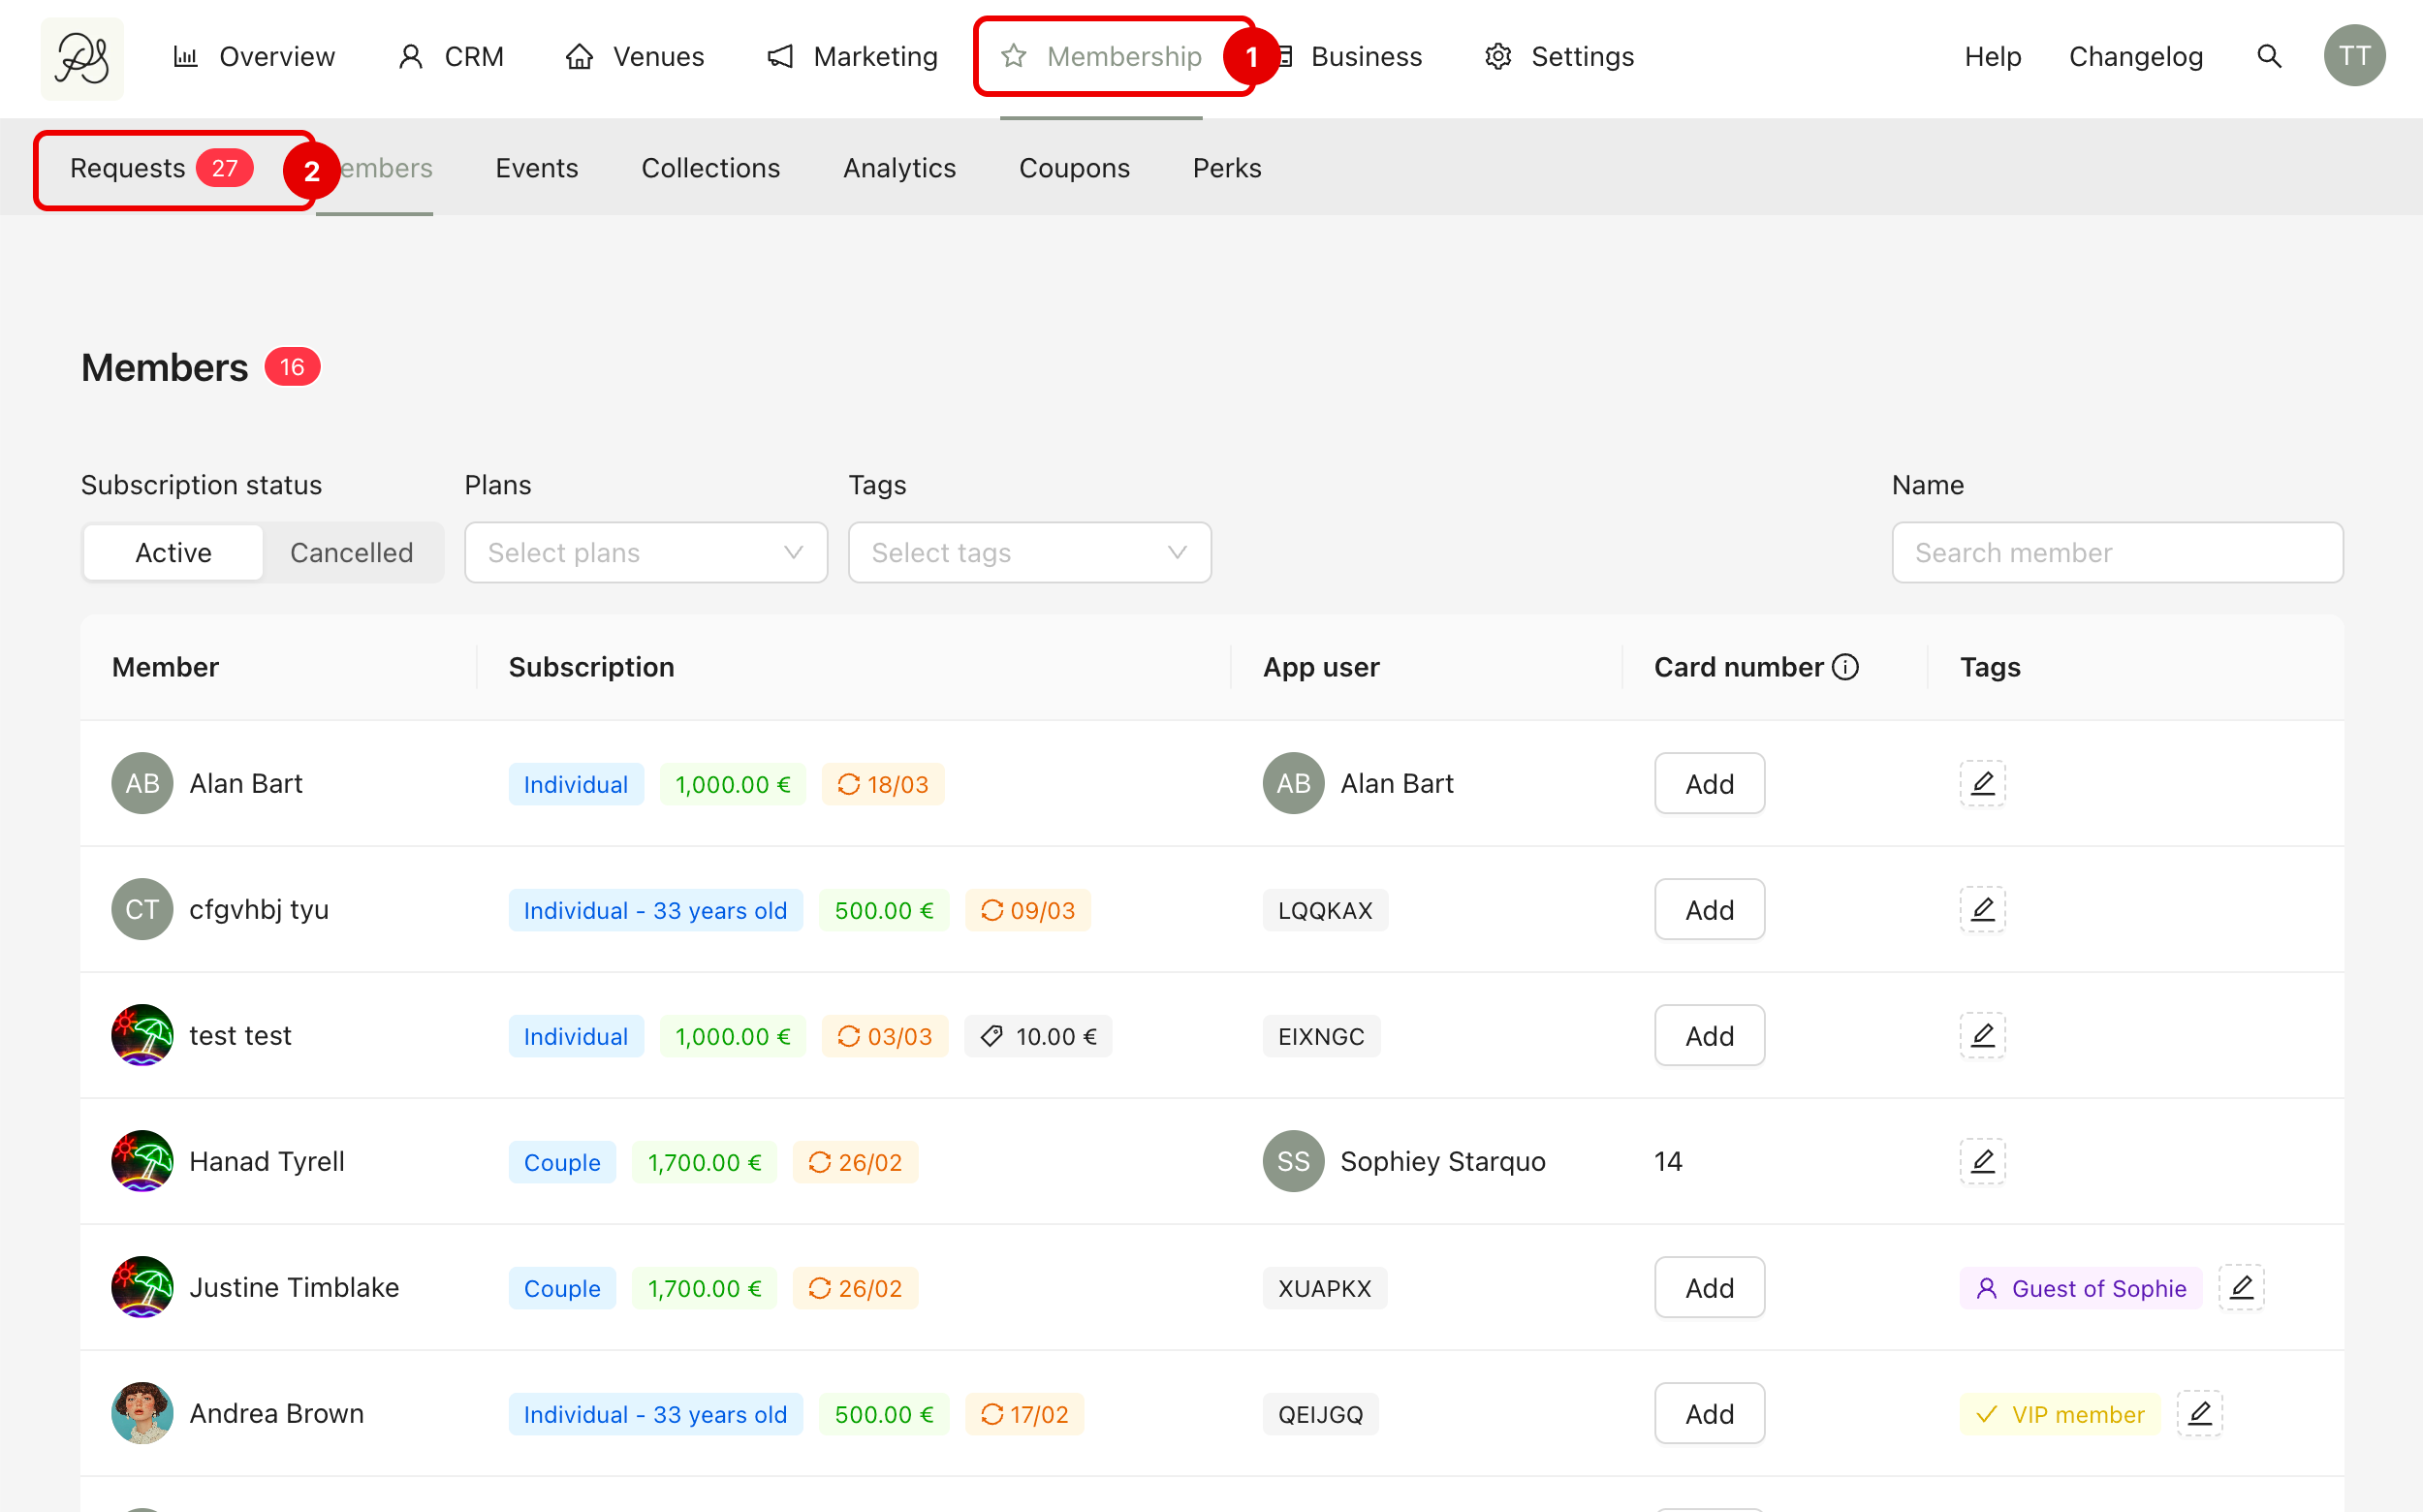
Once a customer completes the onboarding process and activates their membership, they appear in the Members tab under the Membership section.
From this page, you can monitor all members, manage their access status, organize them with tags, and review their detailed information.
To view members, go to Membership (1) → Members (2). This page displays the full list of members.
You can filter the list by program, plan, or tag, and use the search bar to quickly find a member by name. The table provides essential information such as the subscribed plan, renewal date, connected application account, assigned tags, and current membership status.

To see detailed information about a member, click directly on their row in the Members list.
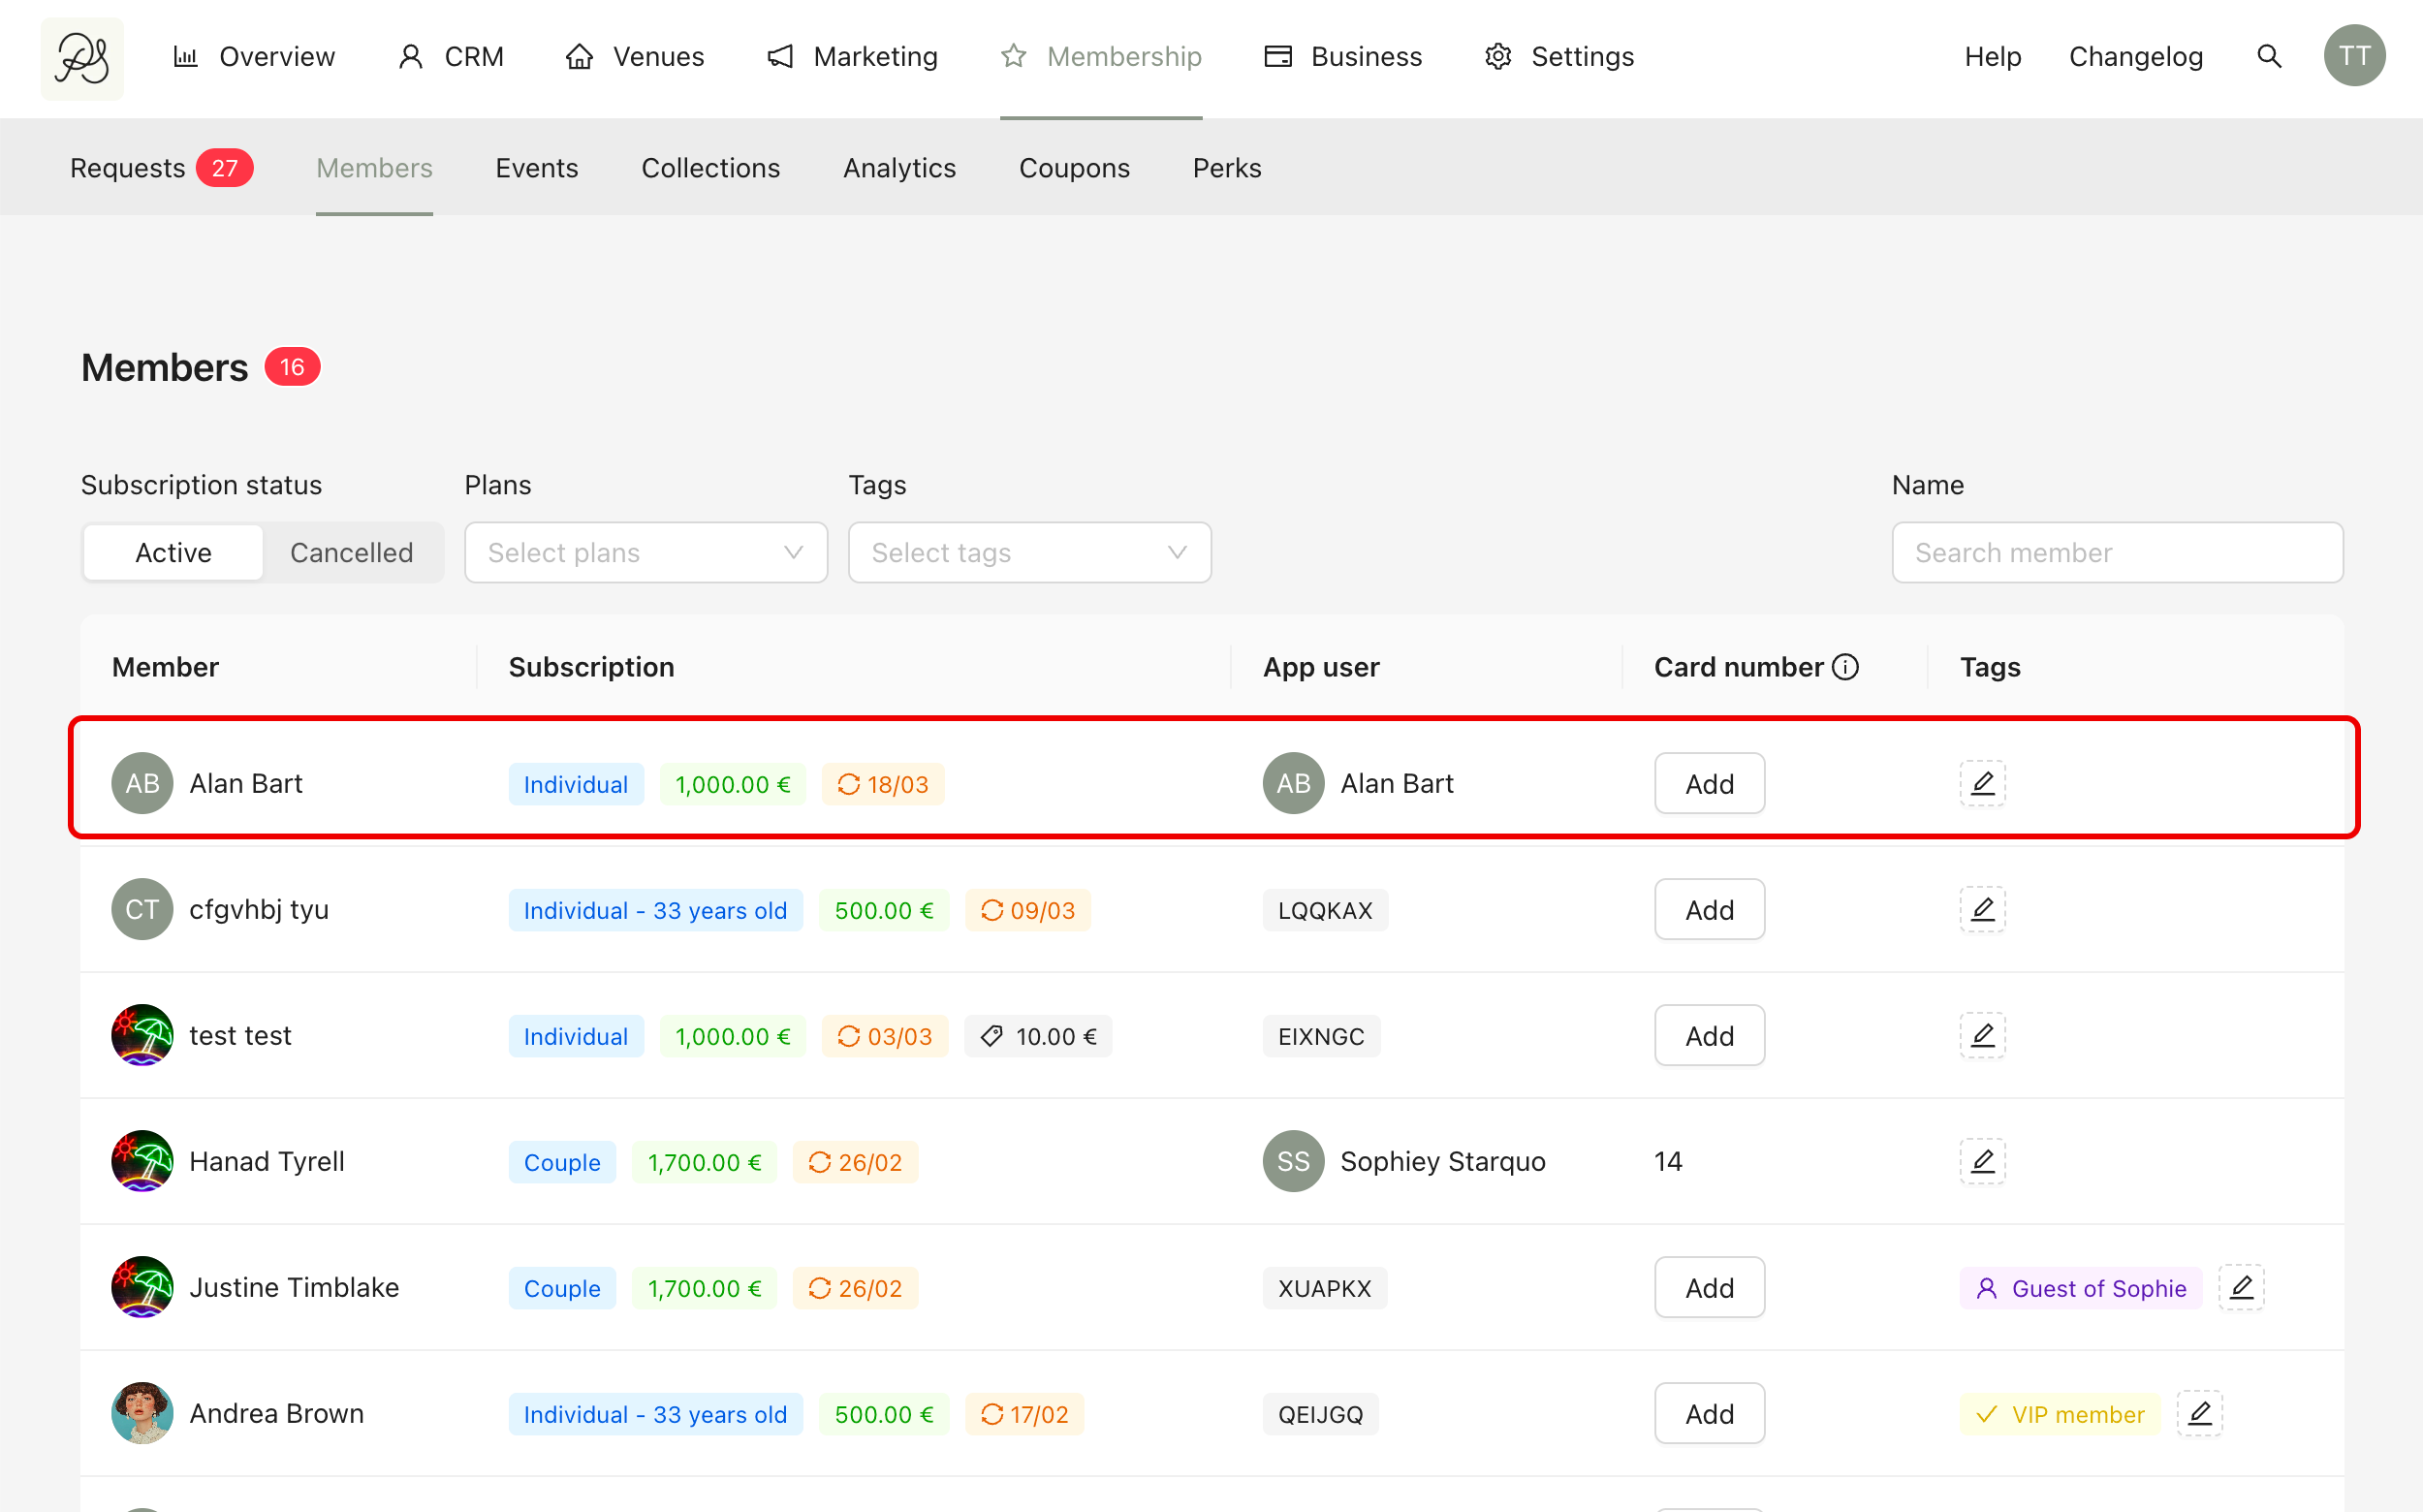
The detail page includes subscription information, form answers, event participation, and activity history. This page gives you a complete overview of the member’s interactions and membership status.

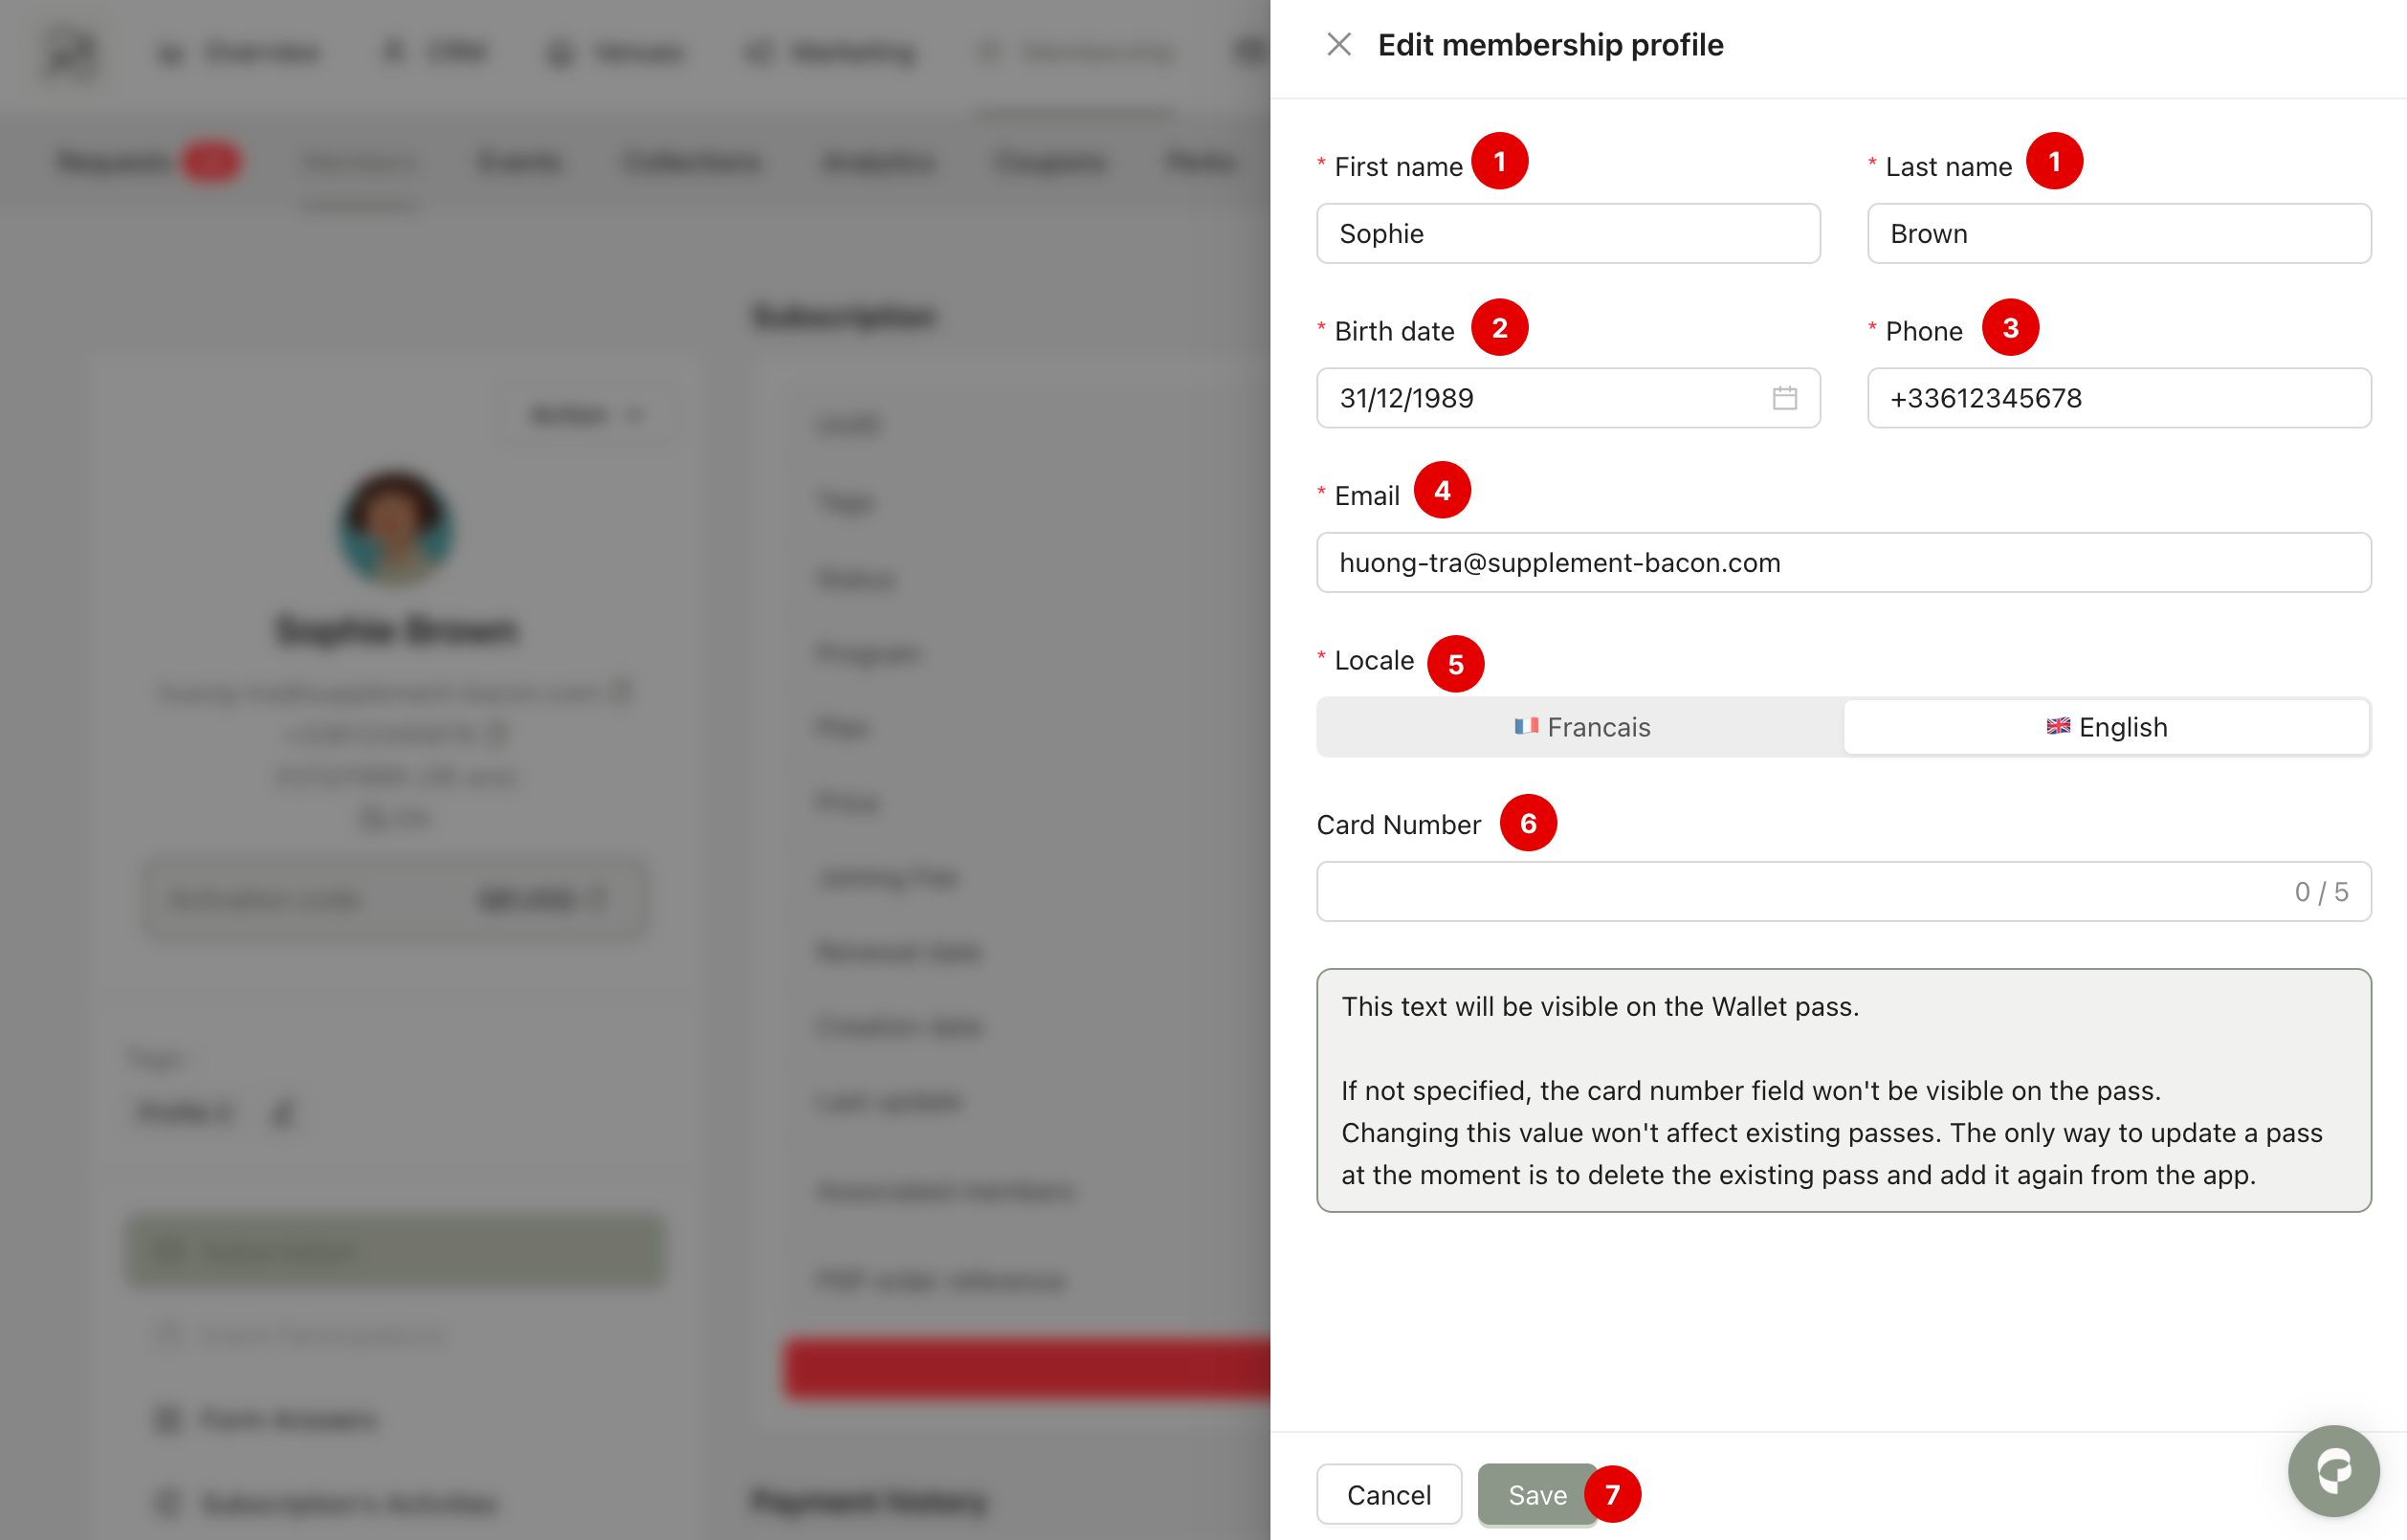
Step 1: Go to Membership → Members and select the member you want to edit to access their detail page. Then click Action → Edit member infos.
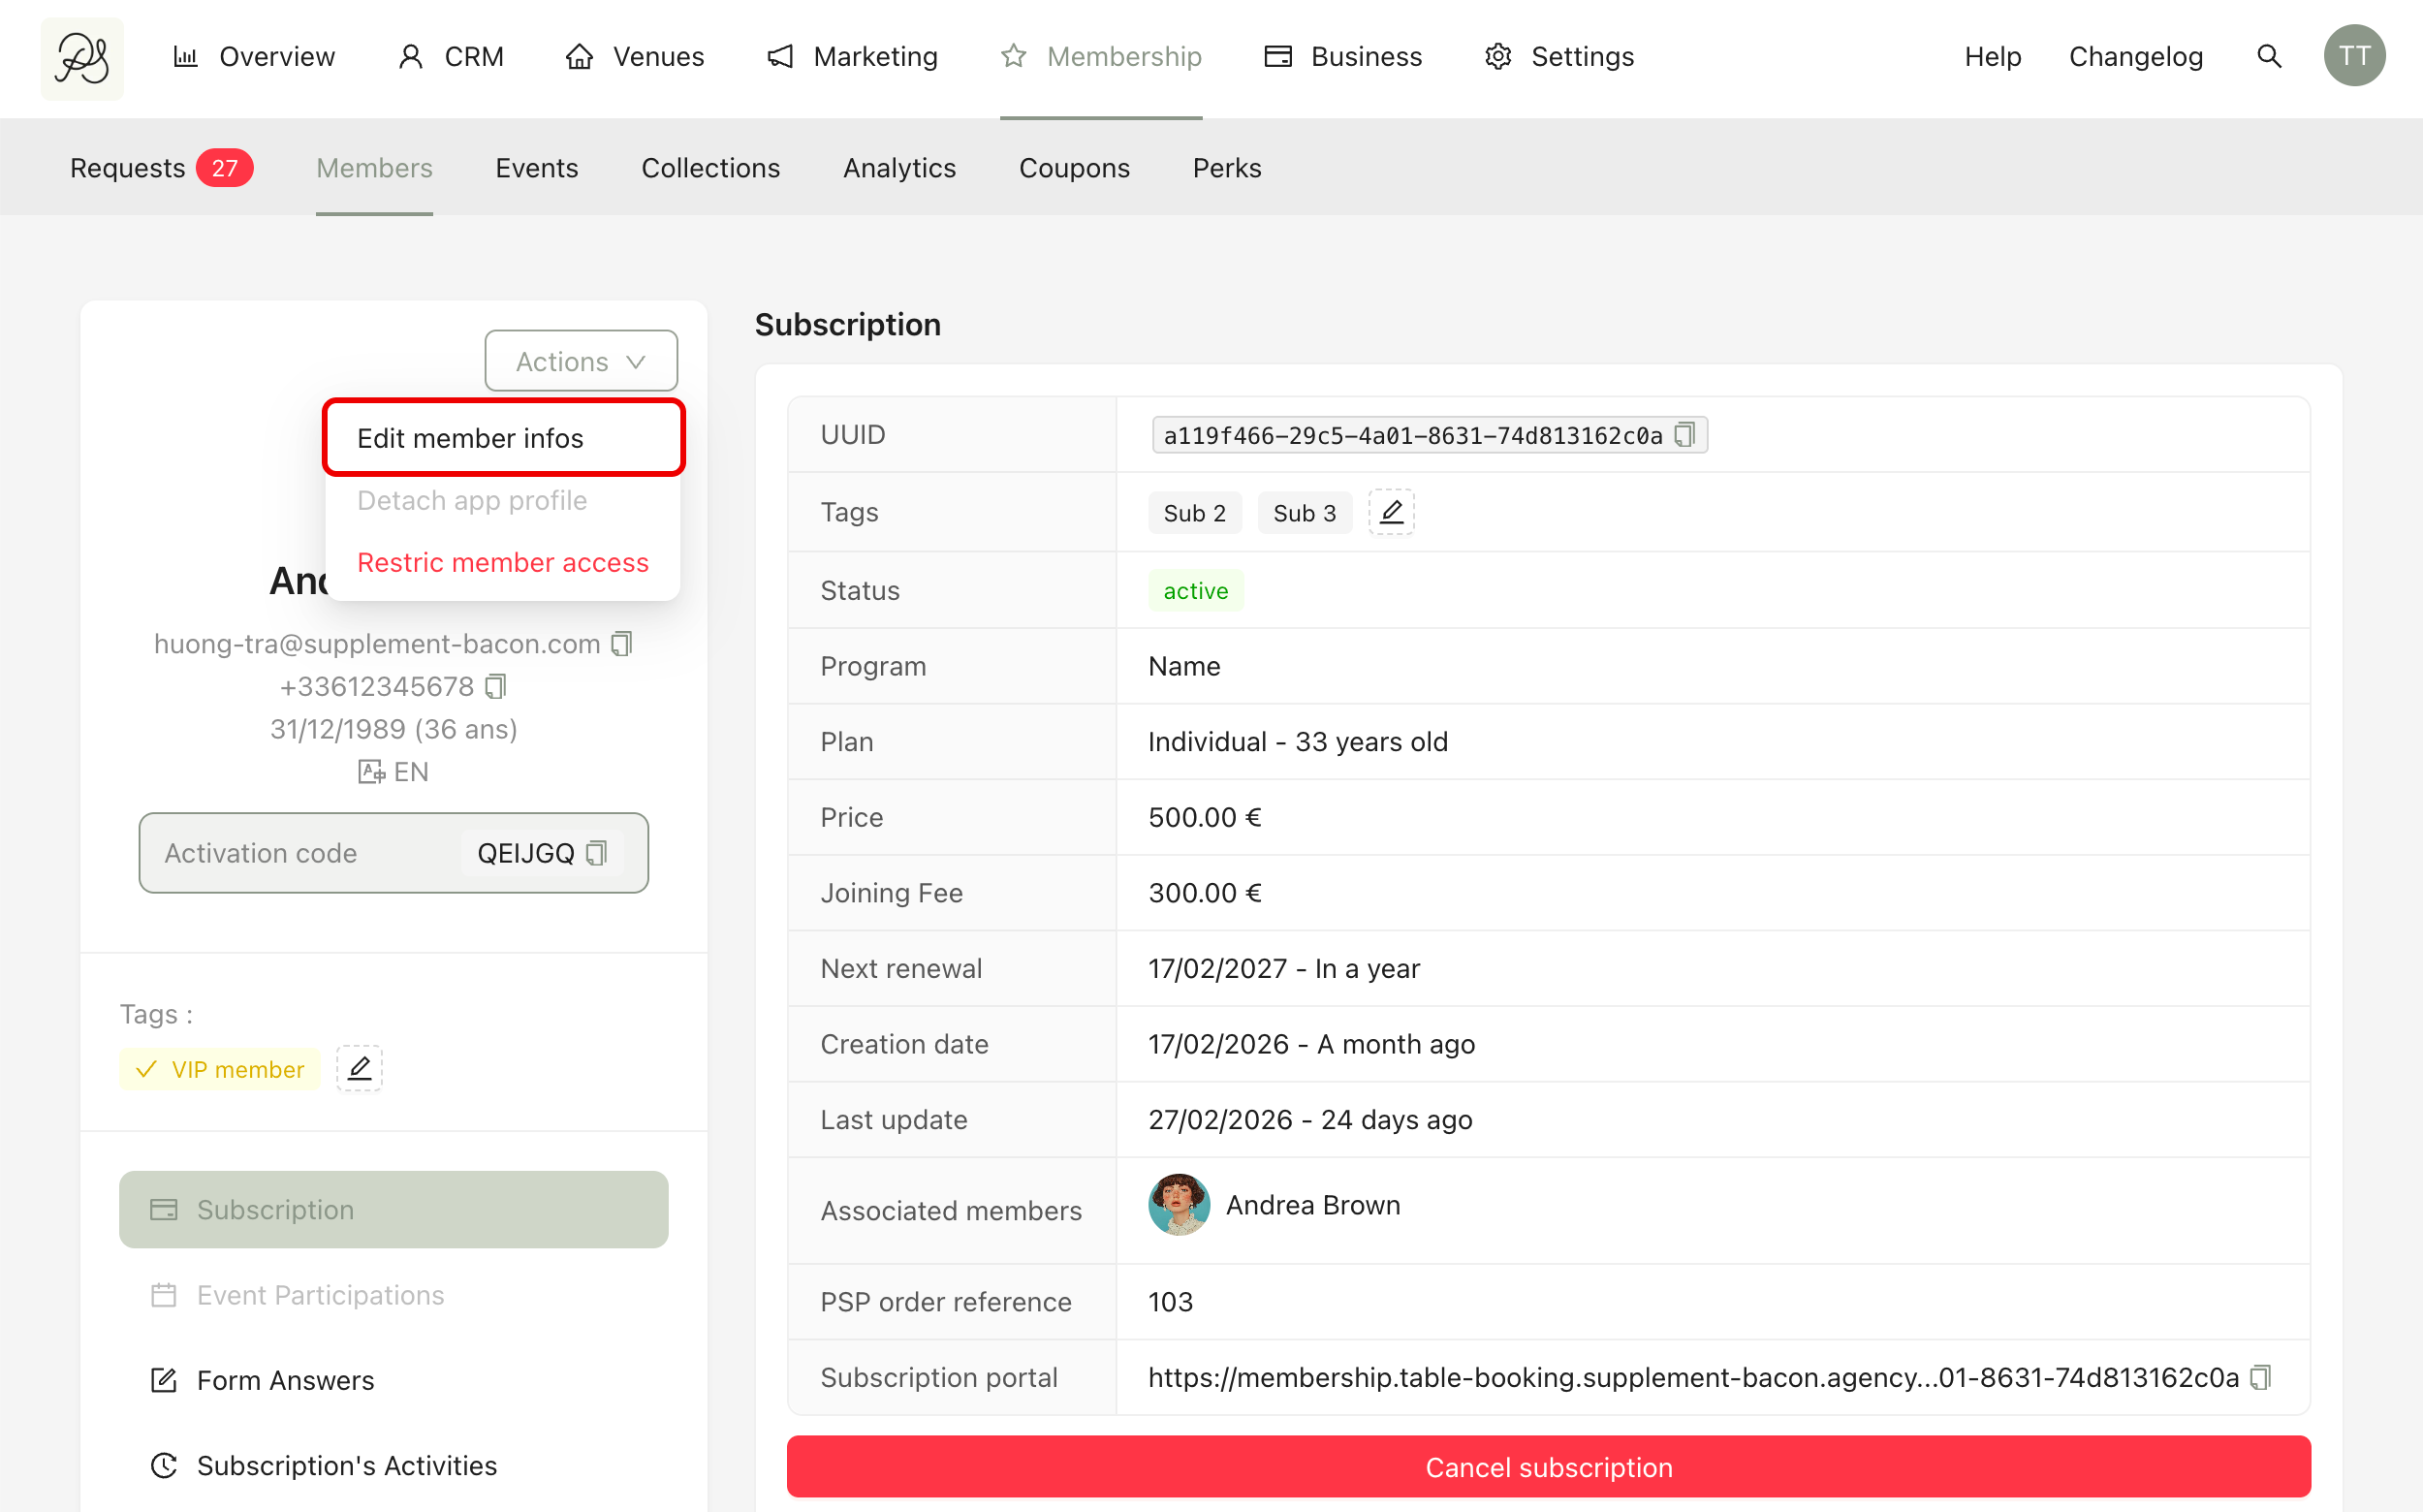
Step 2: A side modal will appear. You can edit the following information:
First name and last name (1)
Date of birth (2)
Phone number (3)
Email address (4)
Preferred language (5)
Card number (optional) (6)
Click Save to apply the changes (7).
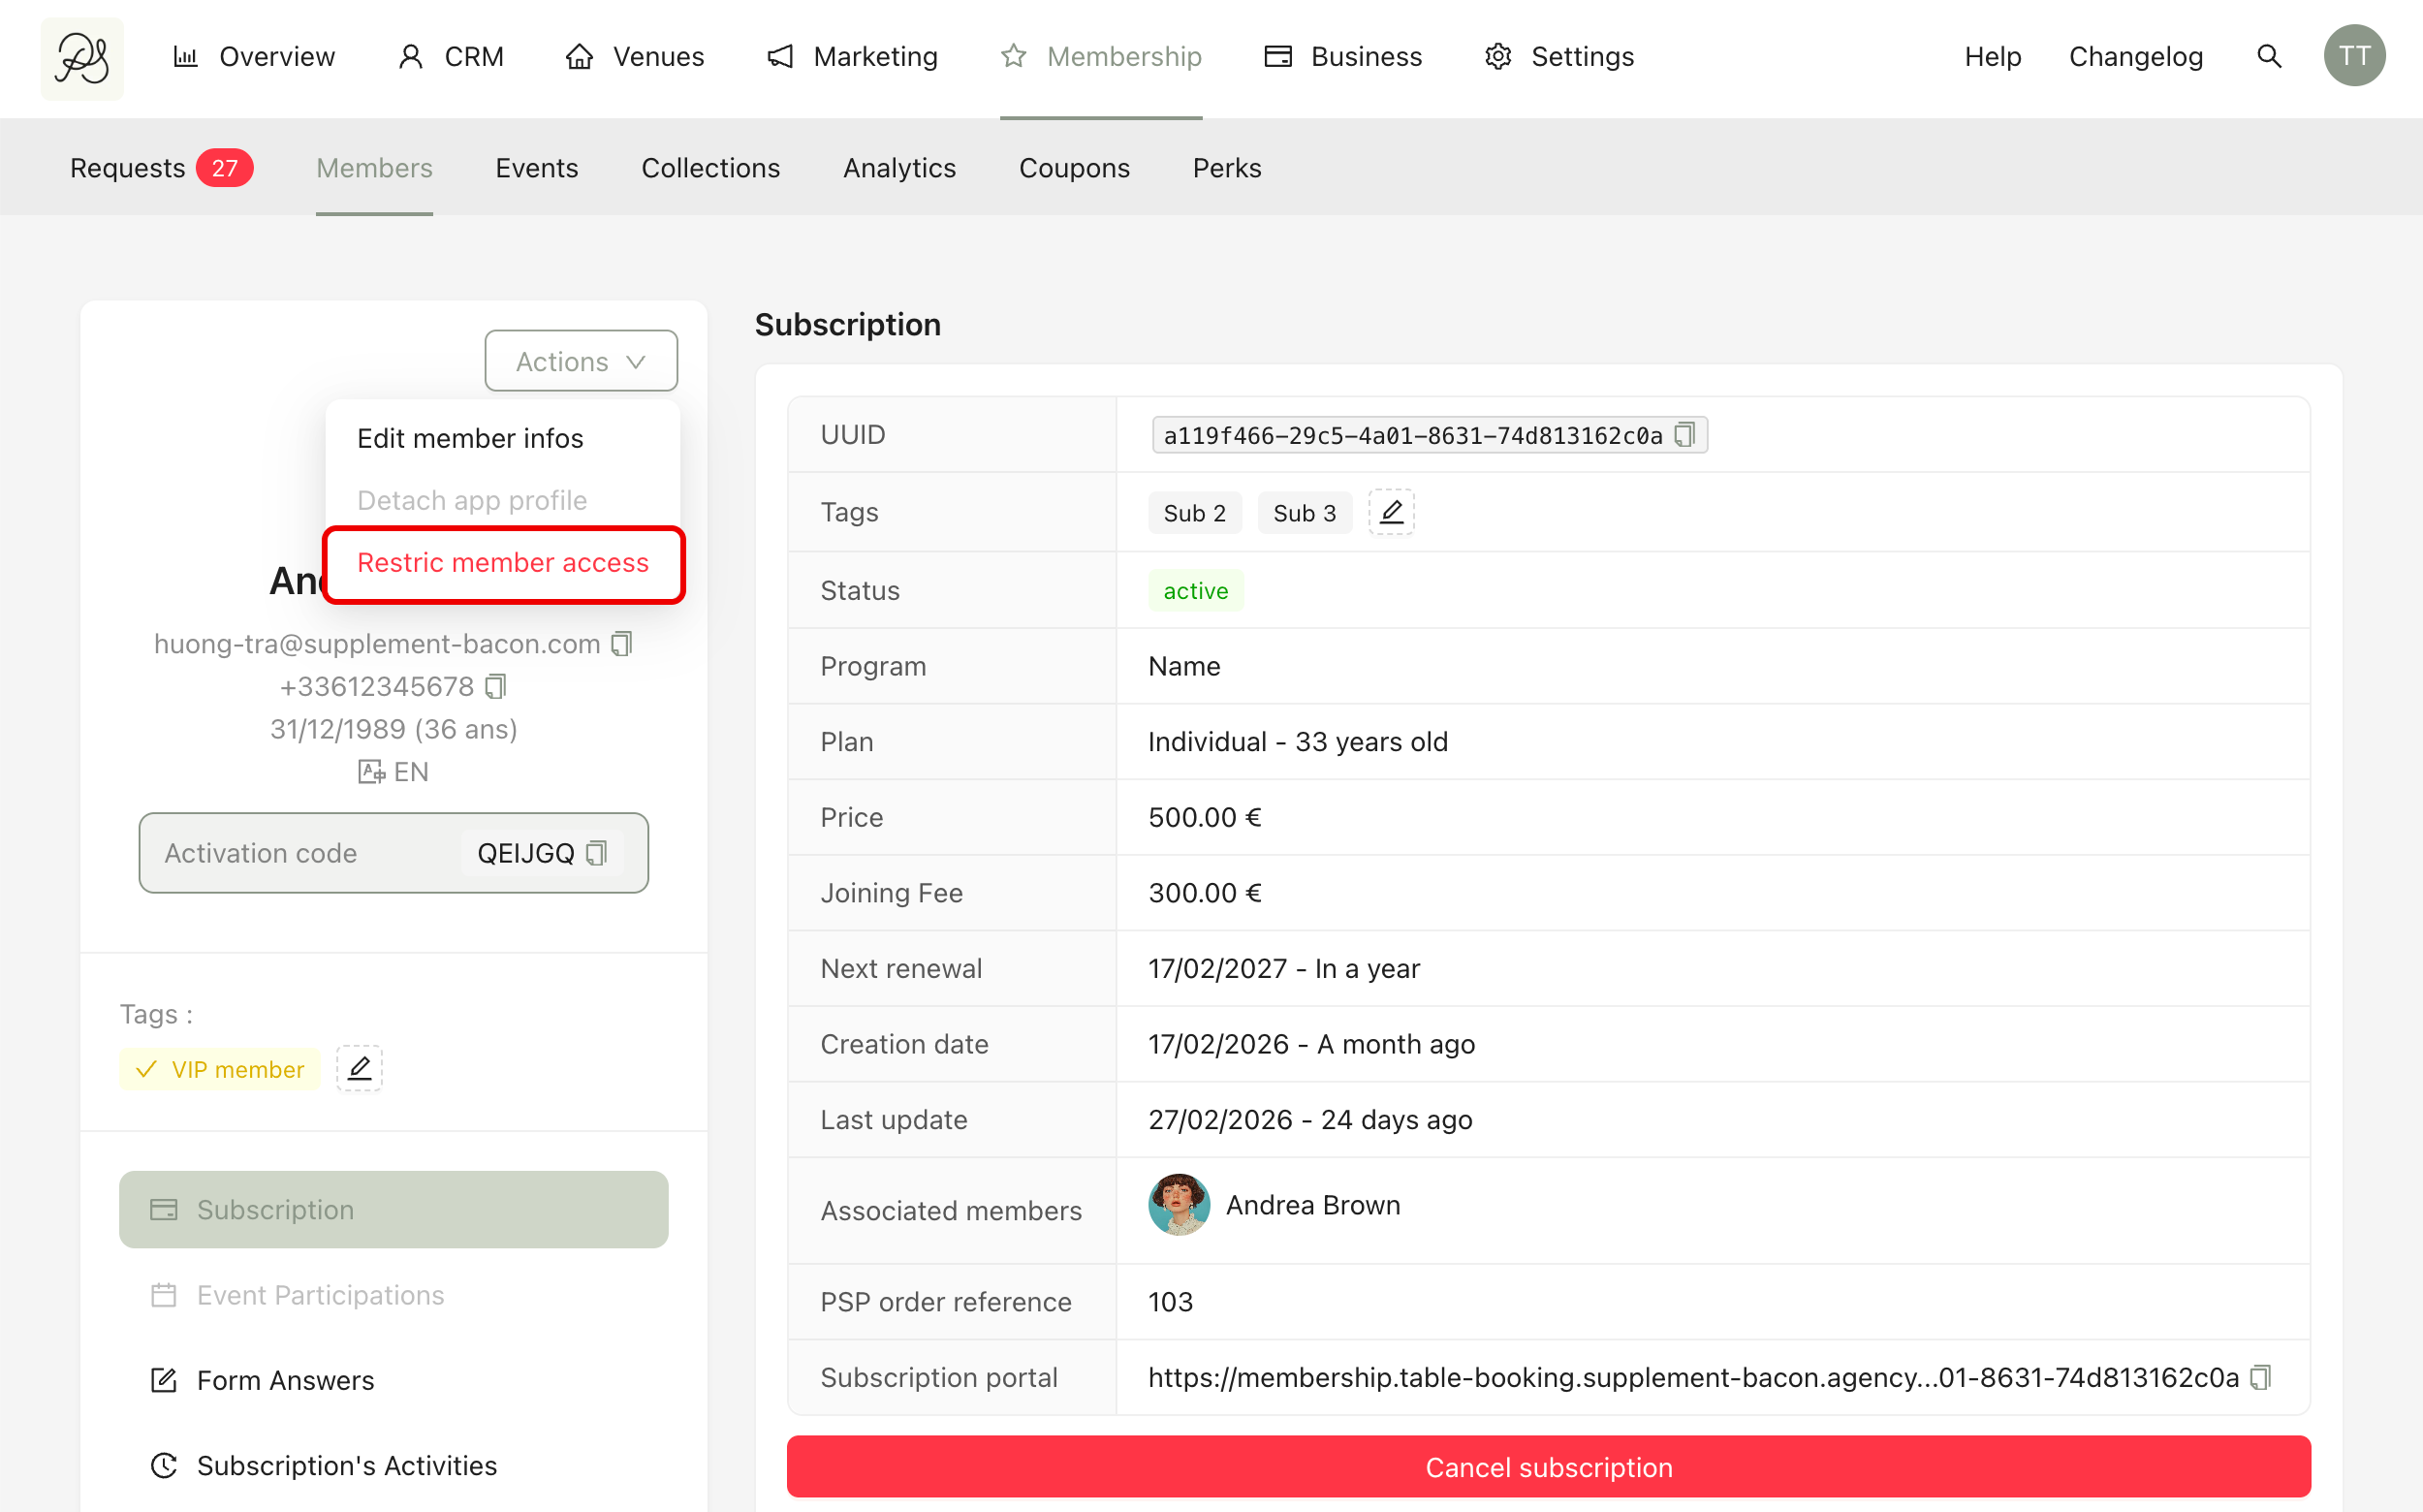
You can restrict a member’s access to their membership benefits without canceling their subscription. To restrict access, go to Actions → Restrict member access. Once restricted, the member will no longer be able to access their membership benefits in the application.
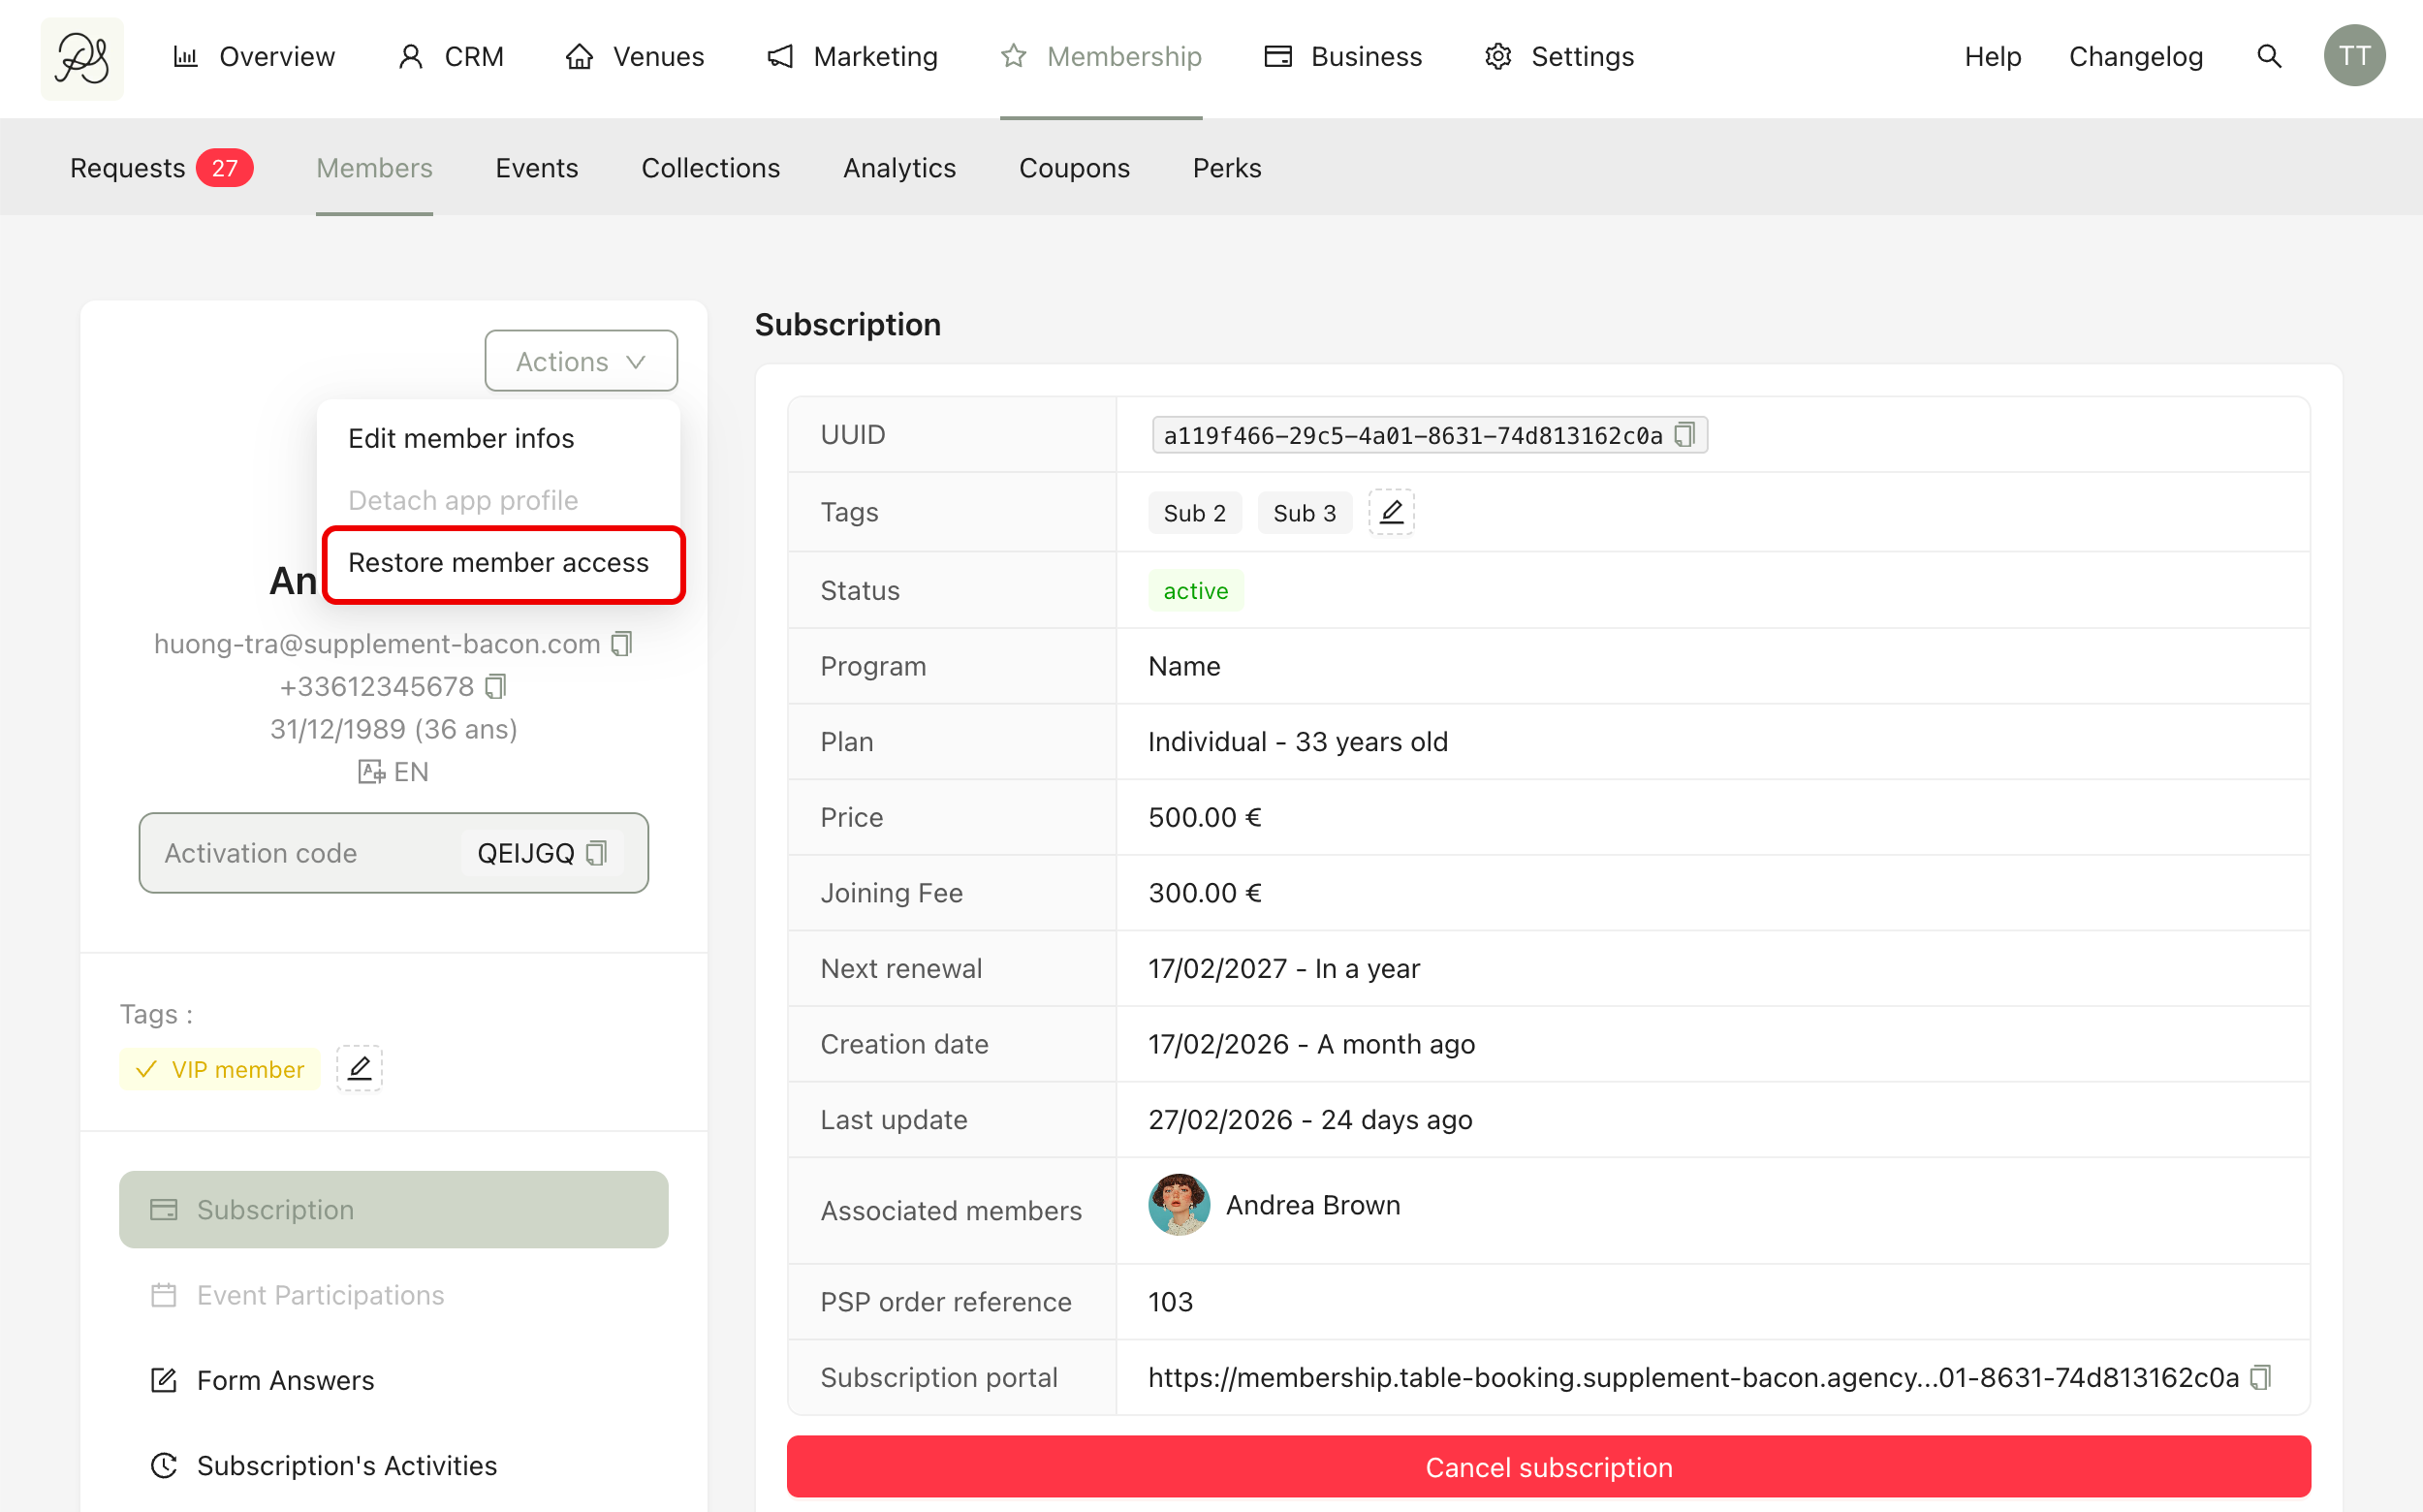
You can restore the member’s access at any time: Go to Actions → Restore member access. The member will then regain normal access to their membership and benefits.
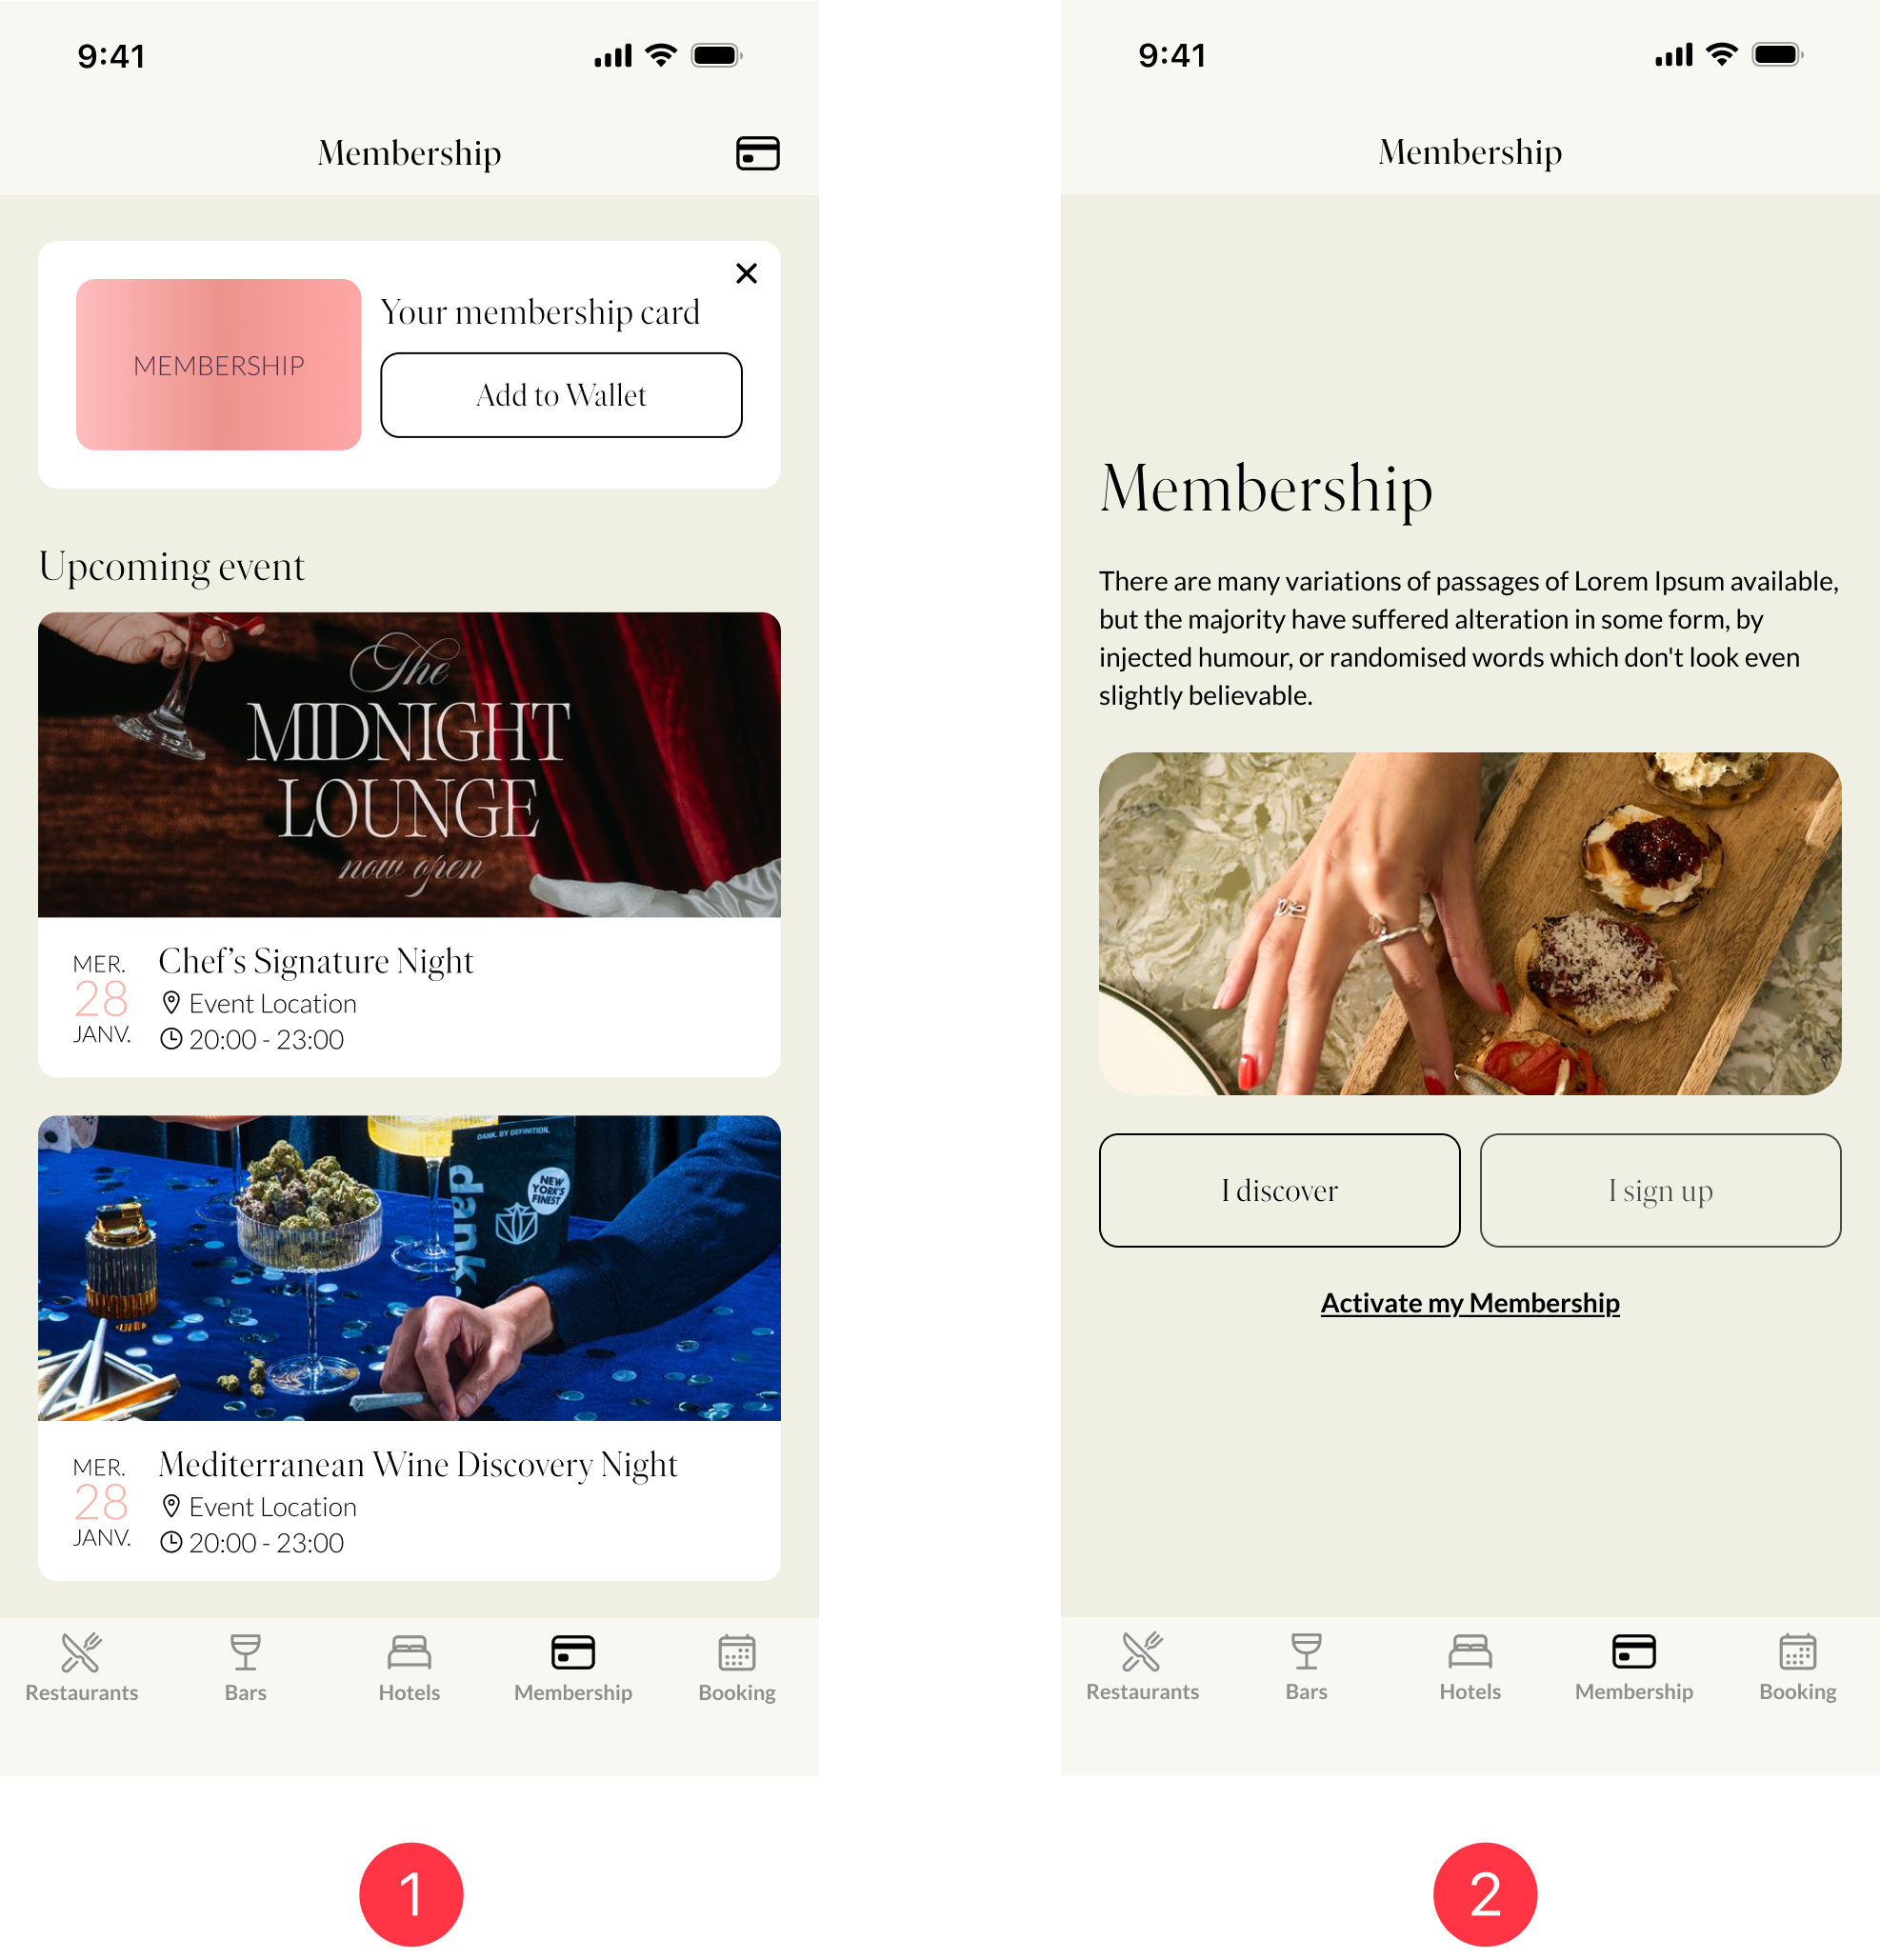
In the mobile application:
A member with an active membership has full access to their benefits (1)
A member with restricted access cannot access their membership features (2)
You can also permanently or temporarily cancel a member’s subscription by going to the Member Details page and clicking the Cancel Subscription button.

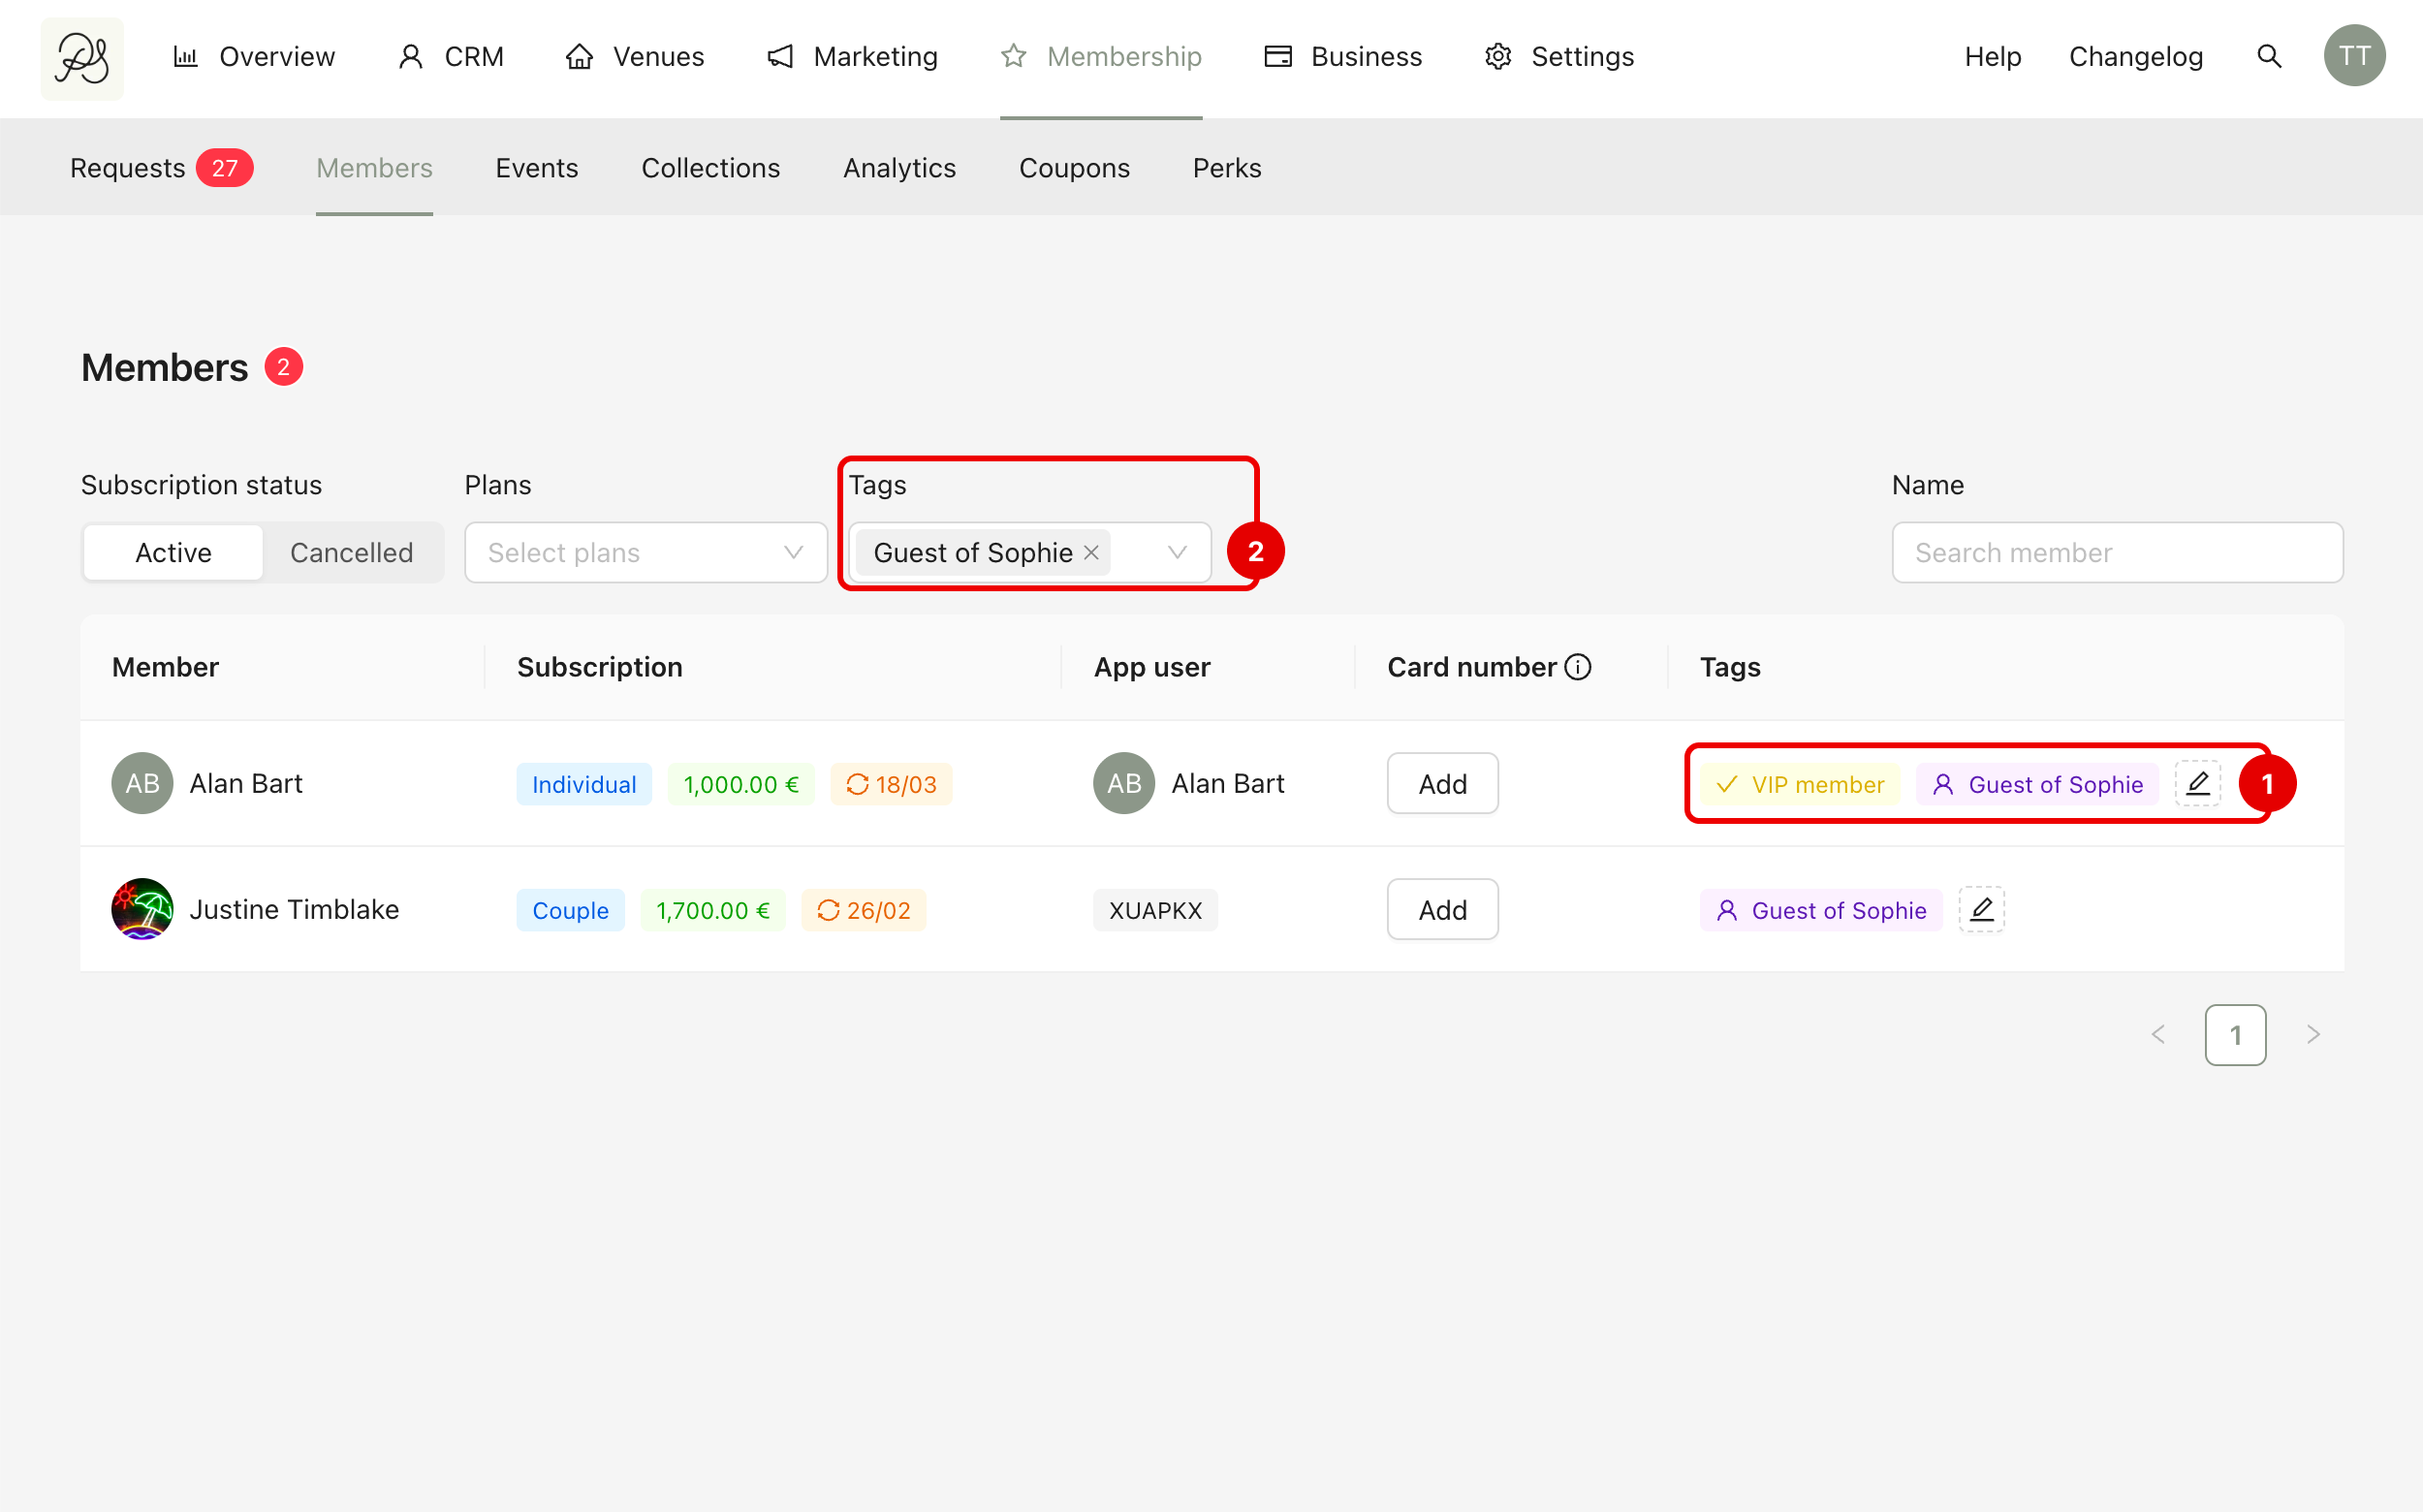
Tags allow you to categorize members for better organization and filtering.
To add tags, find the member in the Members tab and click Edit in the Tags column. Select the desired tag(s) (1) and click Save (2).
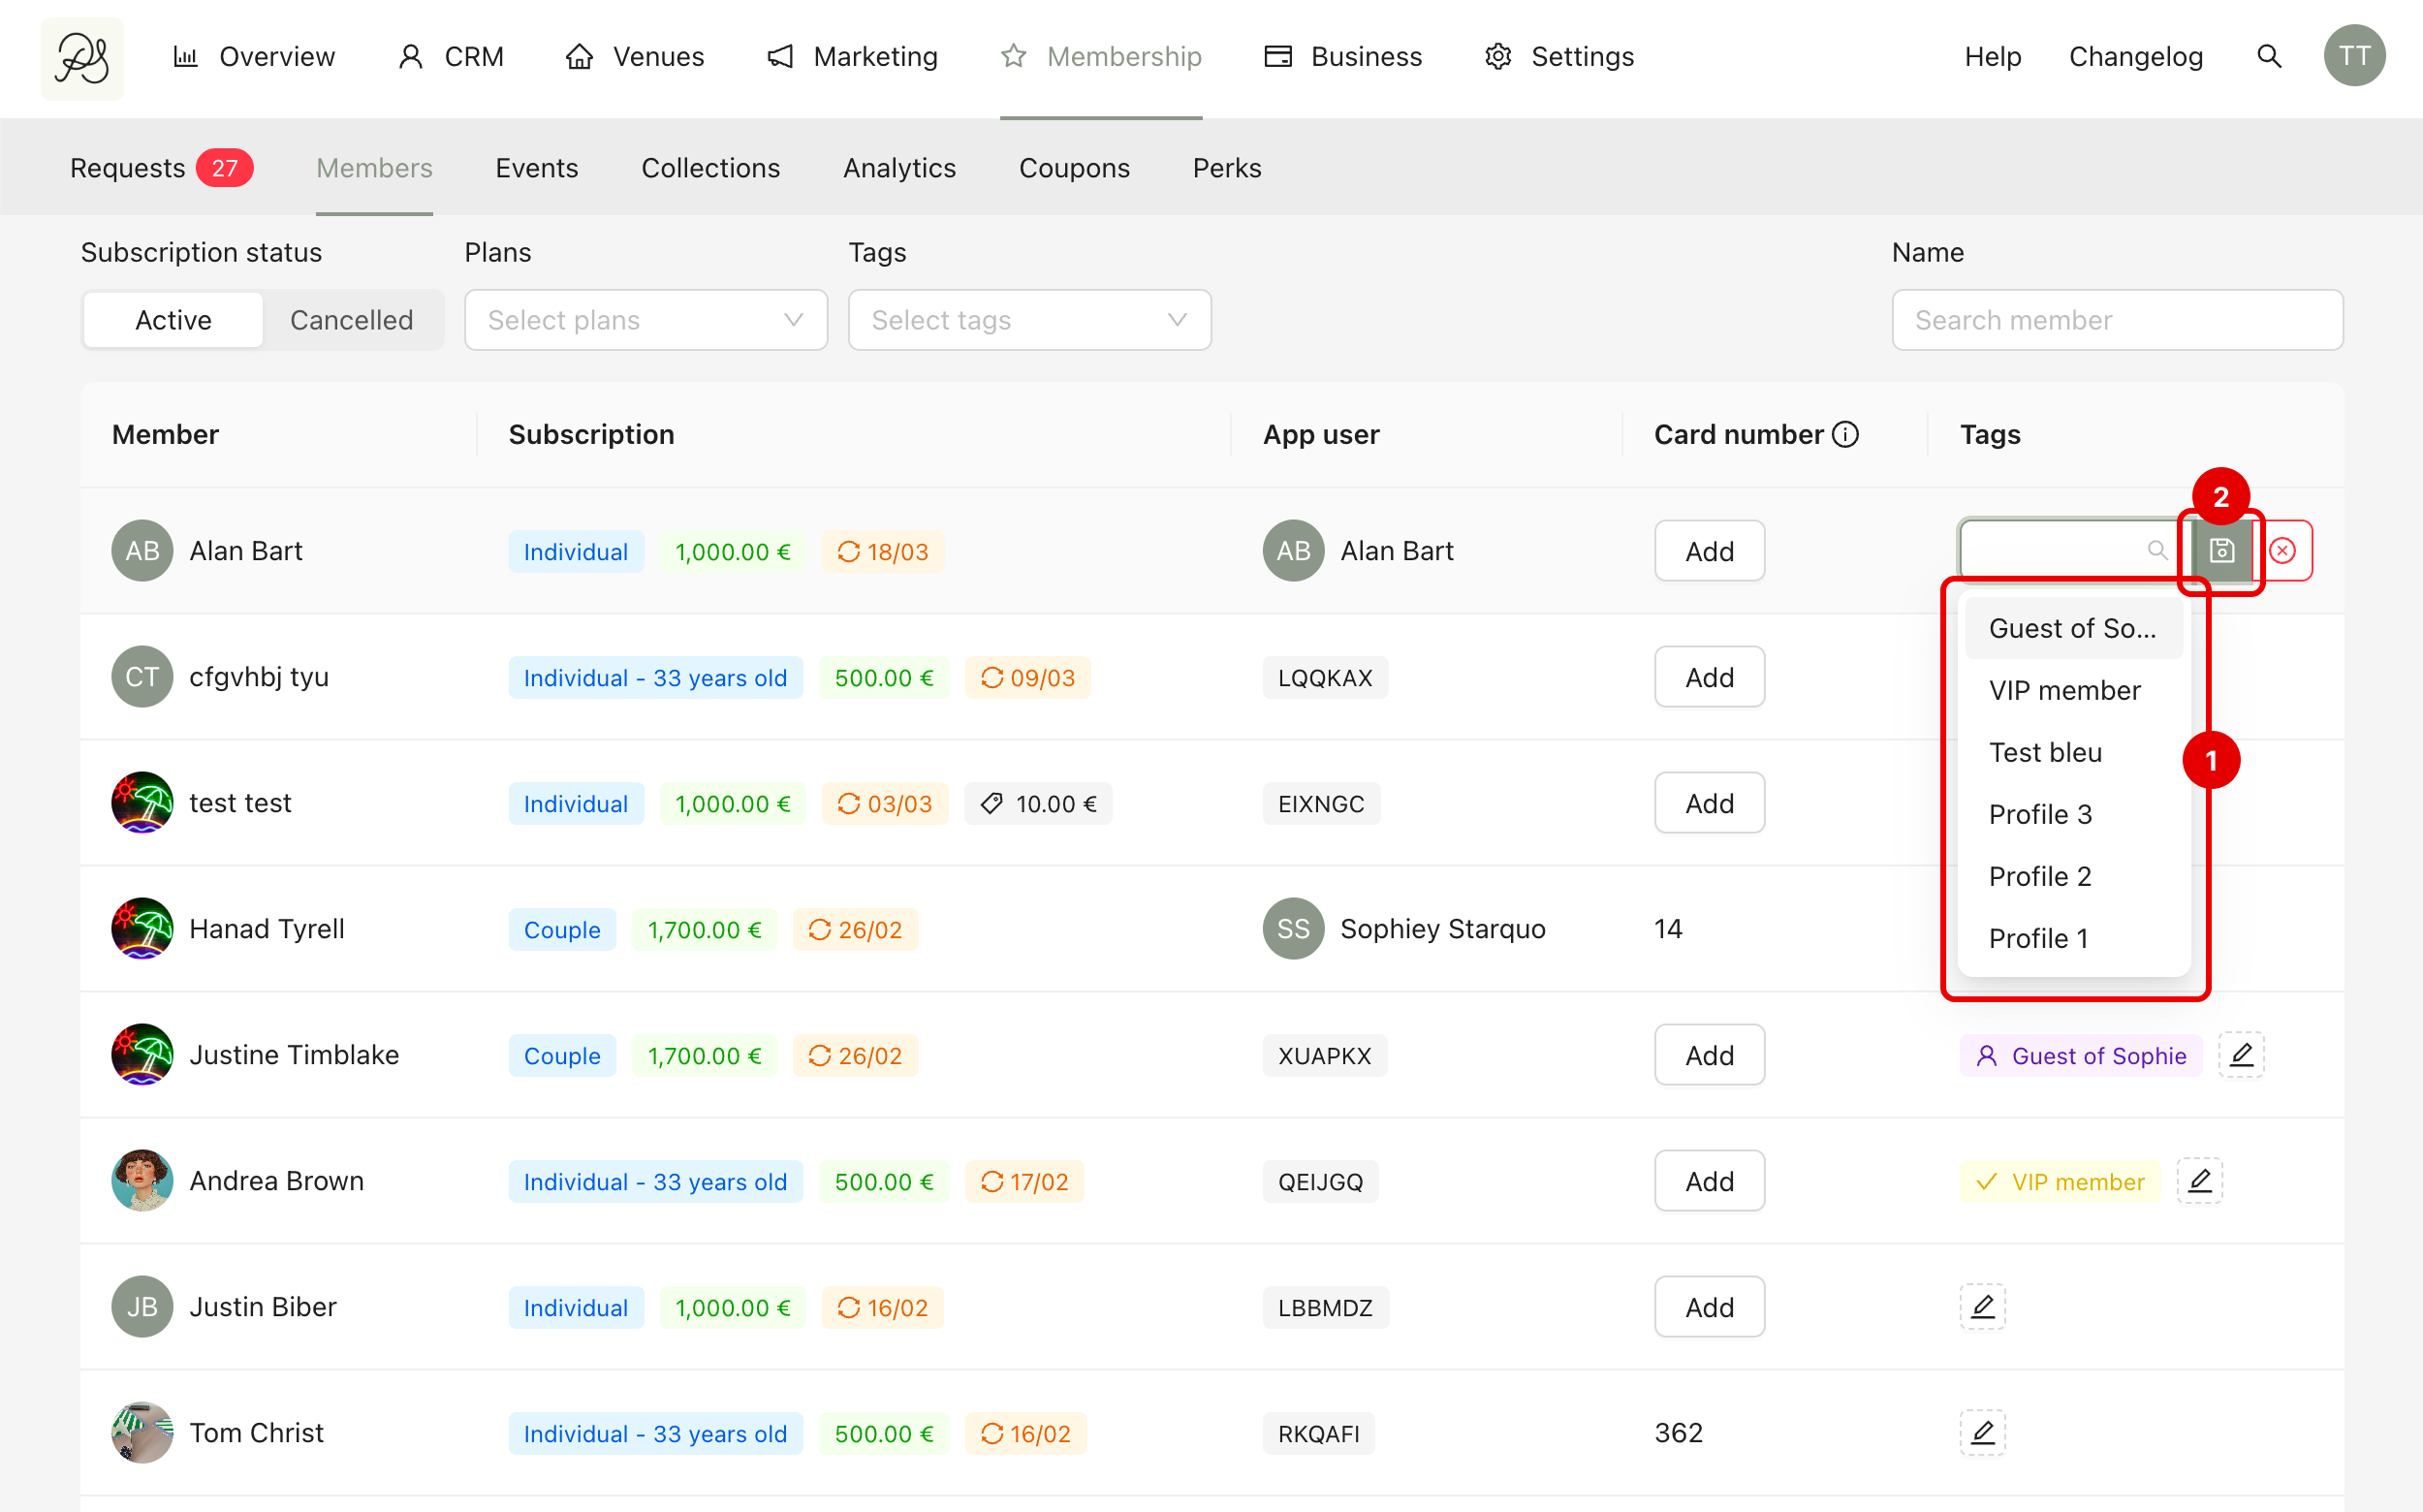
The tags will then appear in the member’s row (1) and can be used for filtering (2).