The Membership Event feature allows you to create exclusive events for your members. These events are organized by your brand and can be accessed directly from the mobile application.
Members can register for events through the app (depending on the booking method you choose), while you manage everything from the dashboard: creation, participation limits, booking rules, and performance tracking.
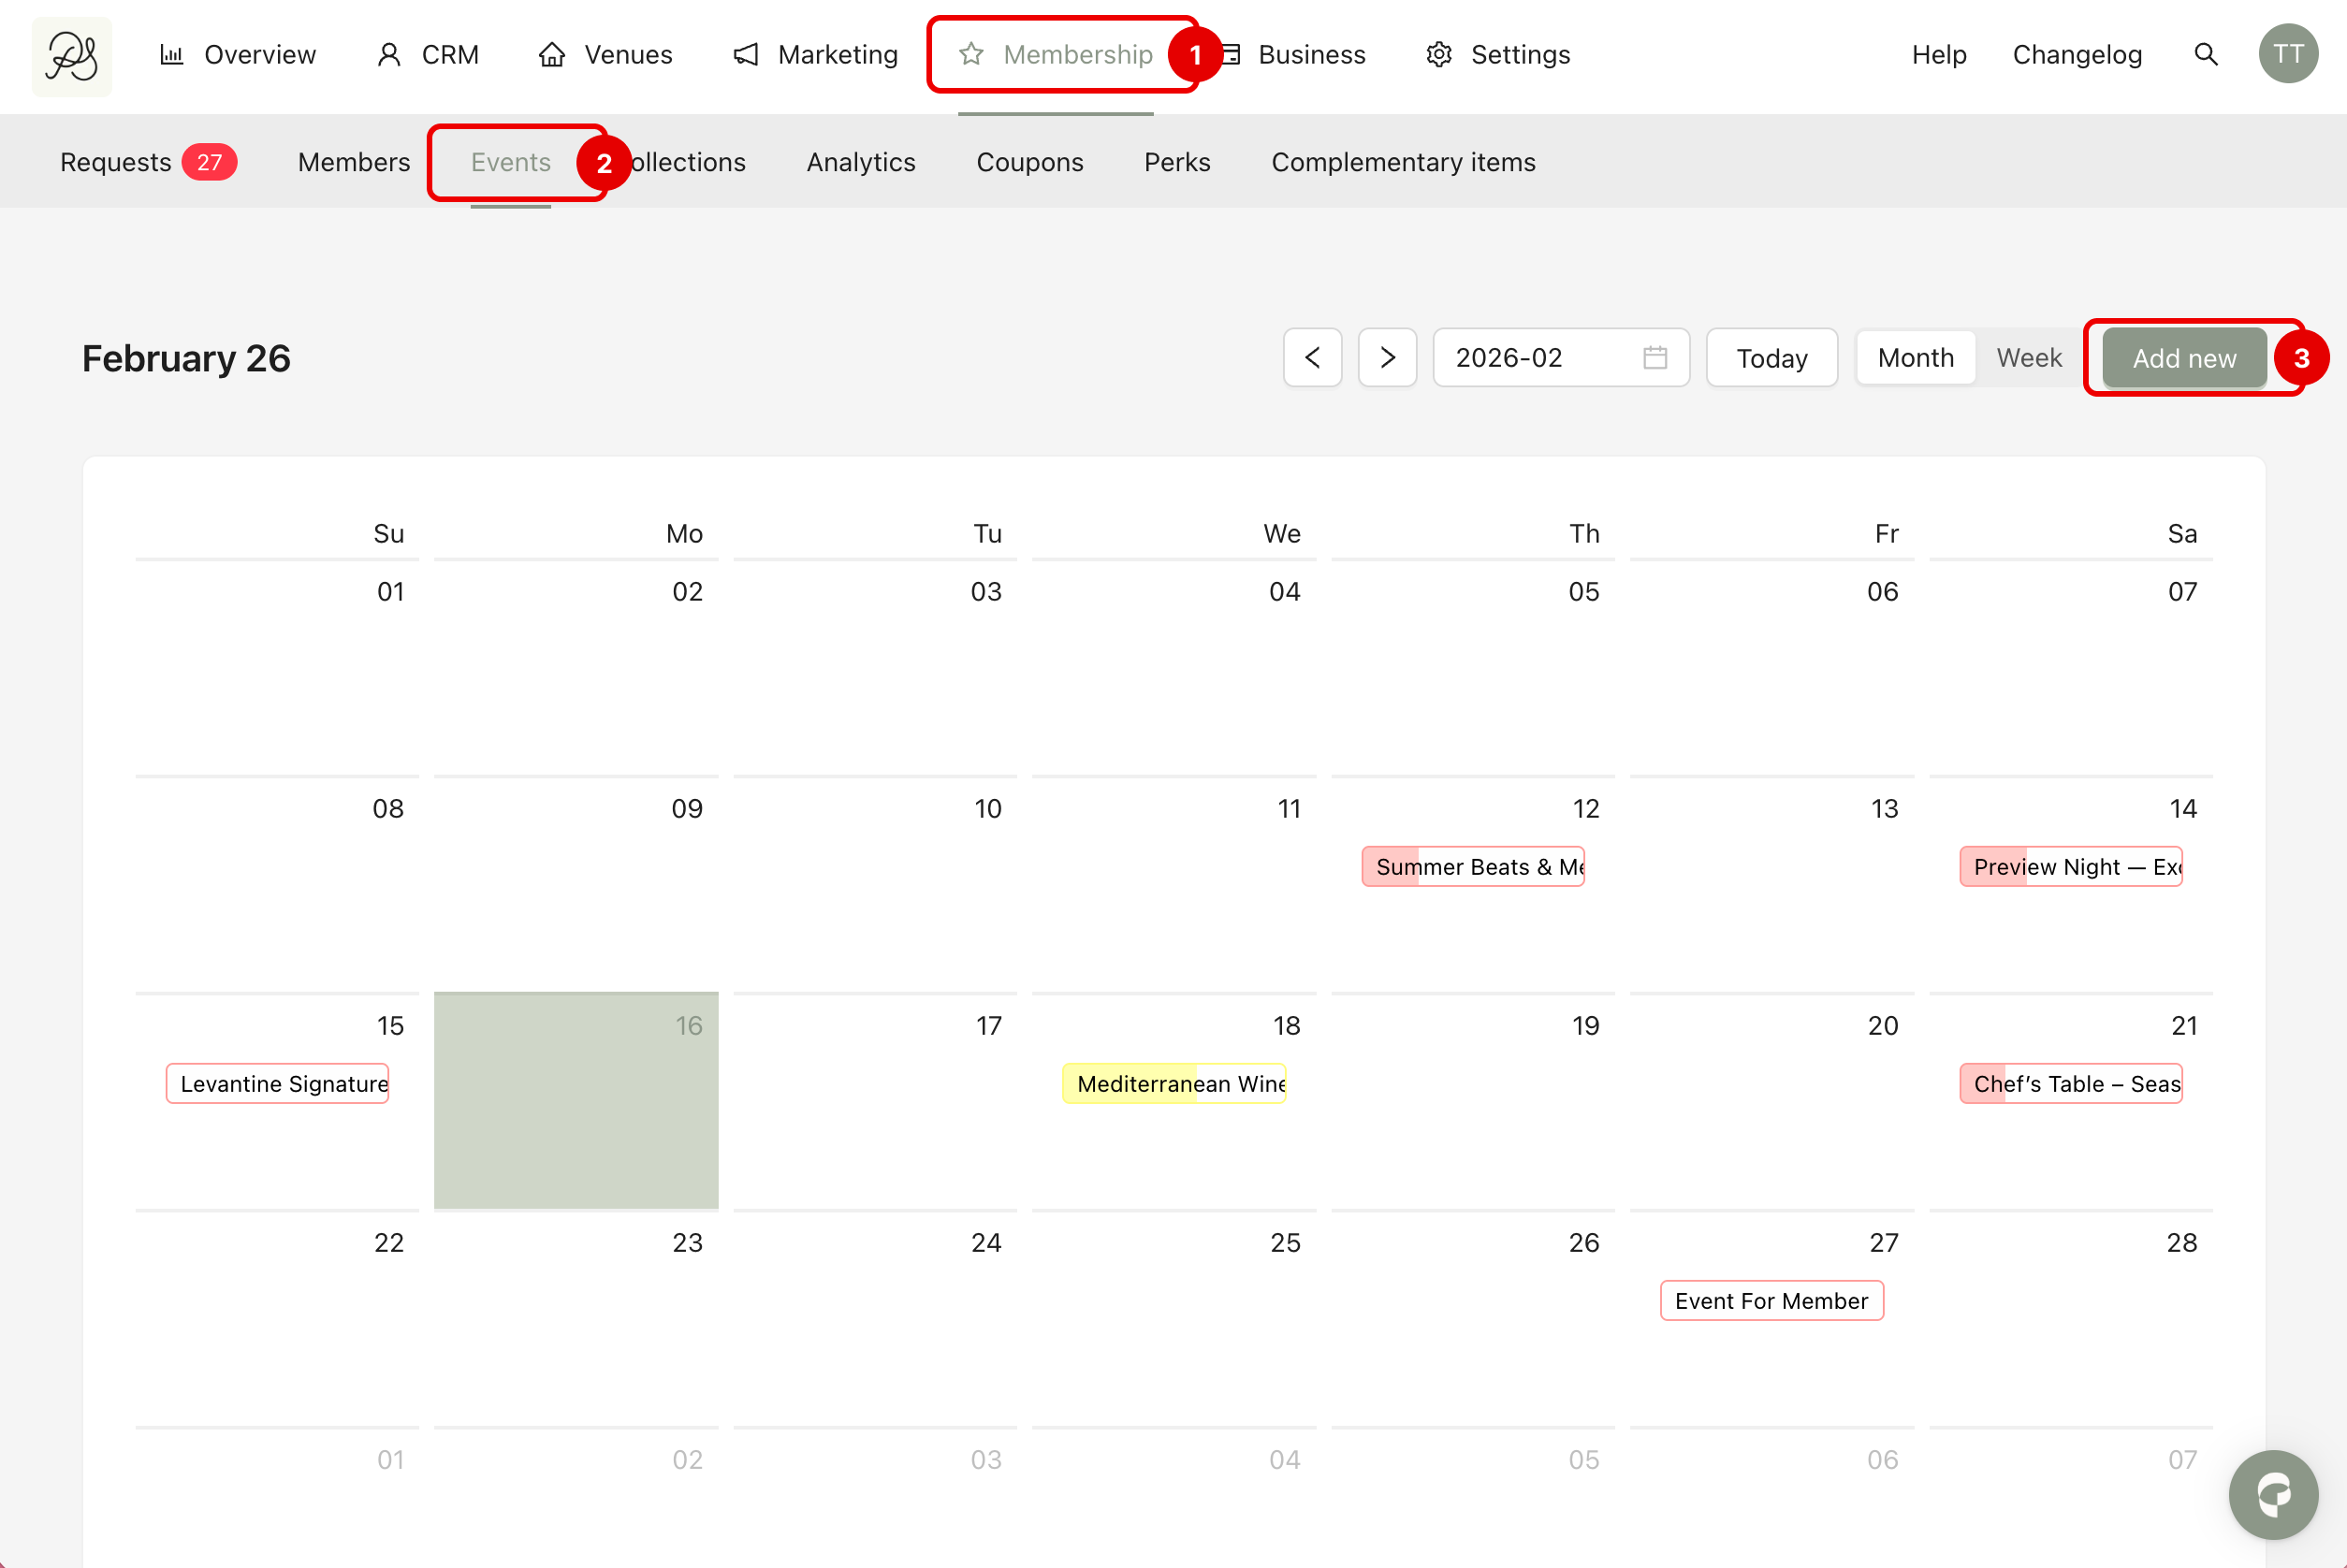
Step 1: To access the Event Section, go to Membership (1) → Events (2) and click Add New (3).
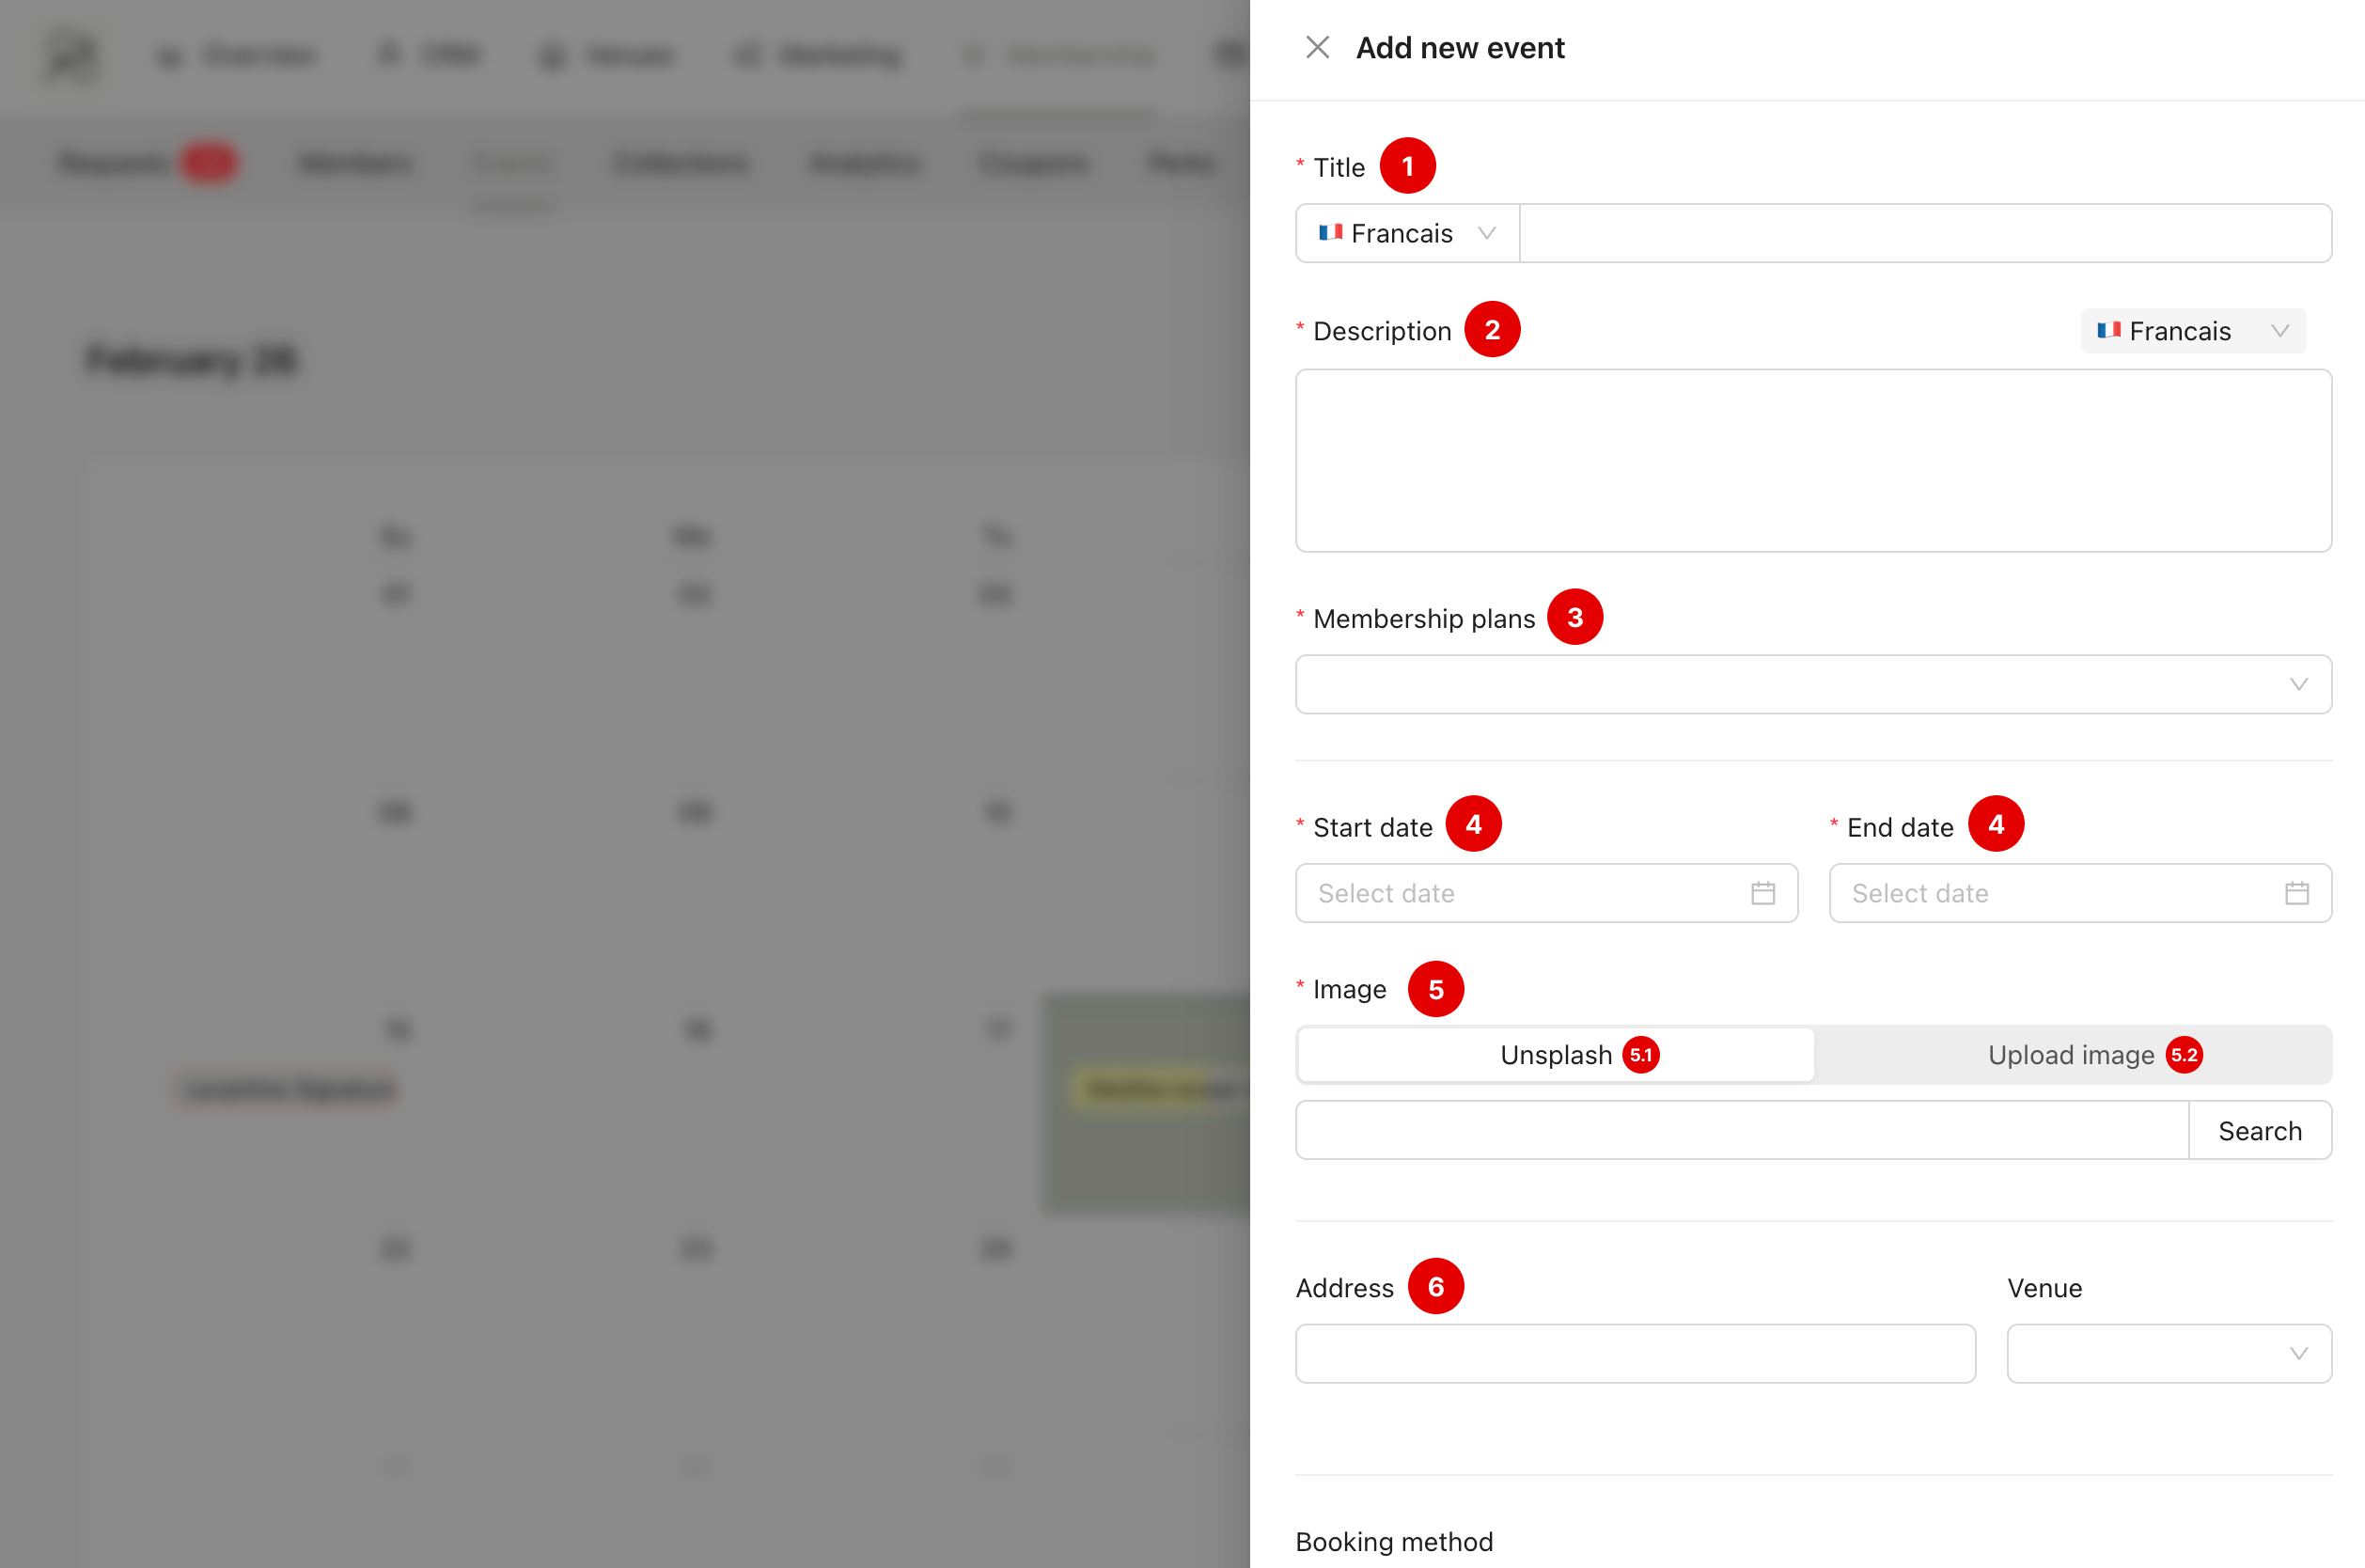
Step 2: A side modal will appear where you can configure your event:
Title (1): Enter the name of your event.
Description (2): Write a short description explaining what the event is about.
Membership Plan (3): Select which programs or plans are allowed to participate. Only members subscribed to the selected plans will be able to register. Members from unselected plans will not see or access the event.
Date (4): Set the start date/time and end date/time of the event.
Image (5): Add a visual to your event in the app. You can either search and select an image directly from Unsplash (5.1), or upload an image from your device (5.2).
Address and Venue (6): Define where the event will take place. You can enter the address manually, or select one of your existing venues from the system.
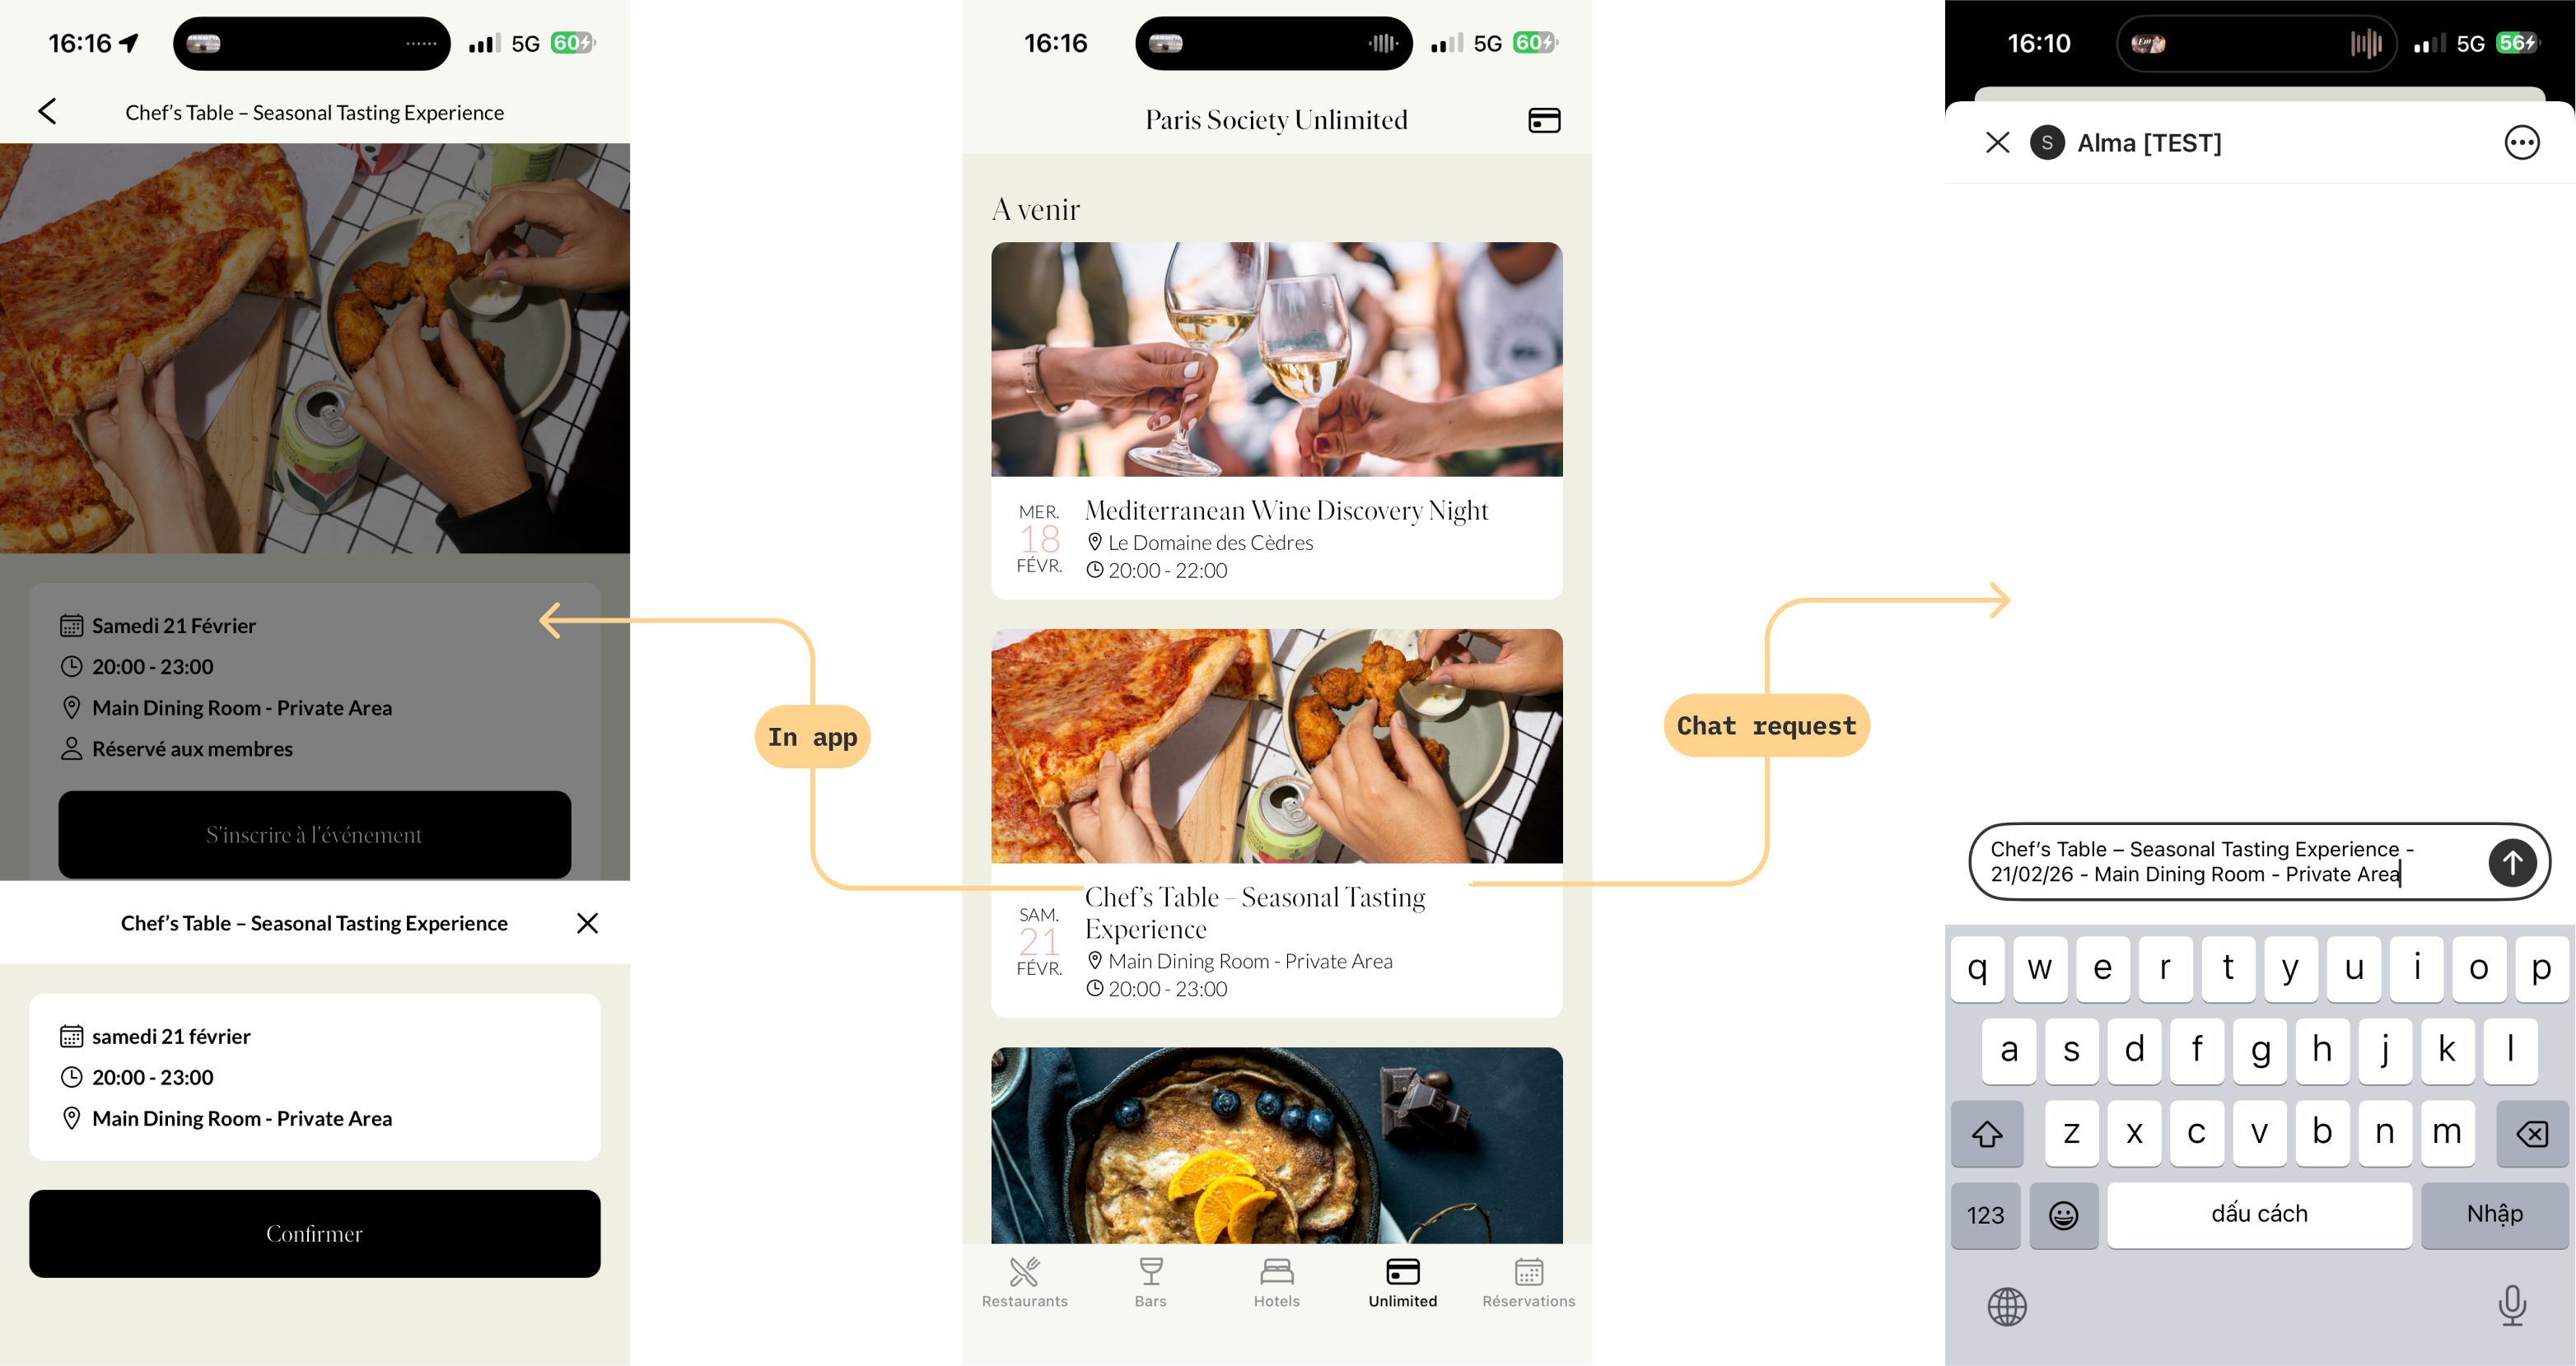
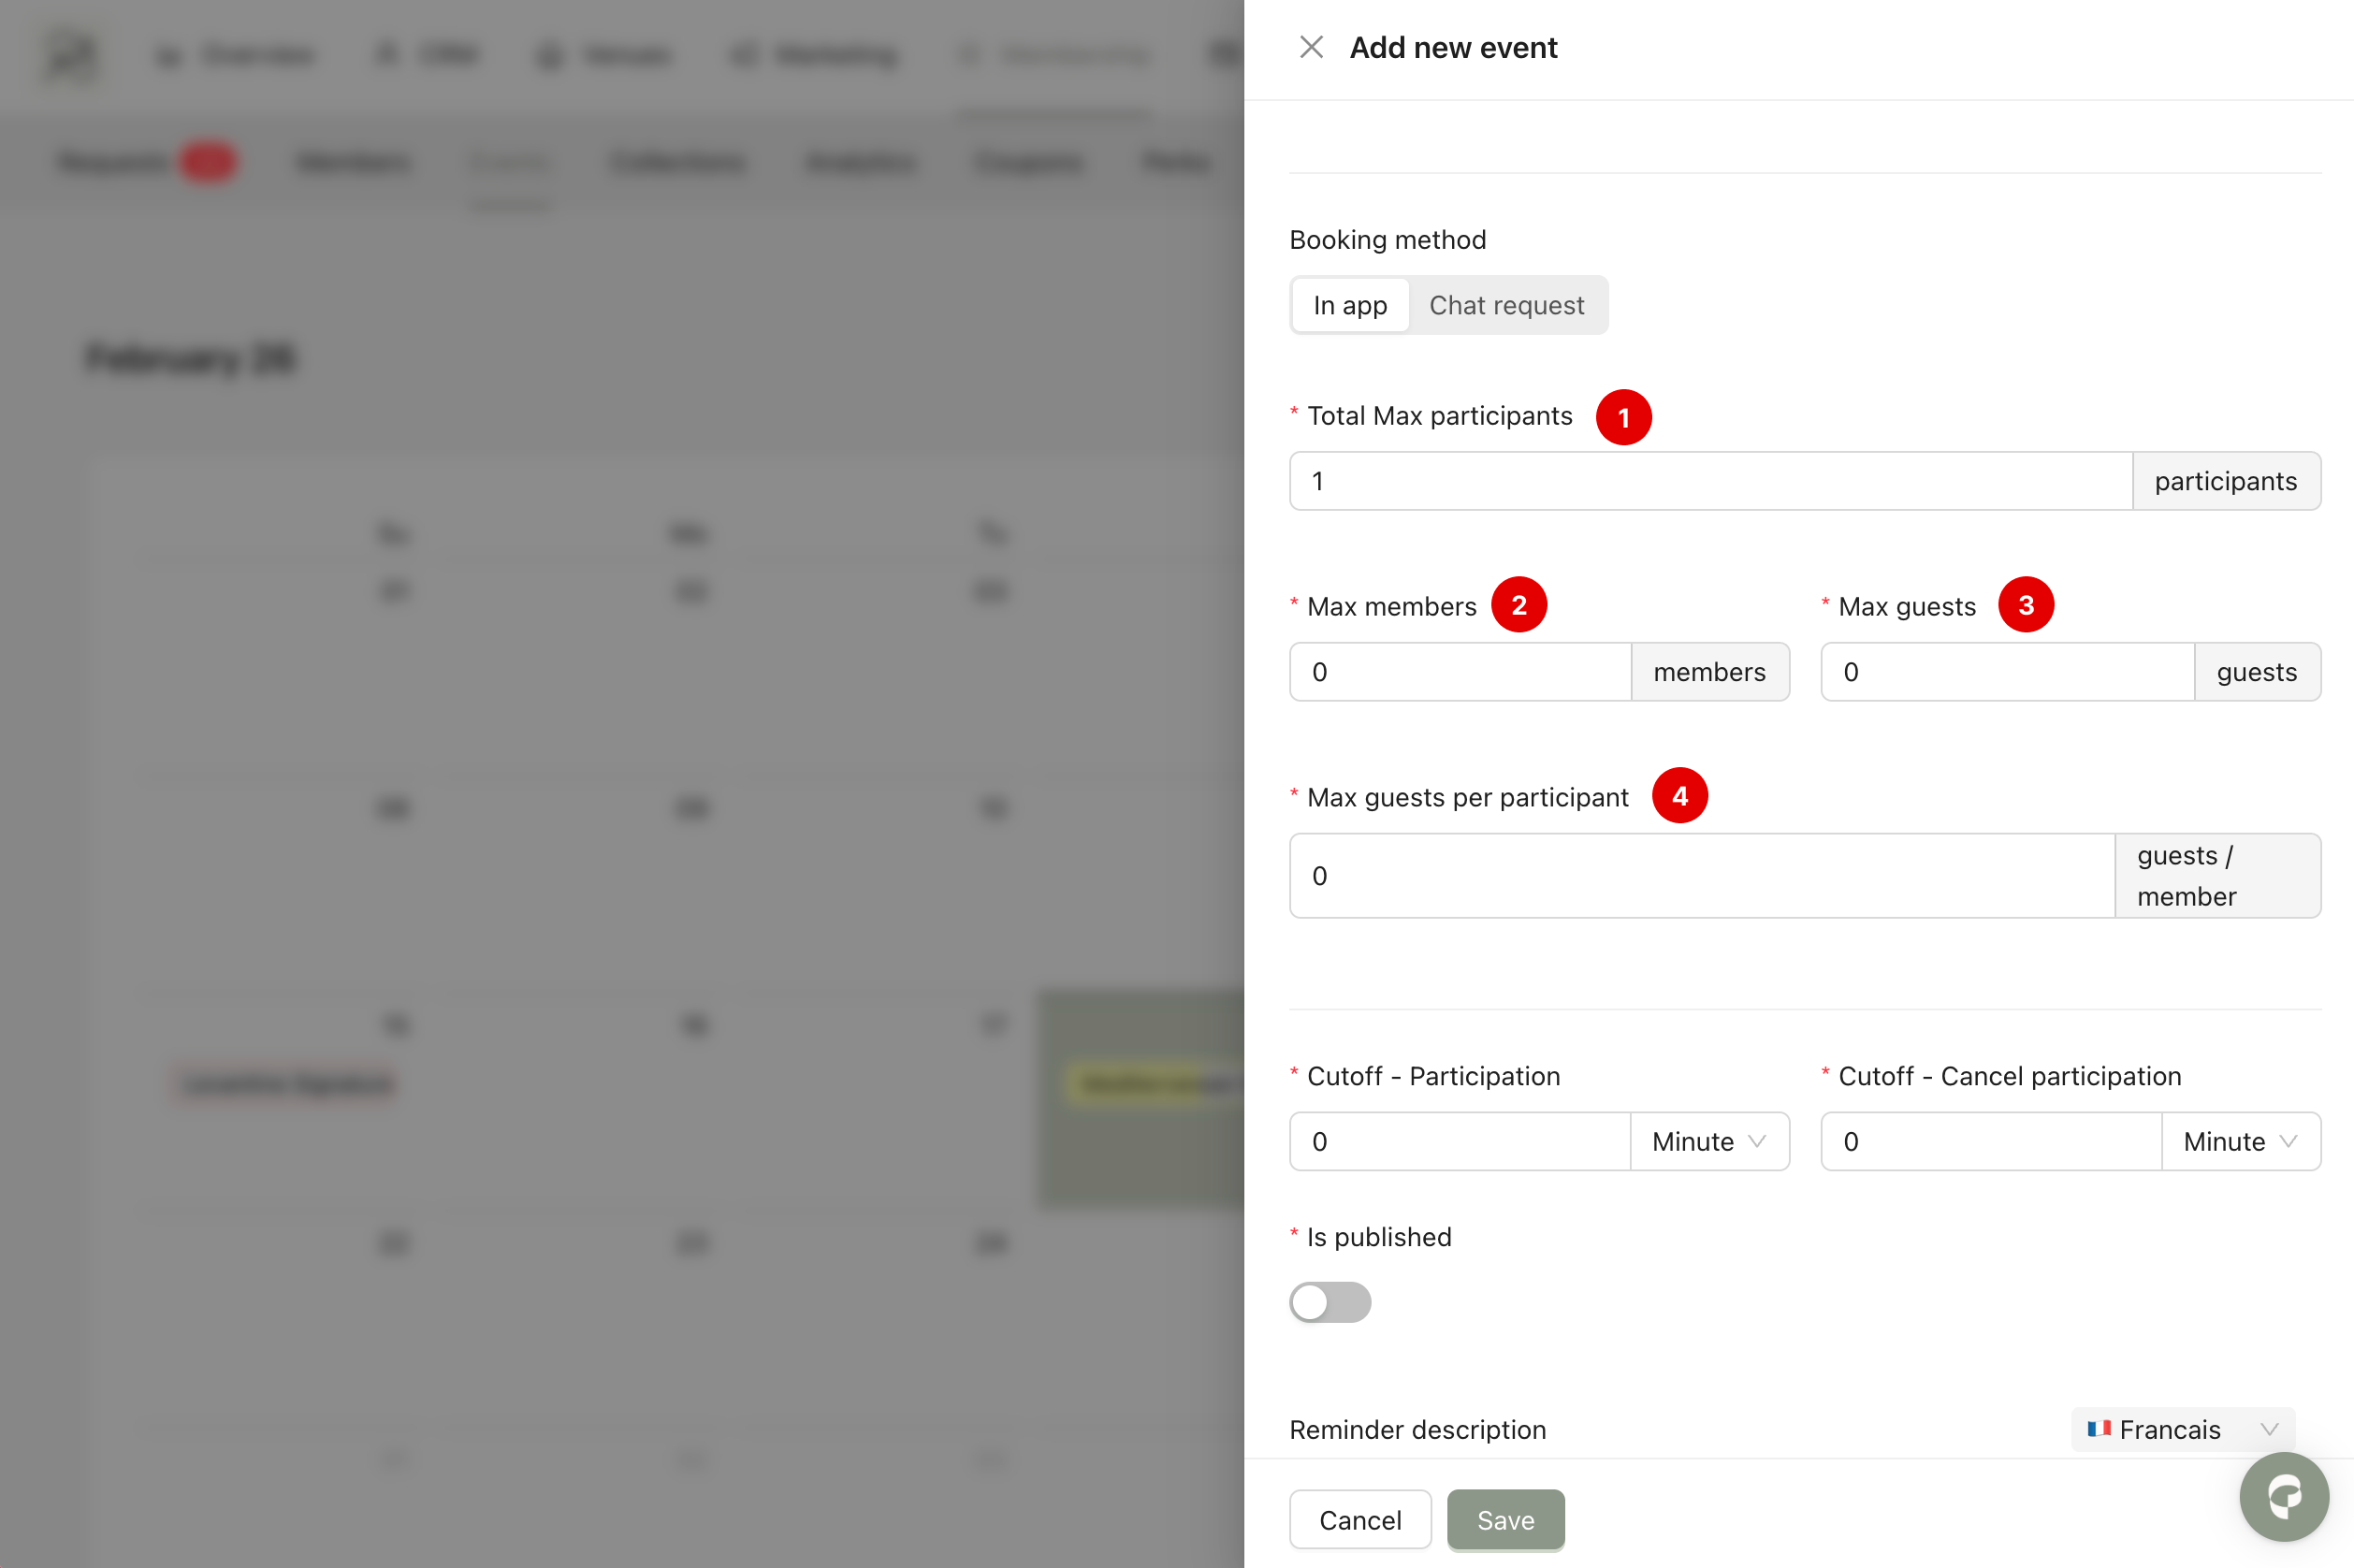
Step 3: Scroll down to configure how members will register for the event. There are two booking methods:
1. In-App Booking
Members can book directly in the mobile application. When selecting this option, you must define participation limits:
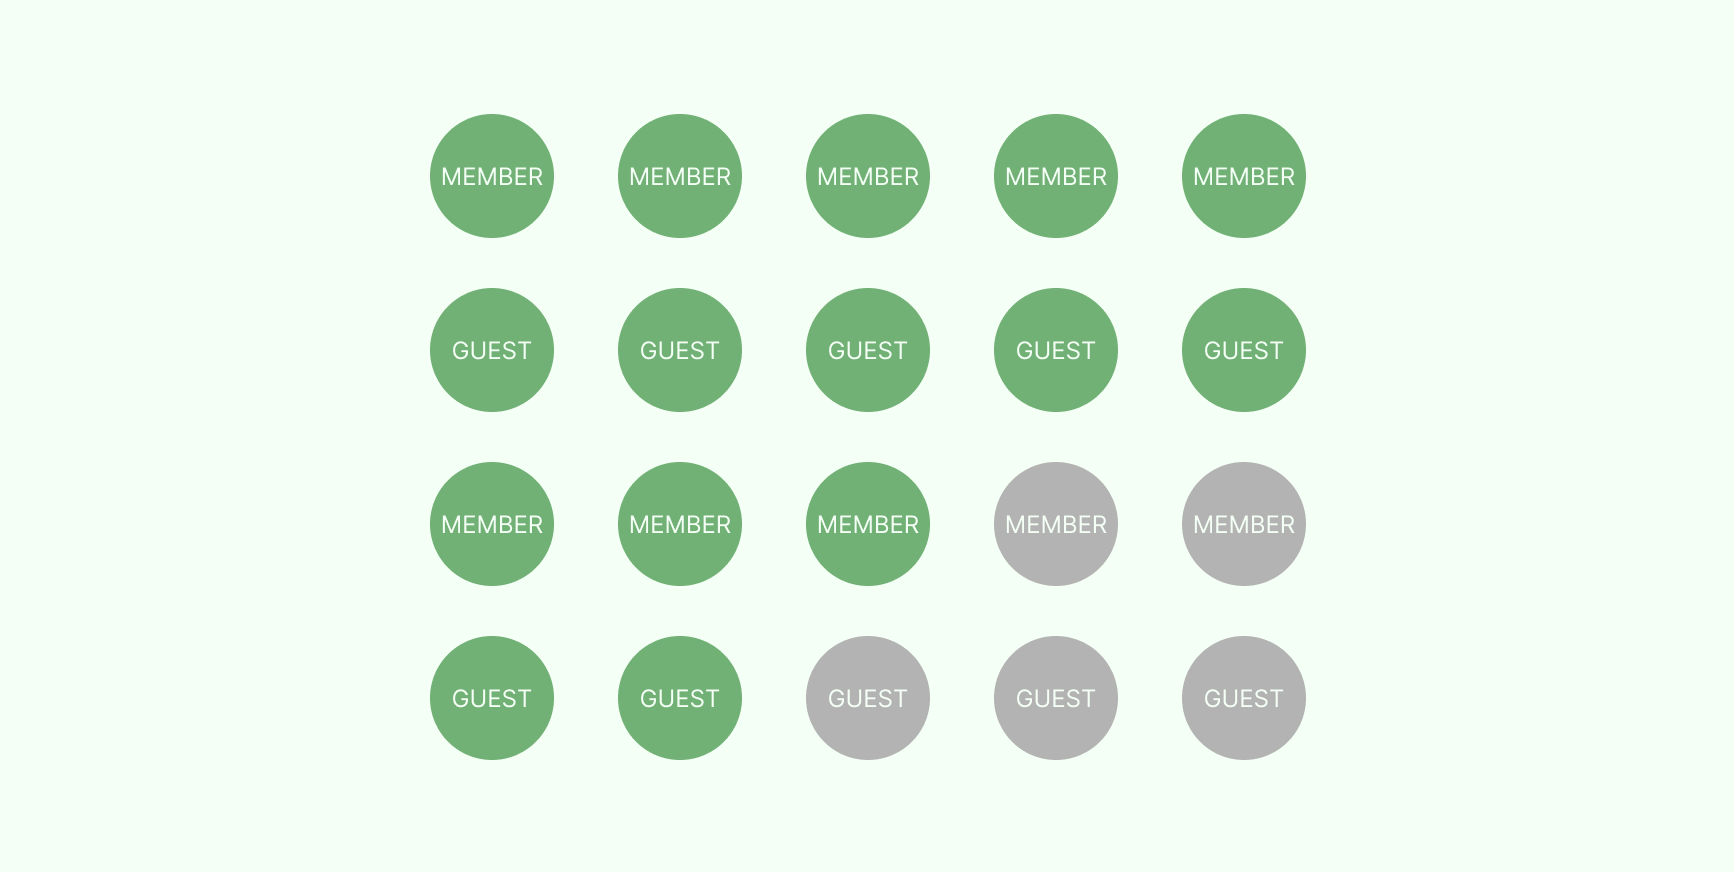
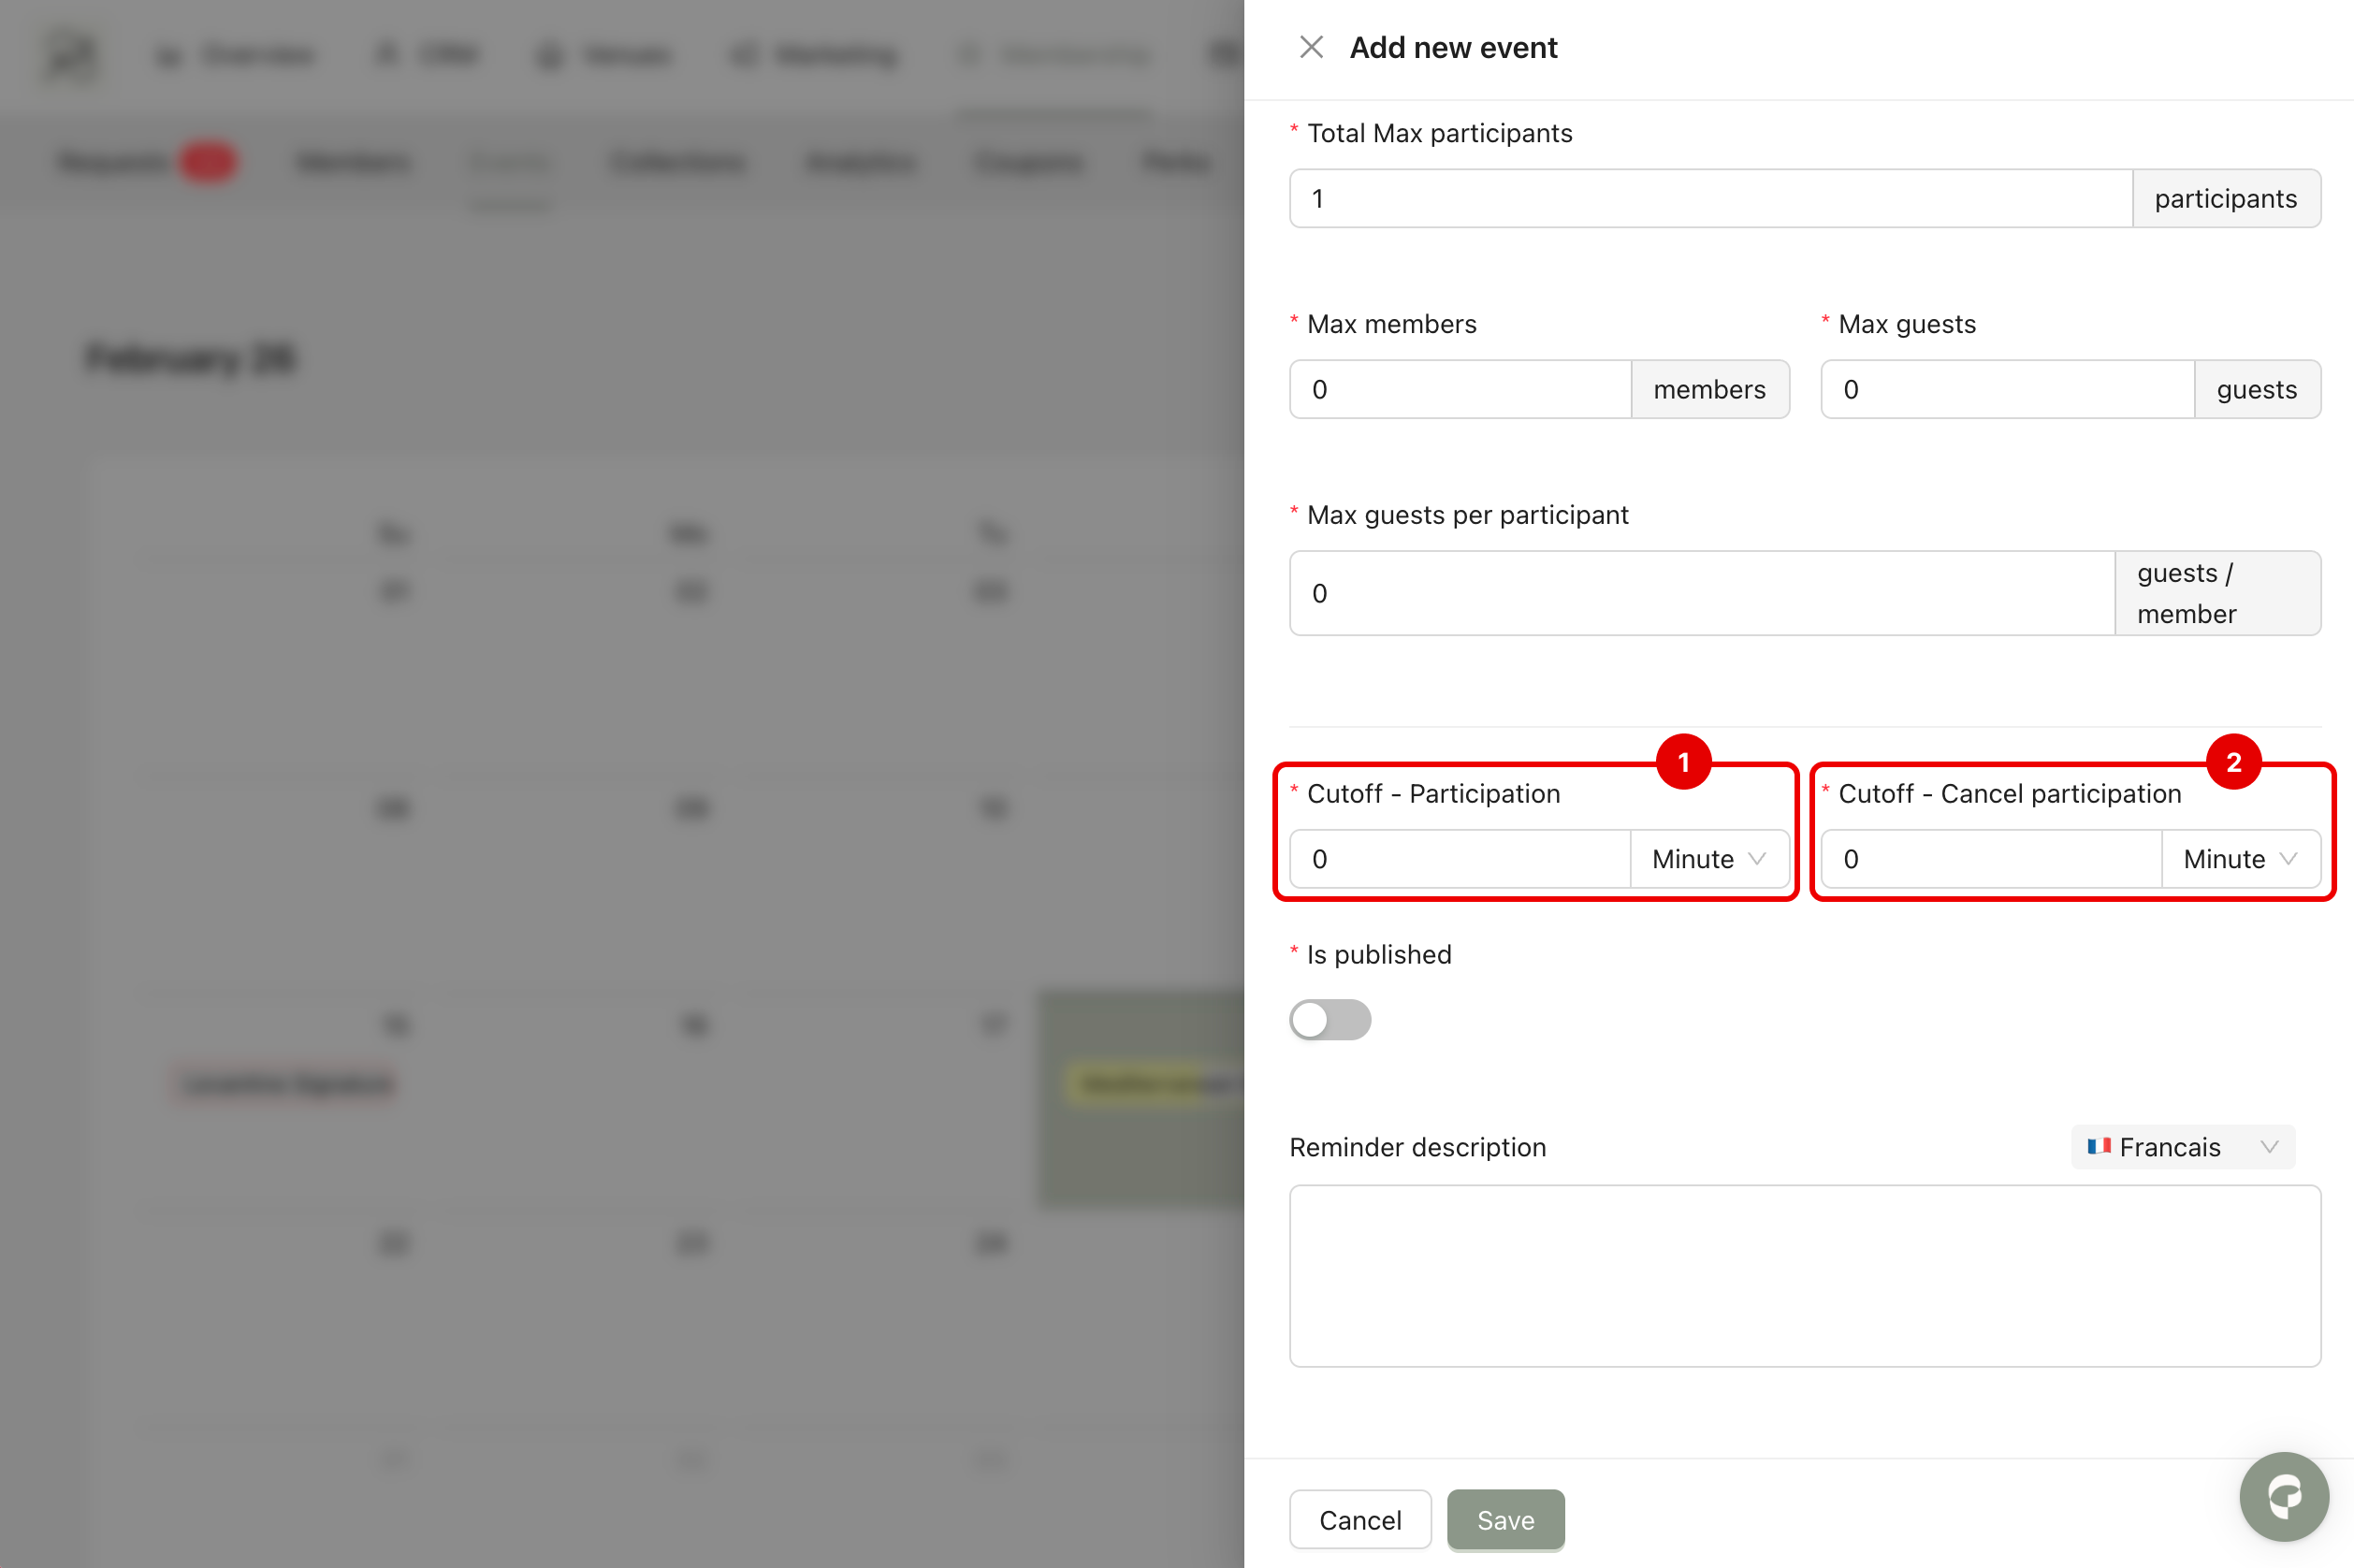
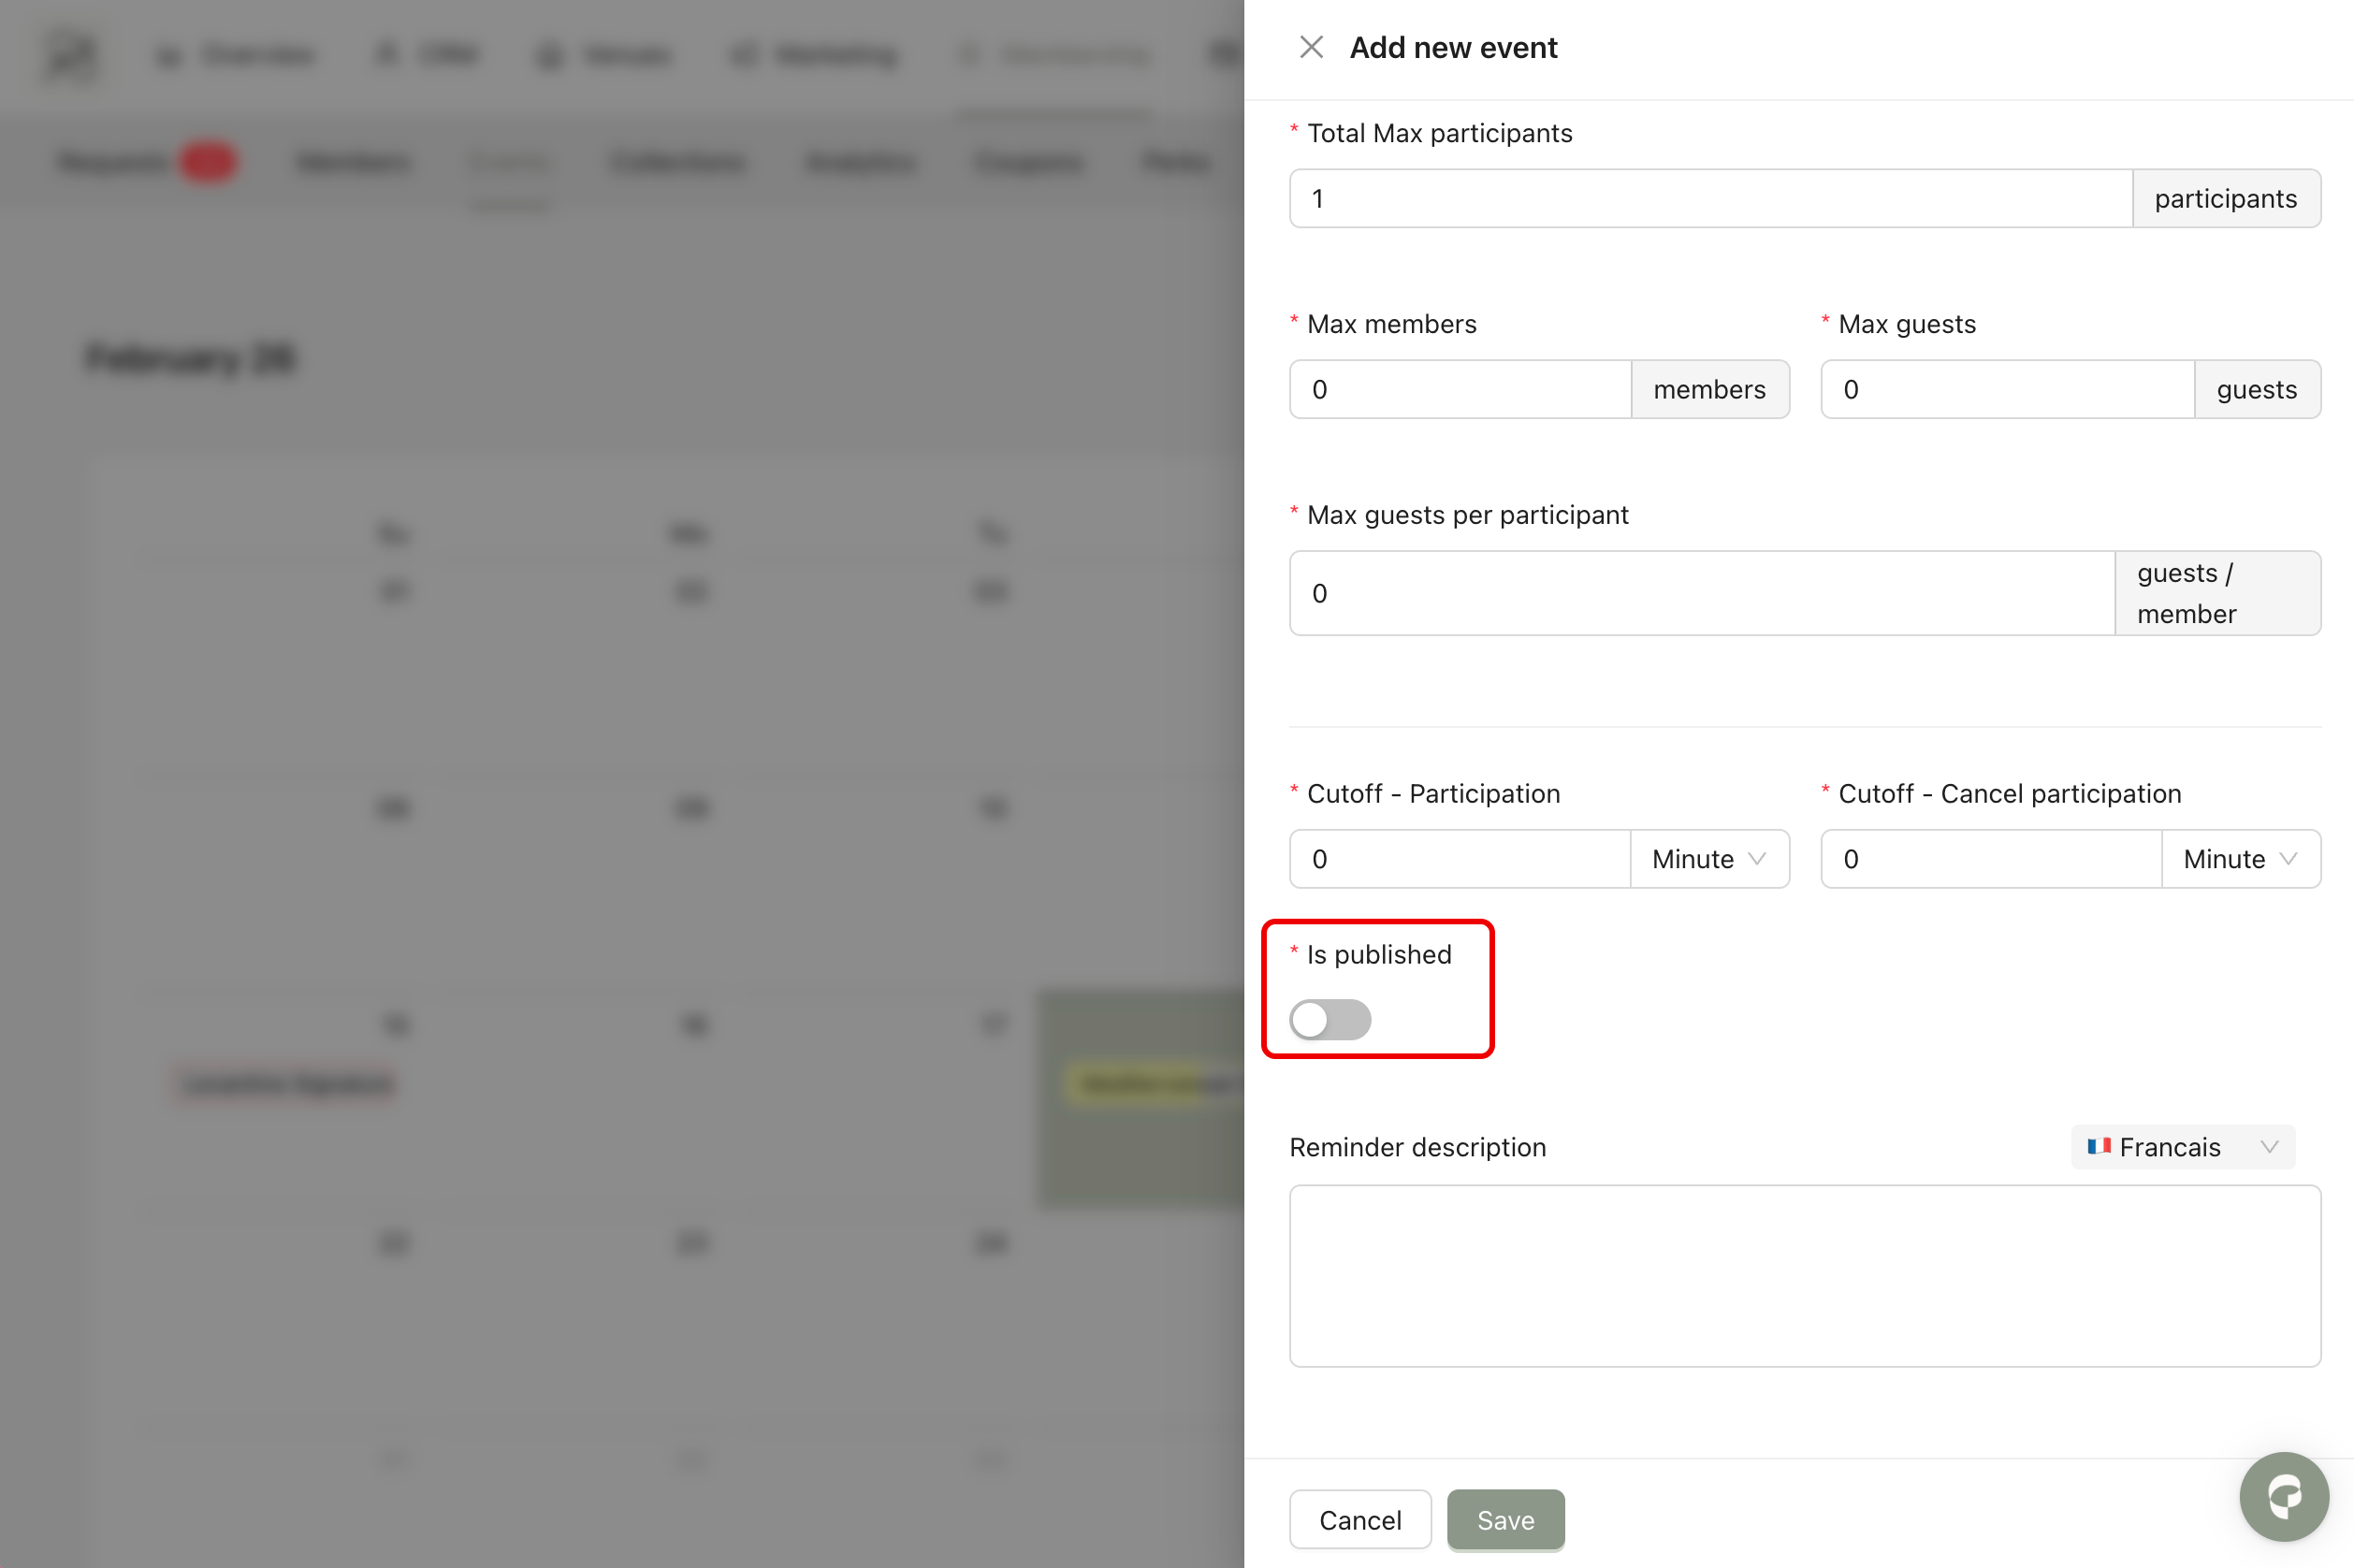
Total Max Participants (1): The maximum number of people allowed at the event (including members and guests). Even if Max Members or Max Guests are higher, the event will stop accepting registrations once the total limit is reached.
Max Members (2): The maximum number of members who can attend. If set to 10, only 10 members can book. Once 10 members have registered. No additional members can book, even if Total Max Participants is not full.
Max Guests (3): The total number of guests allowed for the event. For example, If set to 5, only 5 guests in total can attend. Even if members are allowed to invite guests, once 5 guests are registered, no more guest spots are available.
Max Guests per Participant (4): The maximum number of guests each member can invite. If set to 2, each member can bring up to 2 guests. If set to 0, members cannot bring any guests.
To better configure the booking rules, you should pay attention to the following cases:
Case 1: The total limit includes both members and guests
Once the total number is reached, the event will stop accepting registrations, even if Max Members or Max Guests have not been reached.
Example:
Total Max Participants = 15
Max Members = 10
Max Guests = 10
Max Guests per Participant = 1
In theory, 10 members could each bring 1 guest, which would result in 20 people in total (10 members + 10 guests).
But because the total limit is 15, the system will stop at 15 participants.
If there are already: 8 members + 7 guests. That equals 15 participants. The event is now full, and no one else can register, even if the member or guest limits are not fully used (8/10 and (7/10).
If 14 spots are already taken (7 members + 7 guests), and only 1 place is left, the next member cannot bring a guest. Only 1 member can register to fill the last spot.
Case 2: Sub-limits can prevent the event from being full
Example:
Total Max Participants = 10
Max Members = 5
Max Guests = 5
In this configuration, the event is designed to have: Up to 5 members, up to 5 guests, a total maximum of 10 people.
However, if the 5 registered members do not invite any guests, the final attendance will only be 5 people. Even though the total capacity is 10, the event will not fill completely because:
No more than 5 members are allowed
Only guests can fill the remaining spots
But guests can only come if invited by members
As a result, 5 places will remain unfilled.
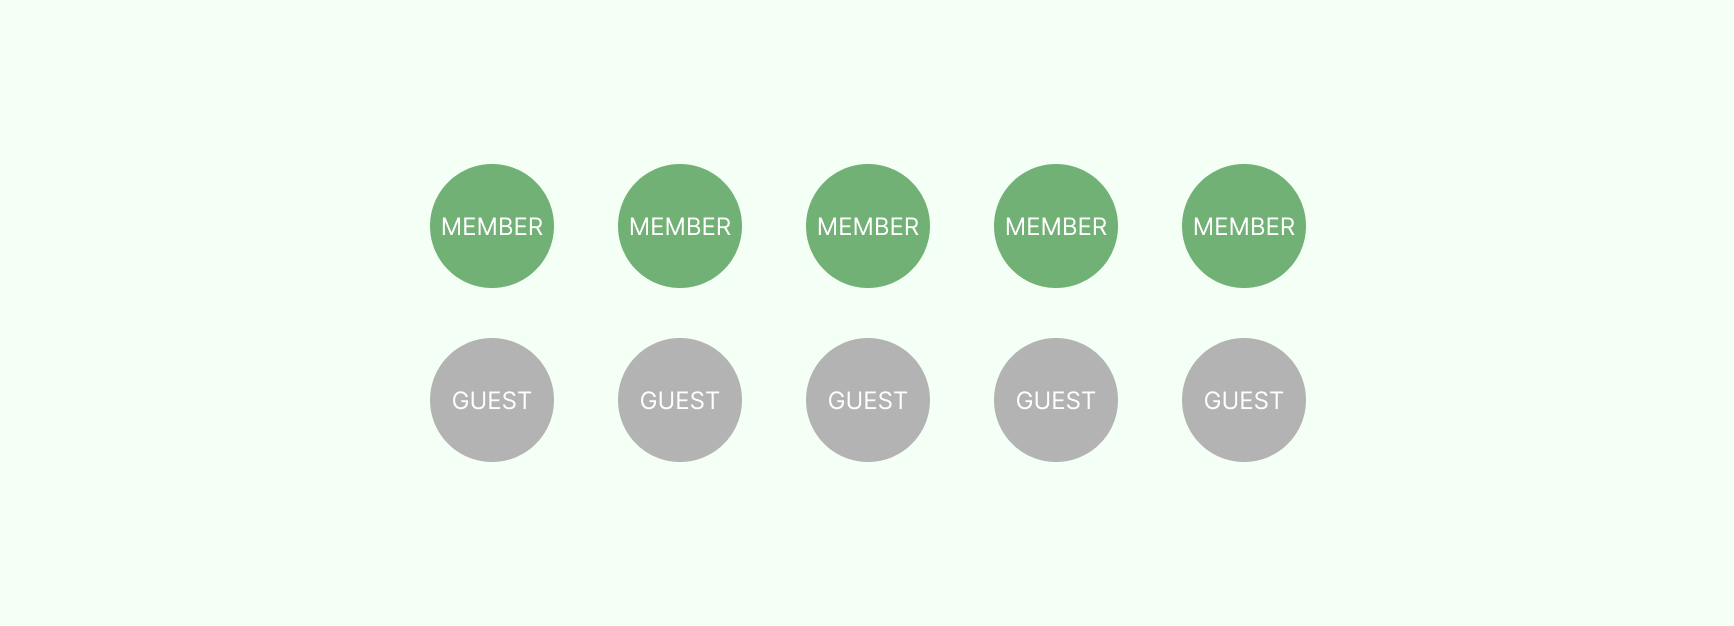
To fully use your capacity, make sure your member and guest limits do not restrict your total. If you want to make sure all spots can be filled, you can increase Max Members (for example, set it to 10).
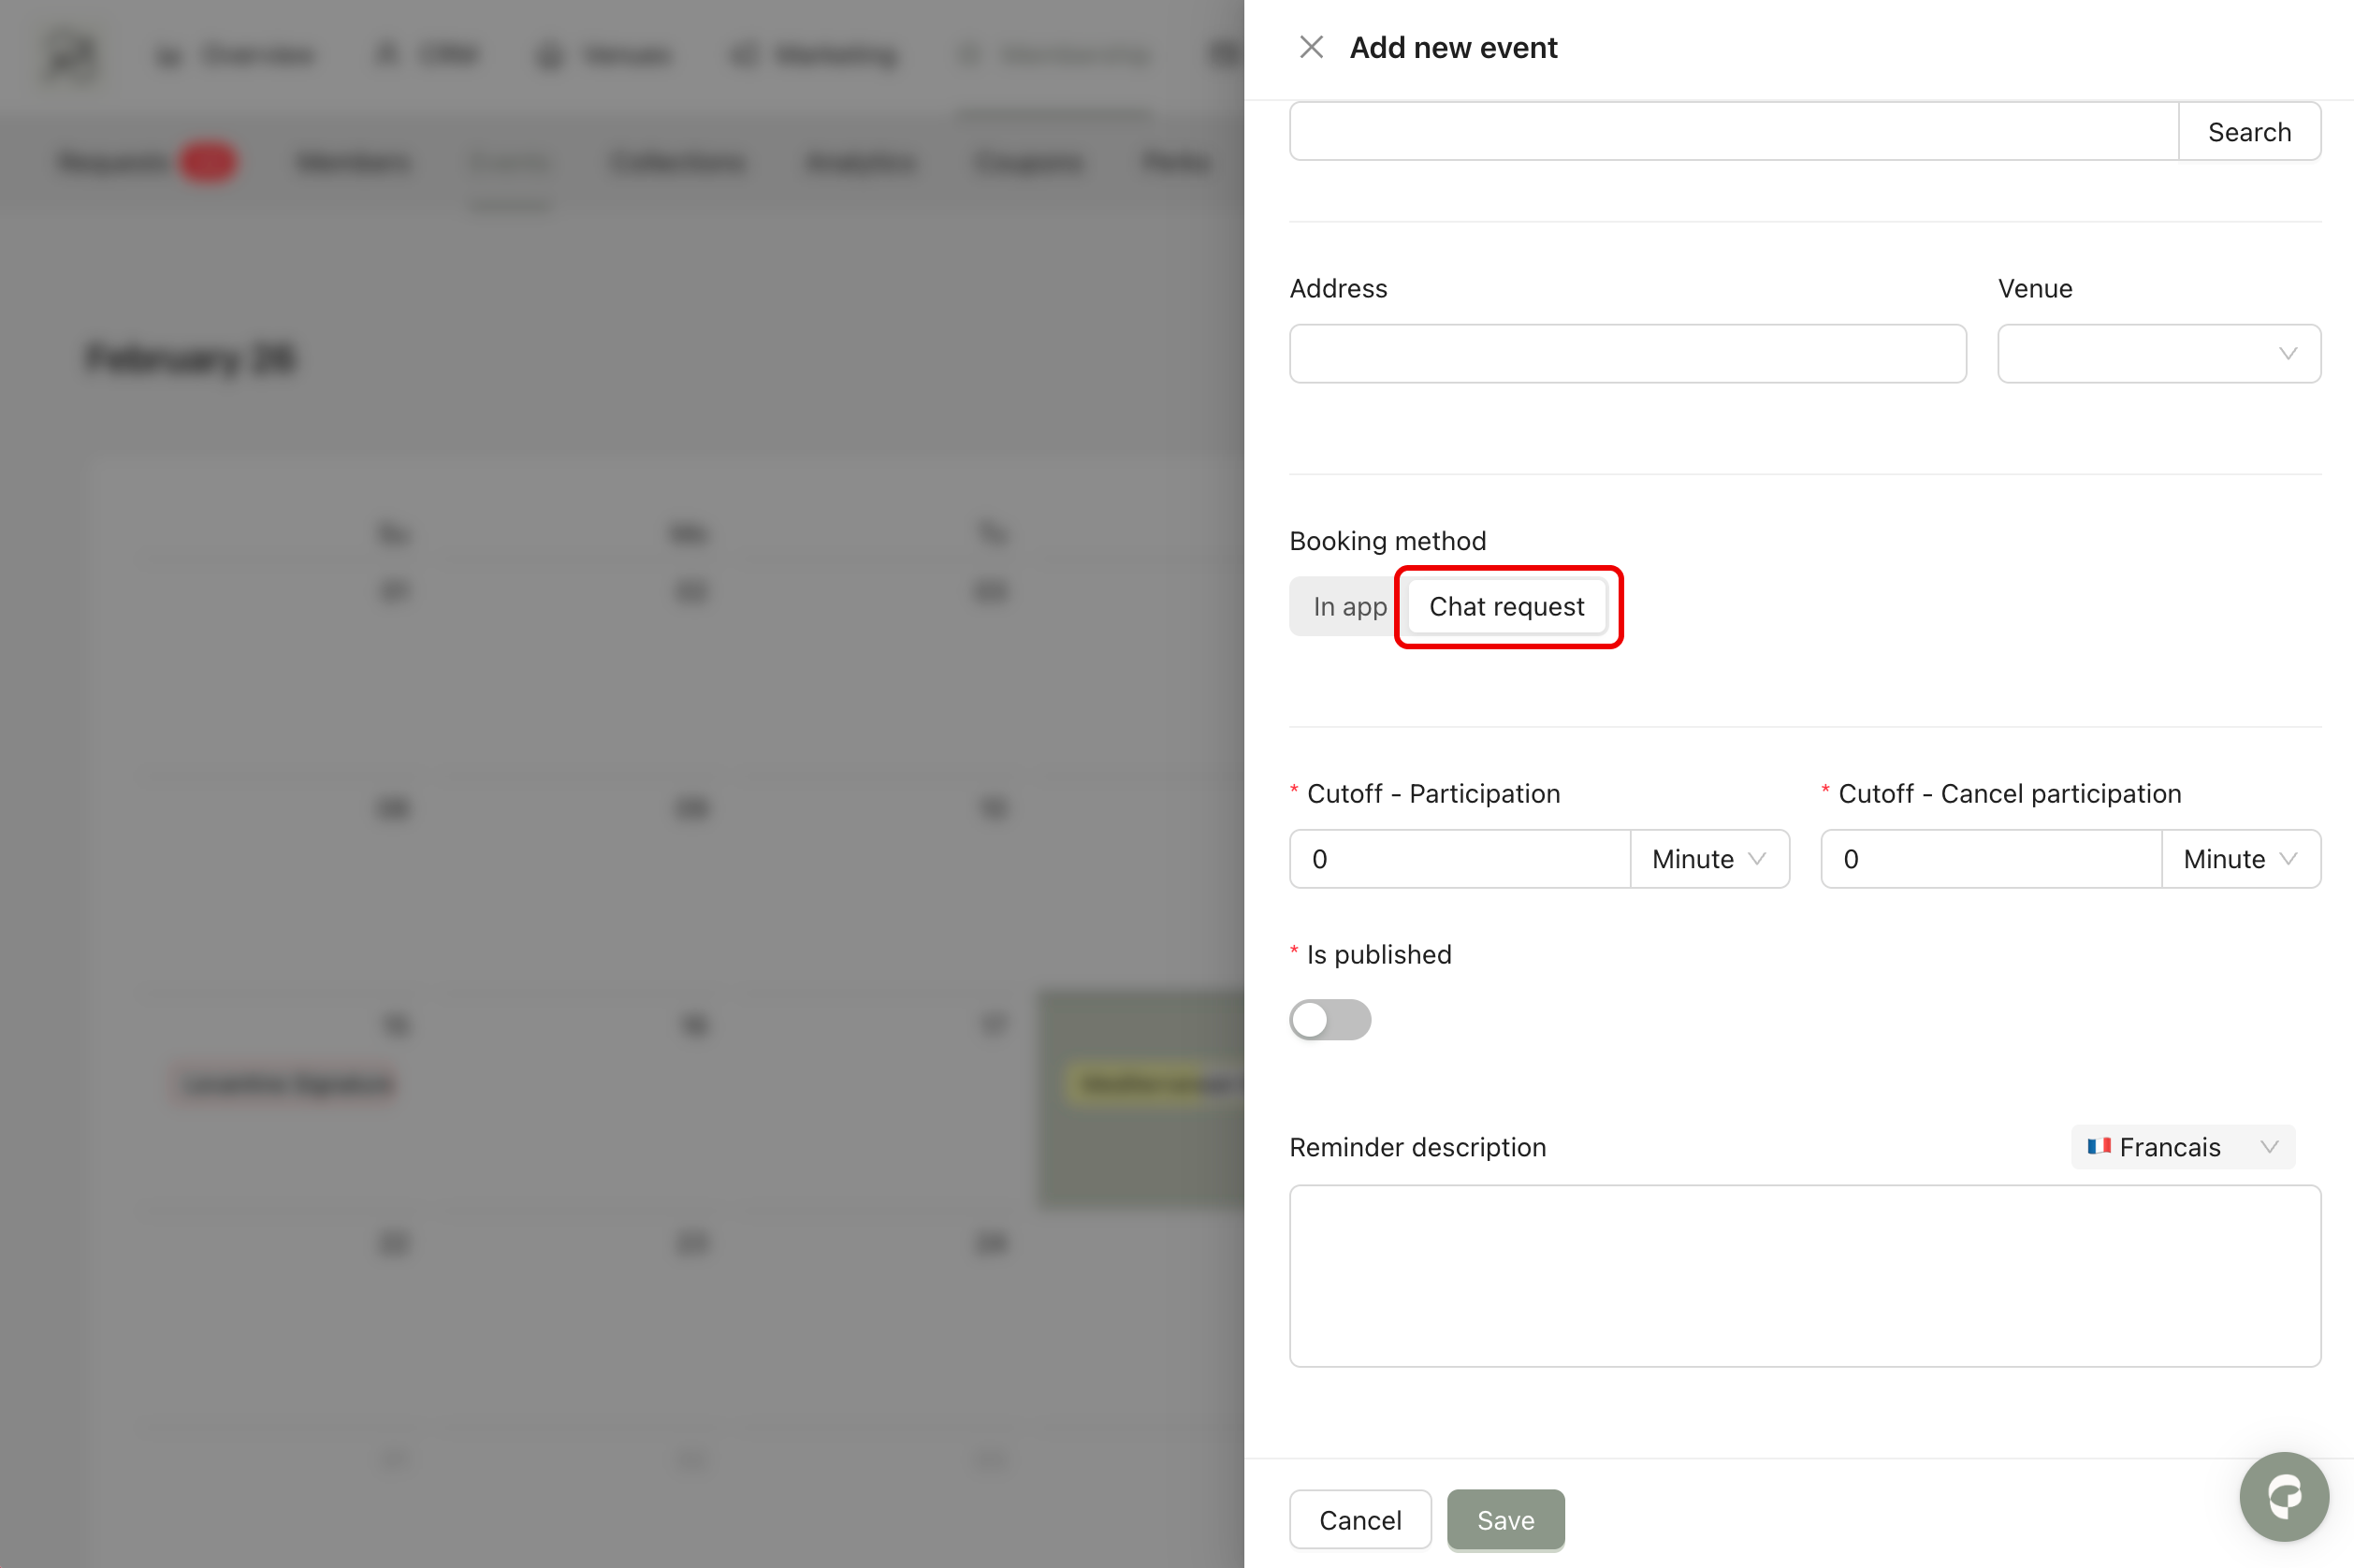
2. Chat Request
Members cannot register directly in the app. When they click the Register button, a chat window will open. They must communicate with a responsible team member to complete the booking. The chat module is connected to Intercom.
Step 4: Cut-off rules define when members can no longer book or cancel their participation. There are two settings:
Cutoff - Participation (1): This sets the latest time a member can register before the event starts. For example, if set to 30 minutes, members cannot register less than 30 minutes before the event.
Cancel Cutoff - Participation (2): This sets the latest time a member can cancel their booking. For example, if set to 1 day, members cannot cancel within 24 hours before the event.
Step 5: To publish the event, turn on the toggle Is Published to make the event visible in the mobile application. If the toggle is off, the event will remain hidden from members.
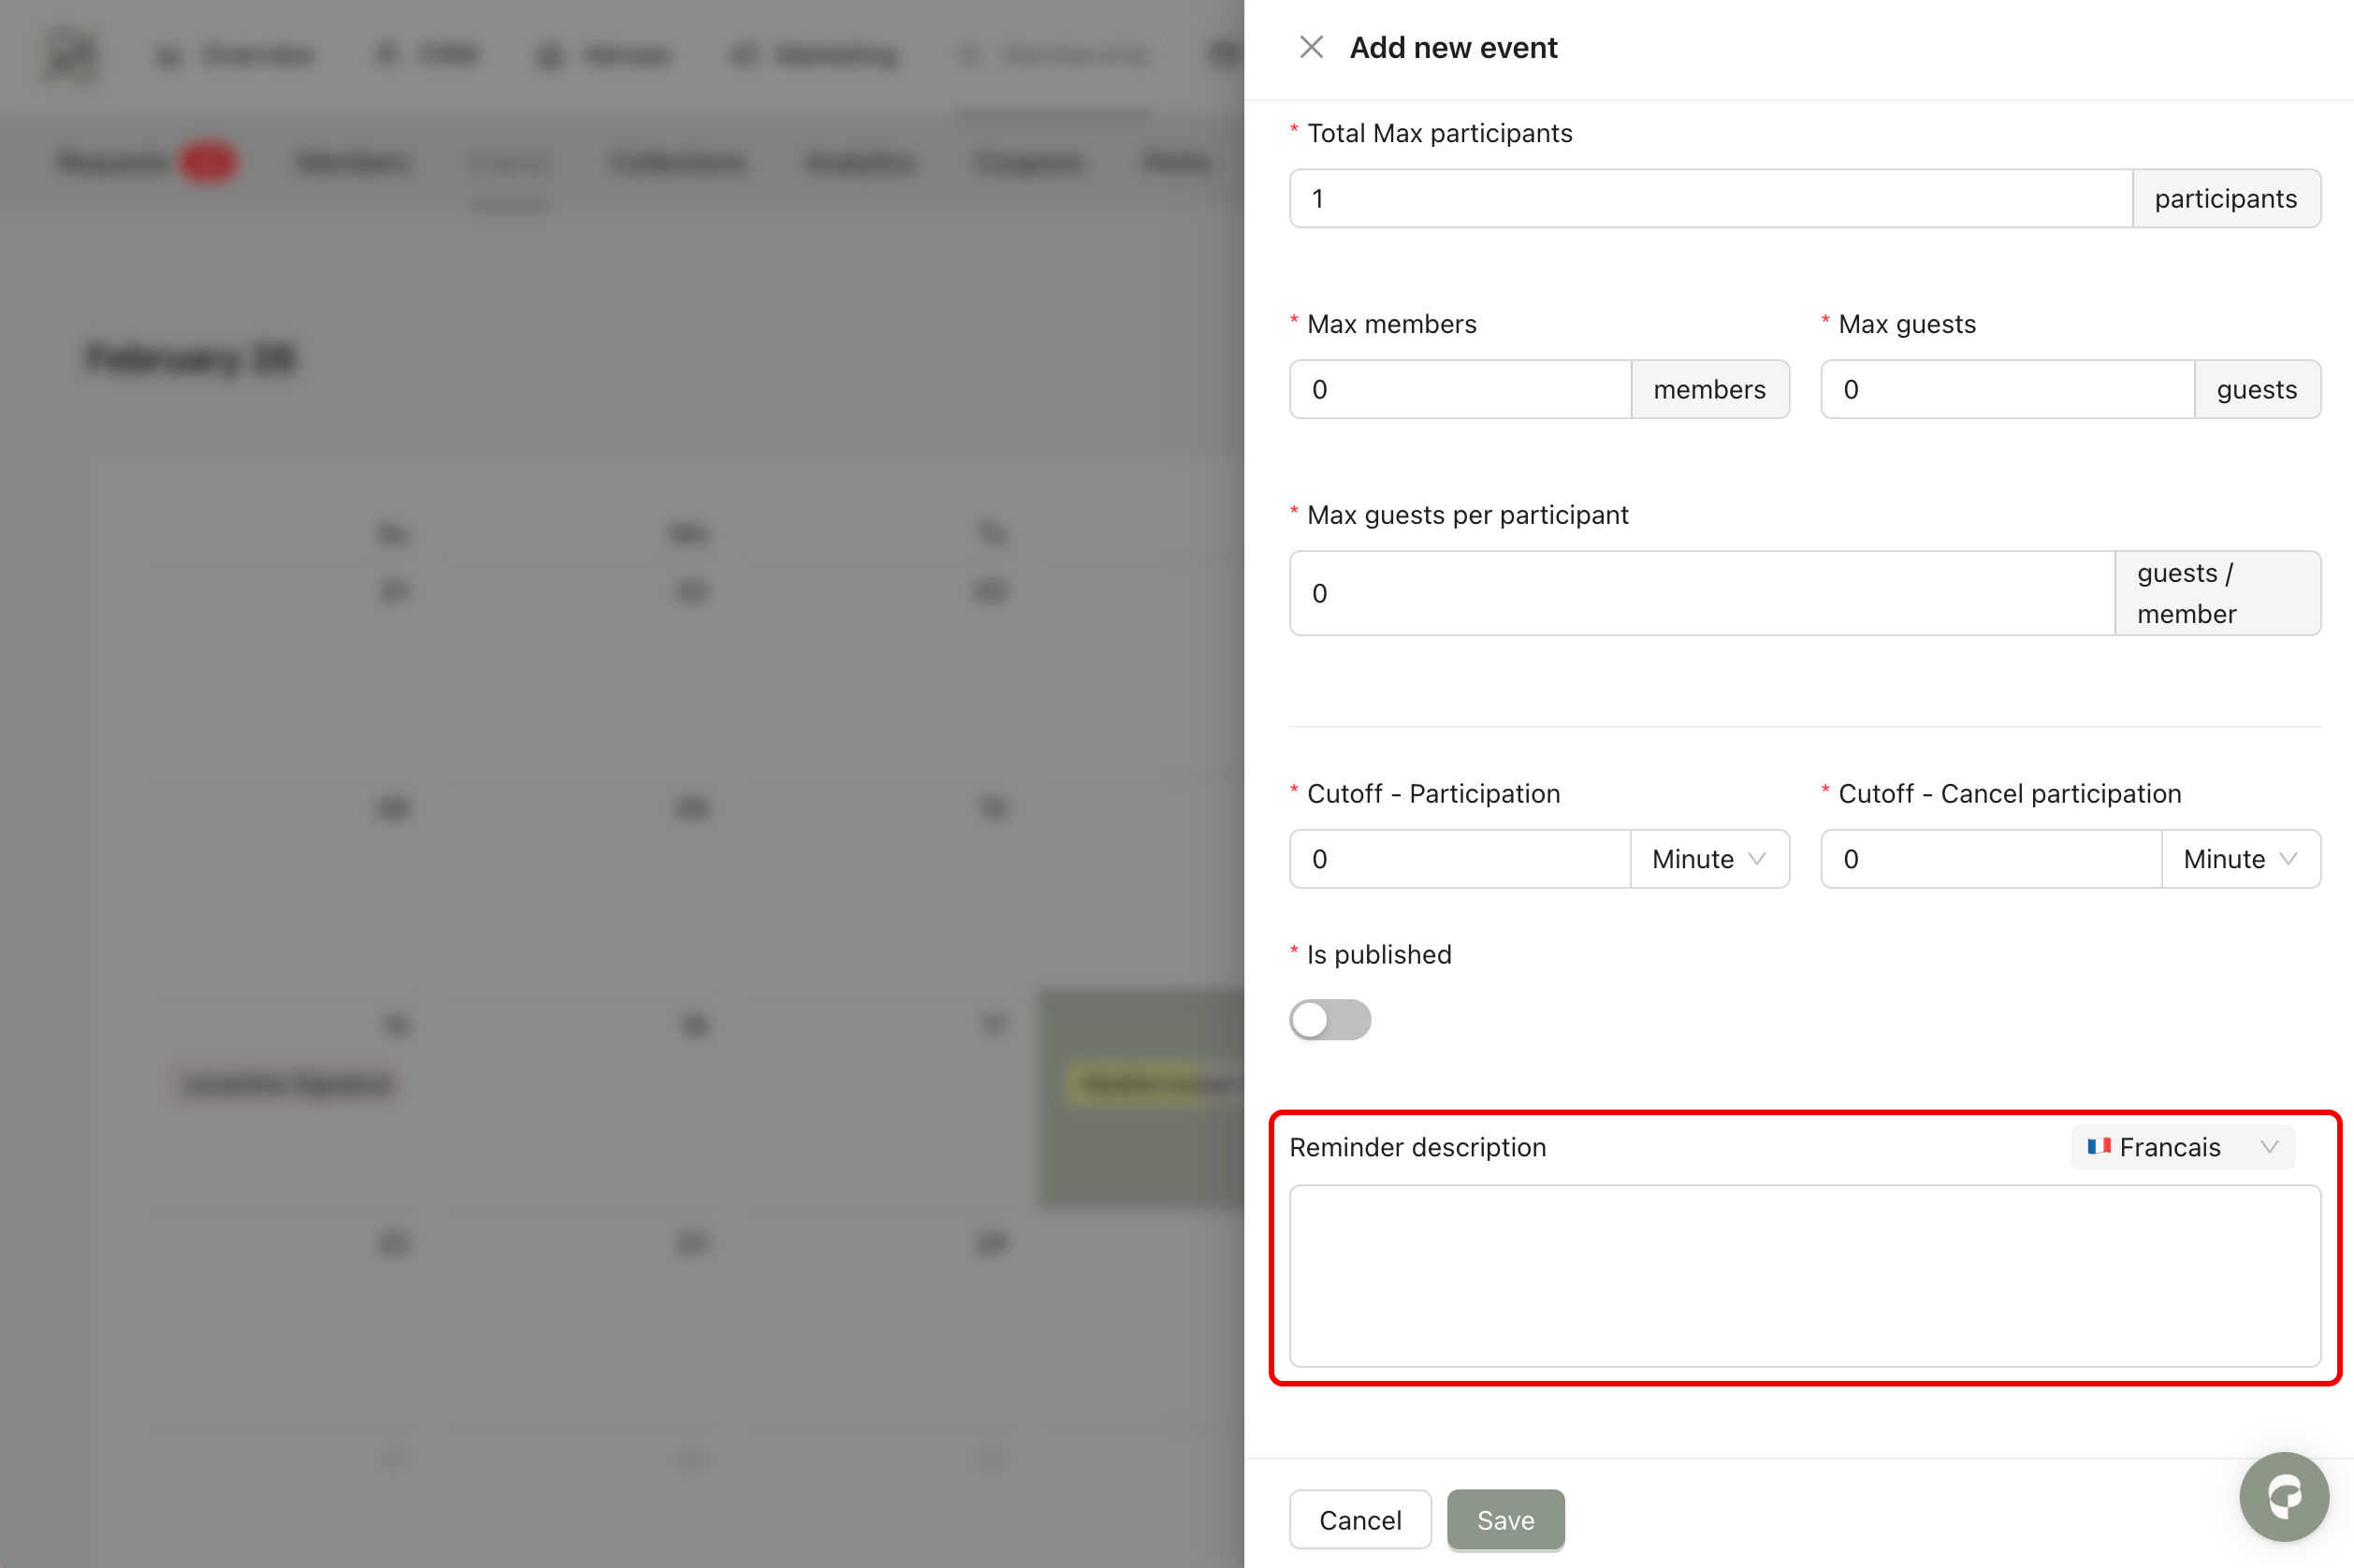
Step 6 (Optional): You can configure a reminder message that will be sent to participants before the event. This is a push notification sent to their phone. You can customize the message content for each event.
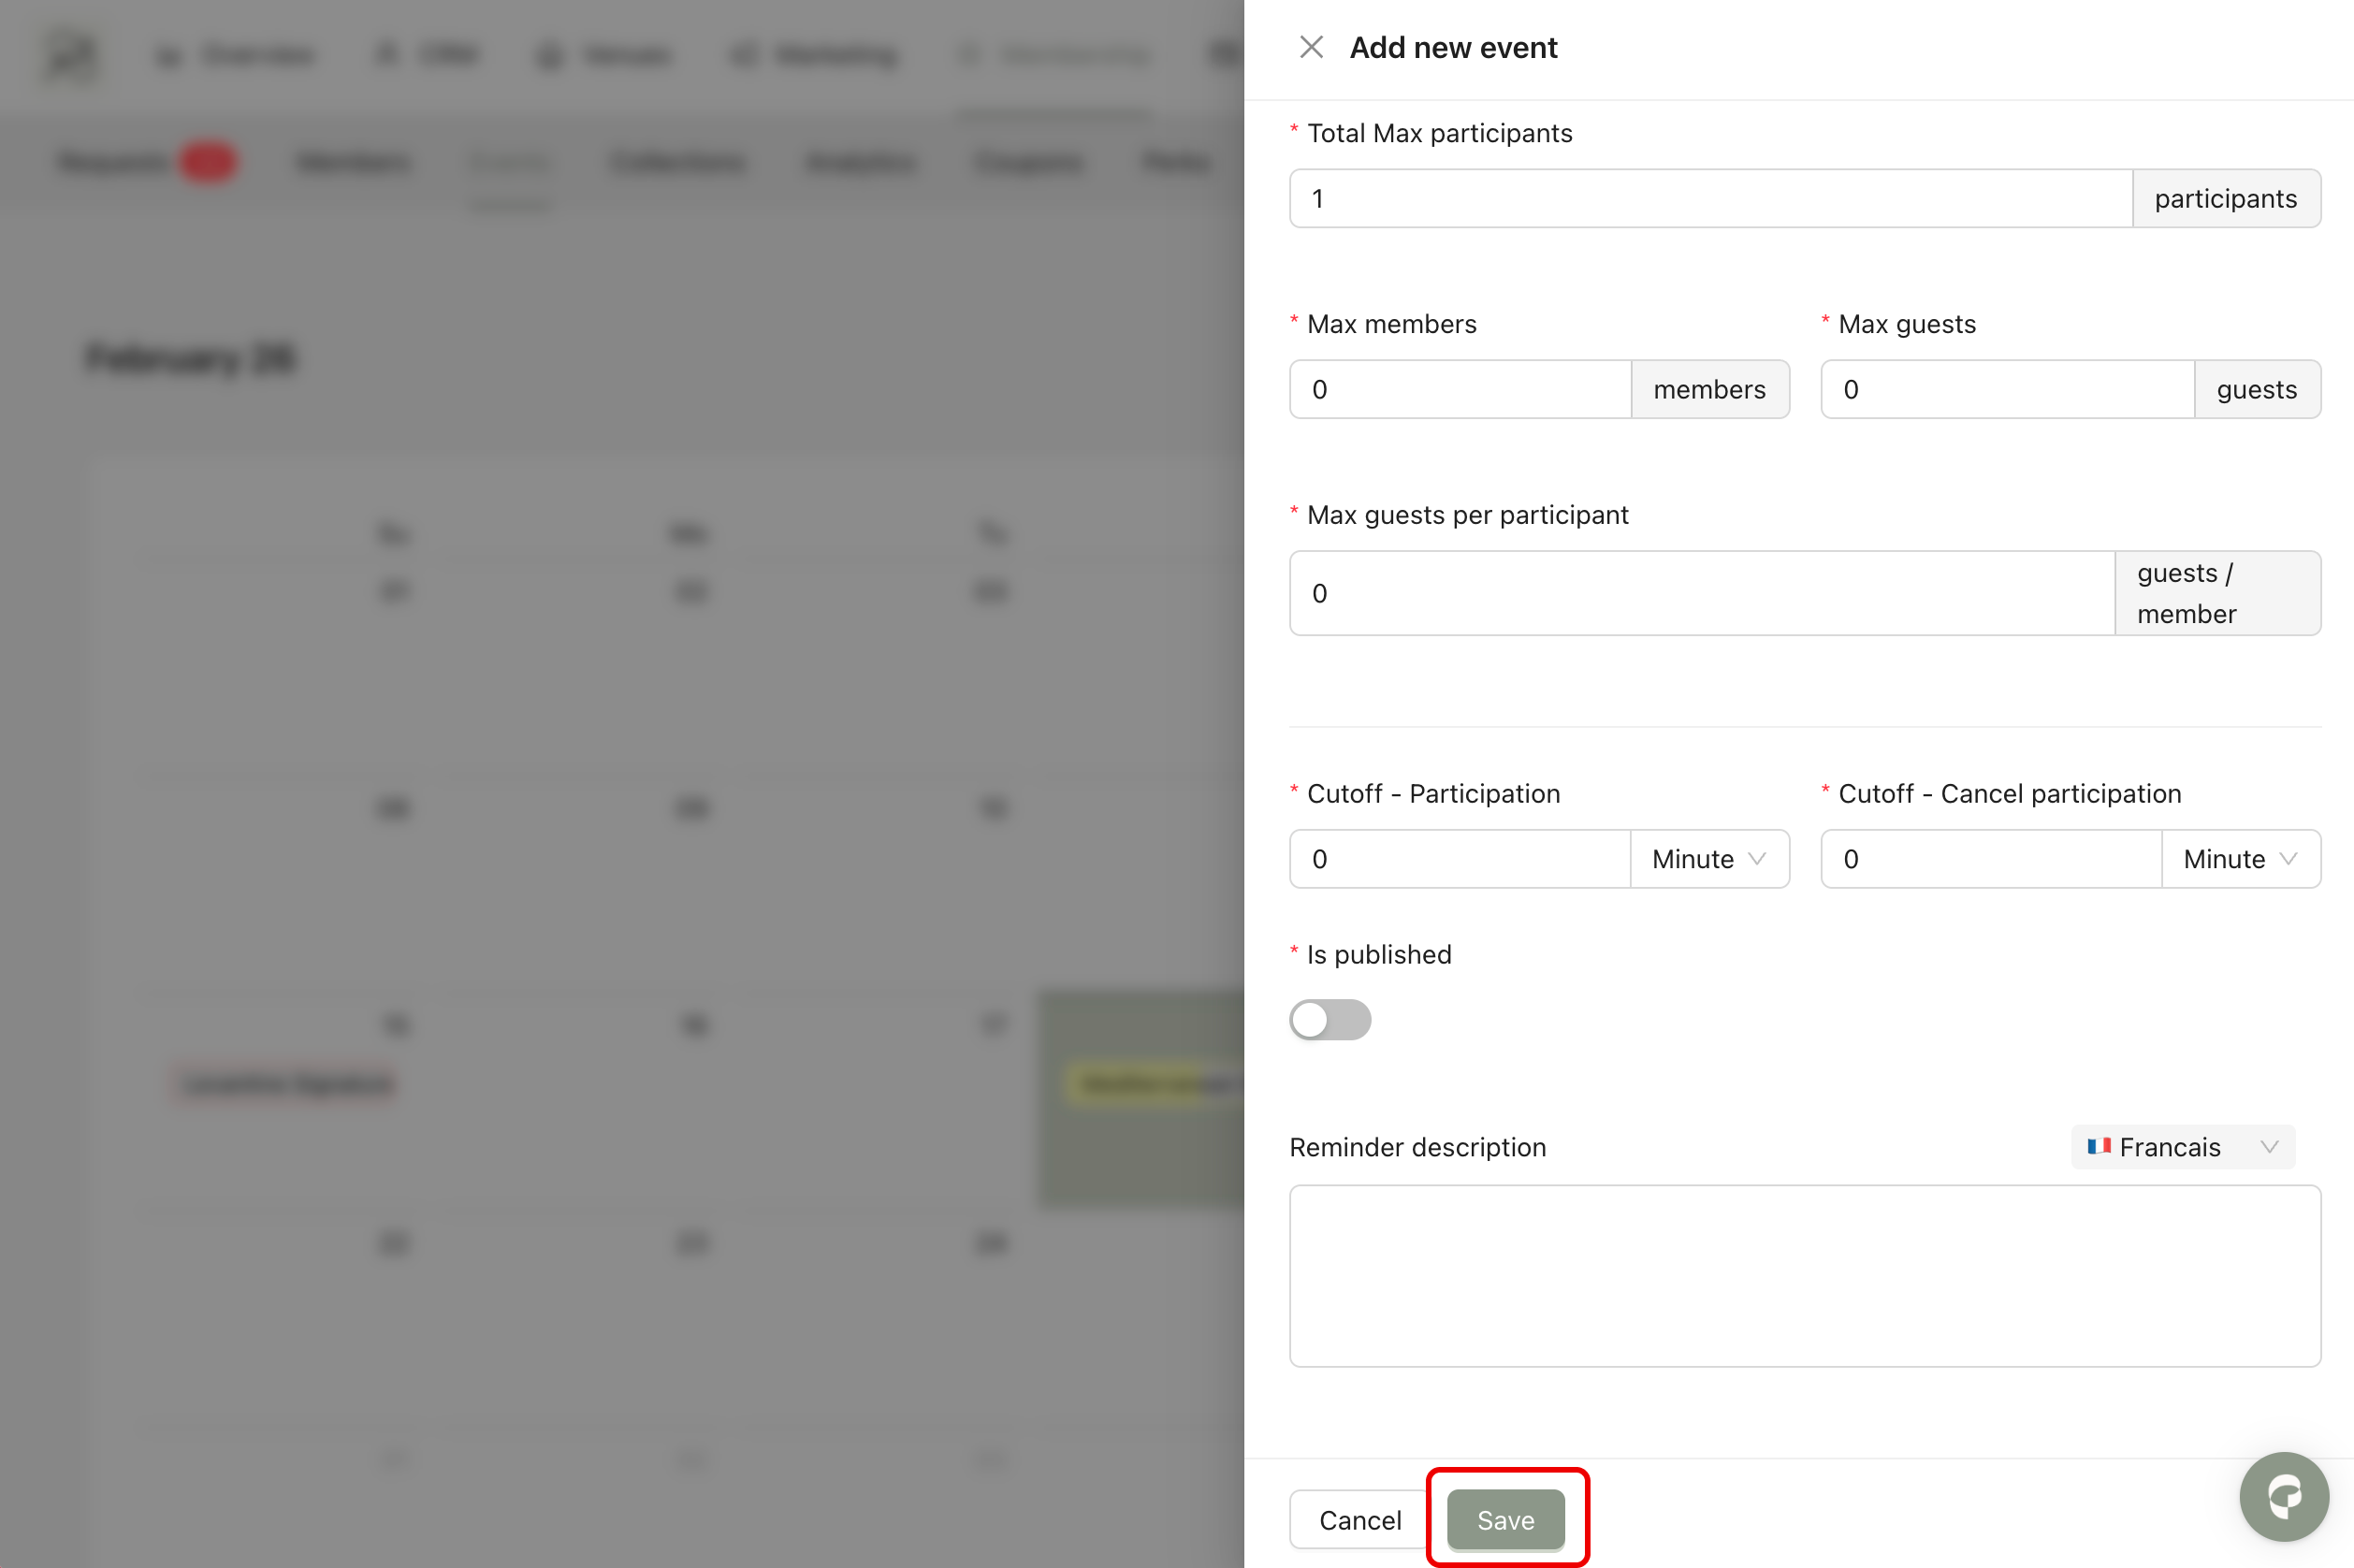
Step 7: Click Save to create the event.
 Final Result: Your event is now created and visible in the dashboard. To make it visible in the mobile application, you must add it to an Event Collection.