The Participants tab allows you to manage everyone registered for an event. From this section, you can view the participant list, see who made the booking, check the booking status, perform check-in on the event day, remove participants if necessary, and review activity logs.
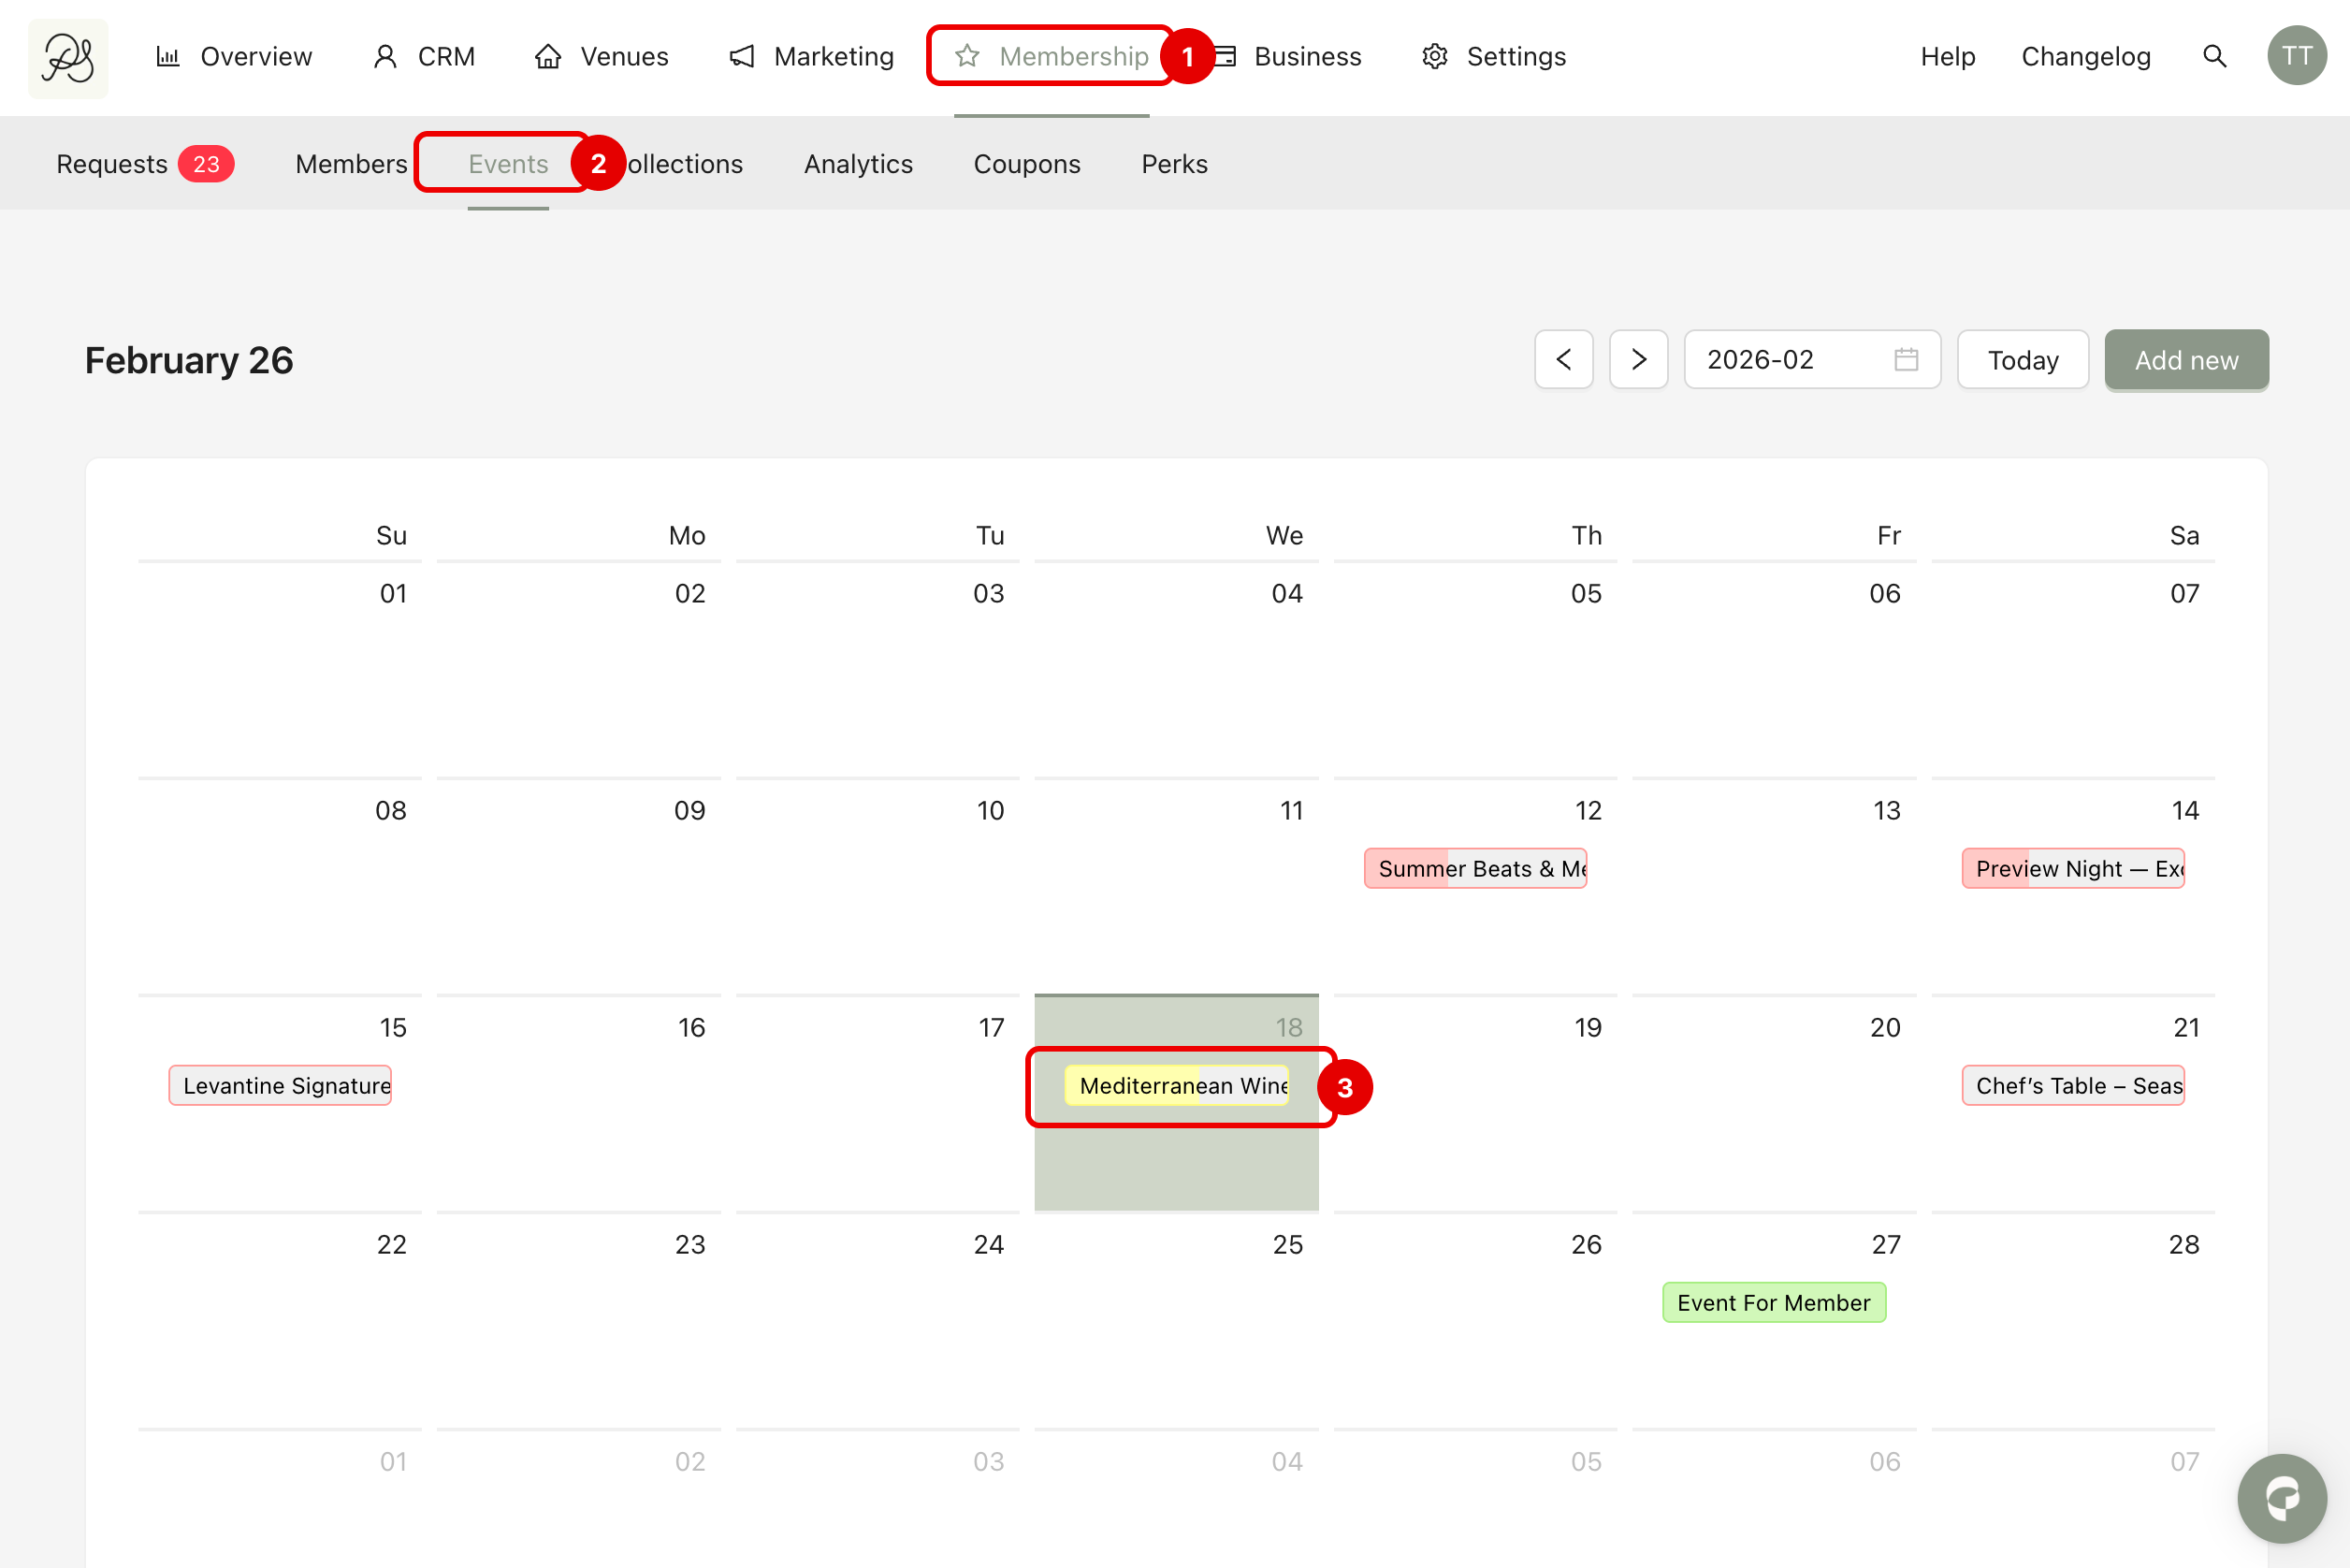
Step 1: Go to Membership (1) → Events (2). Click on the event you want to manage (3).
Step 2: Open the Participants tab. You will see a table listing all registered participants.
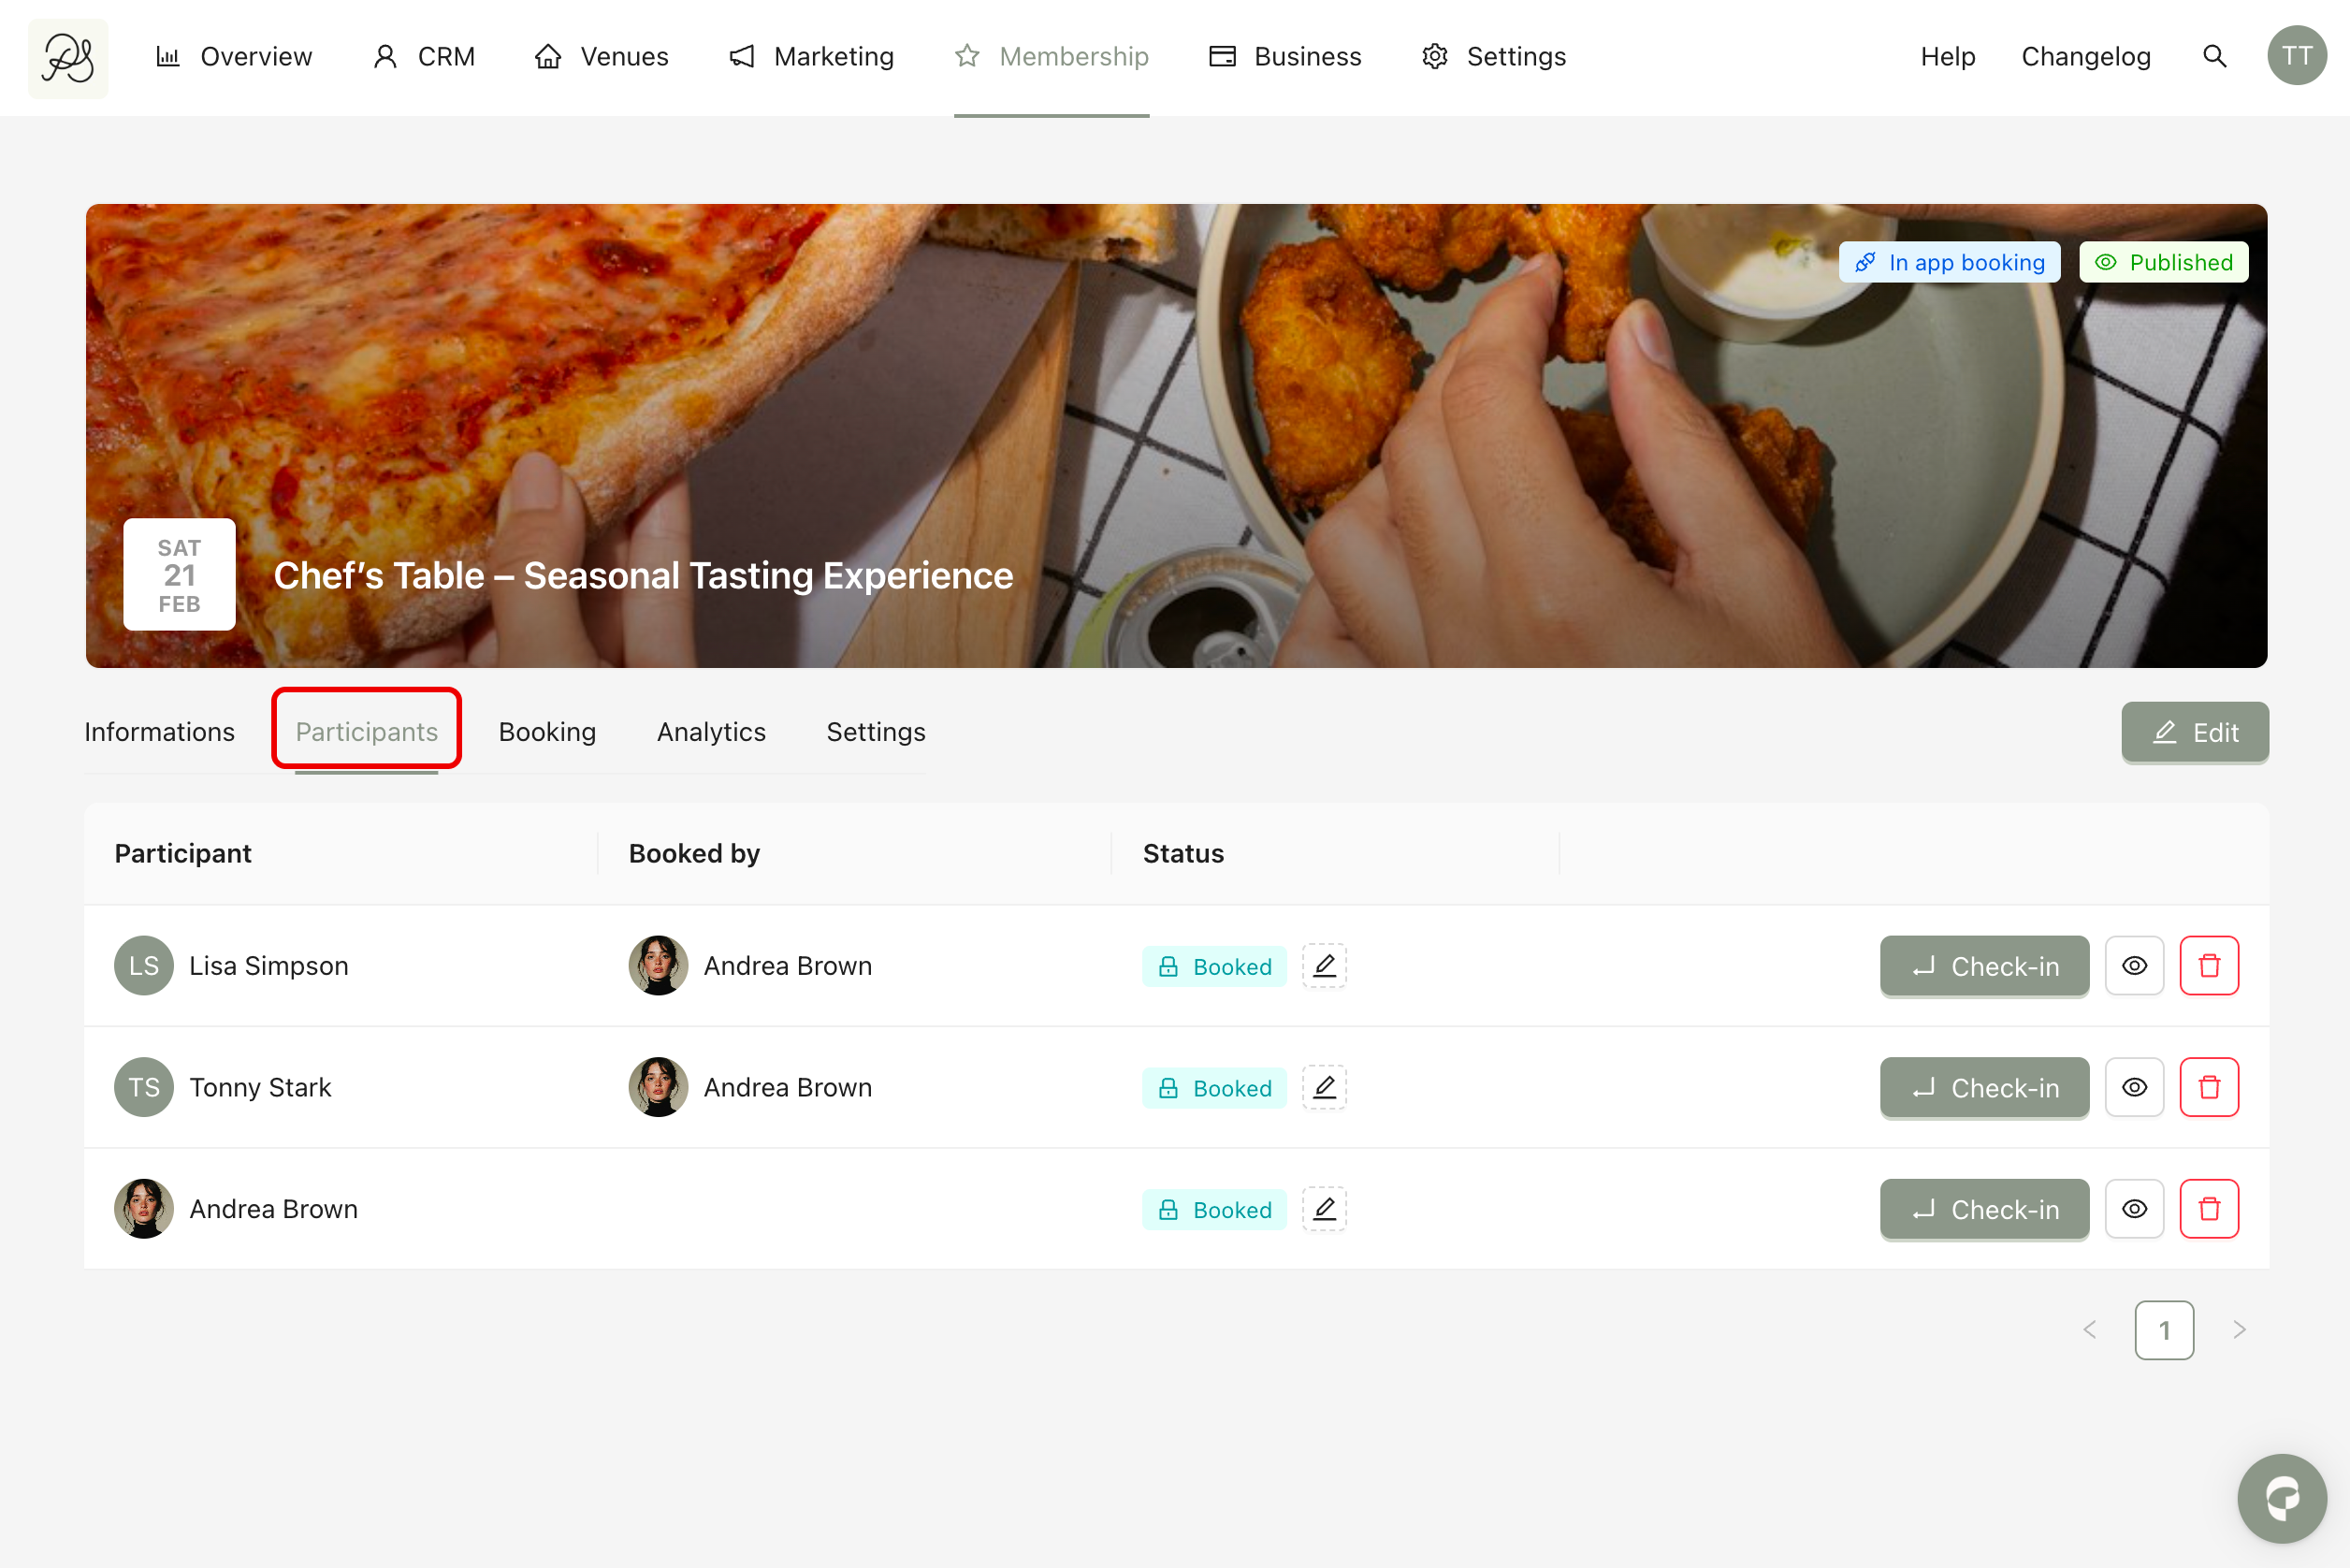
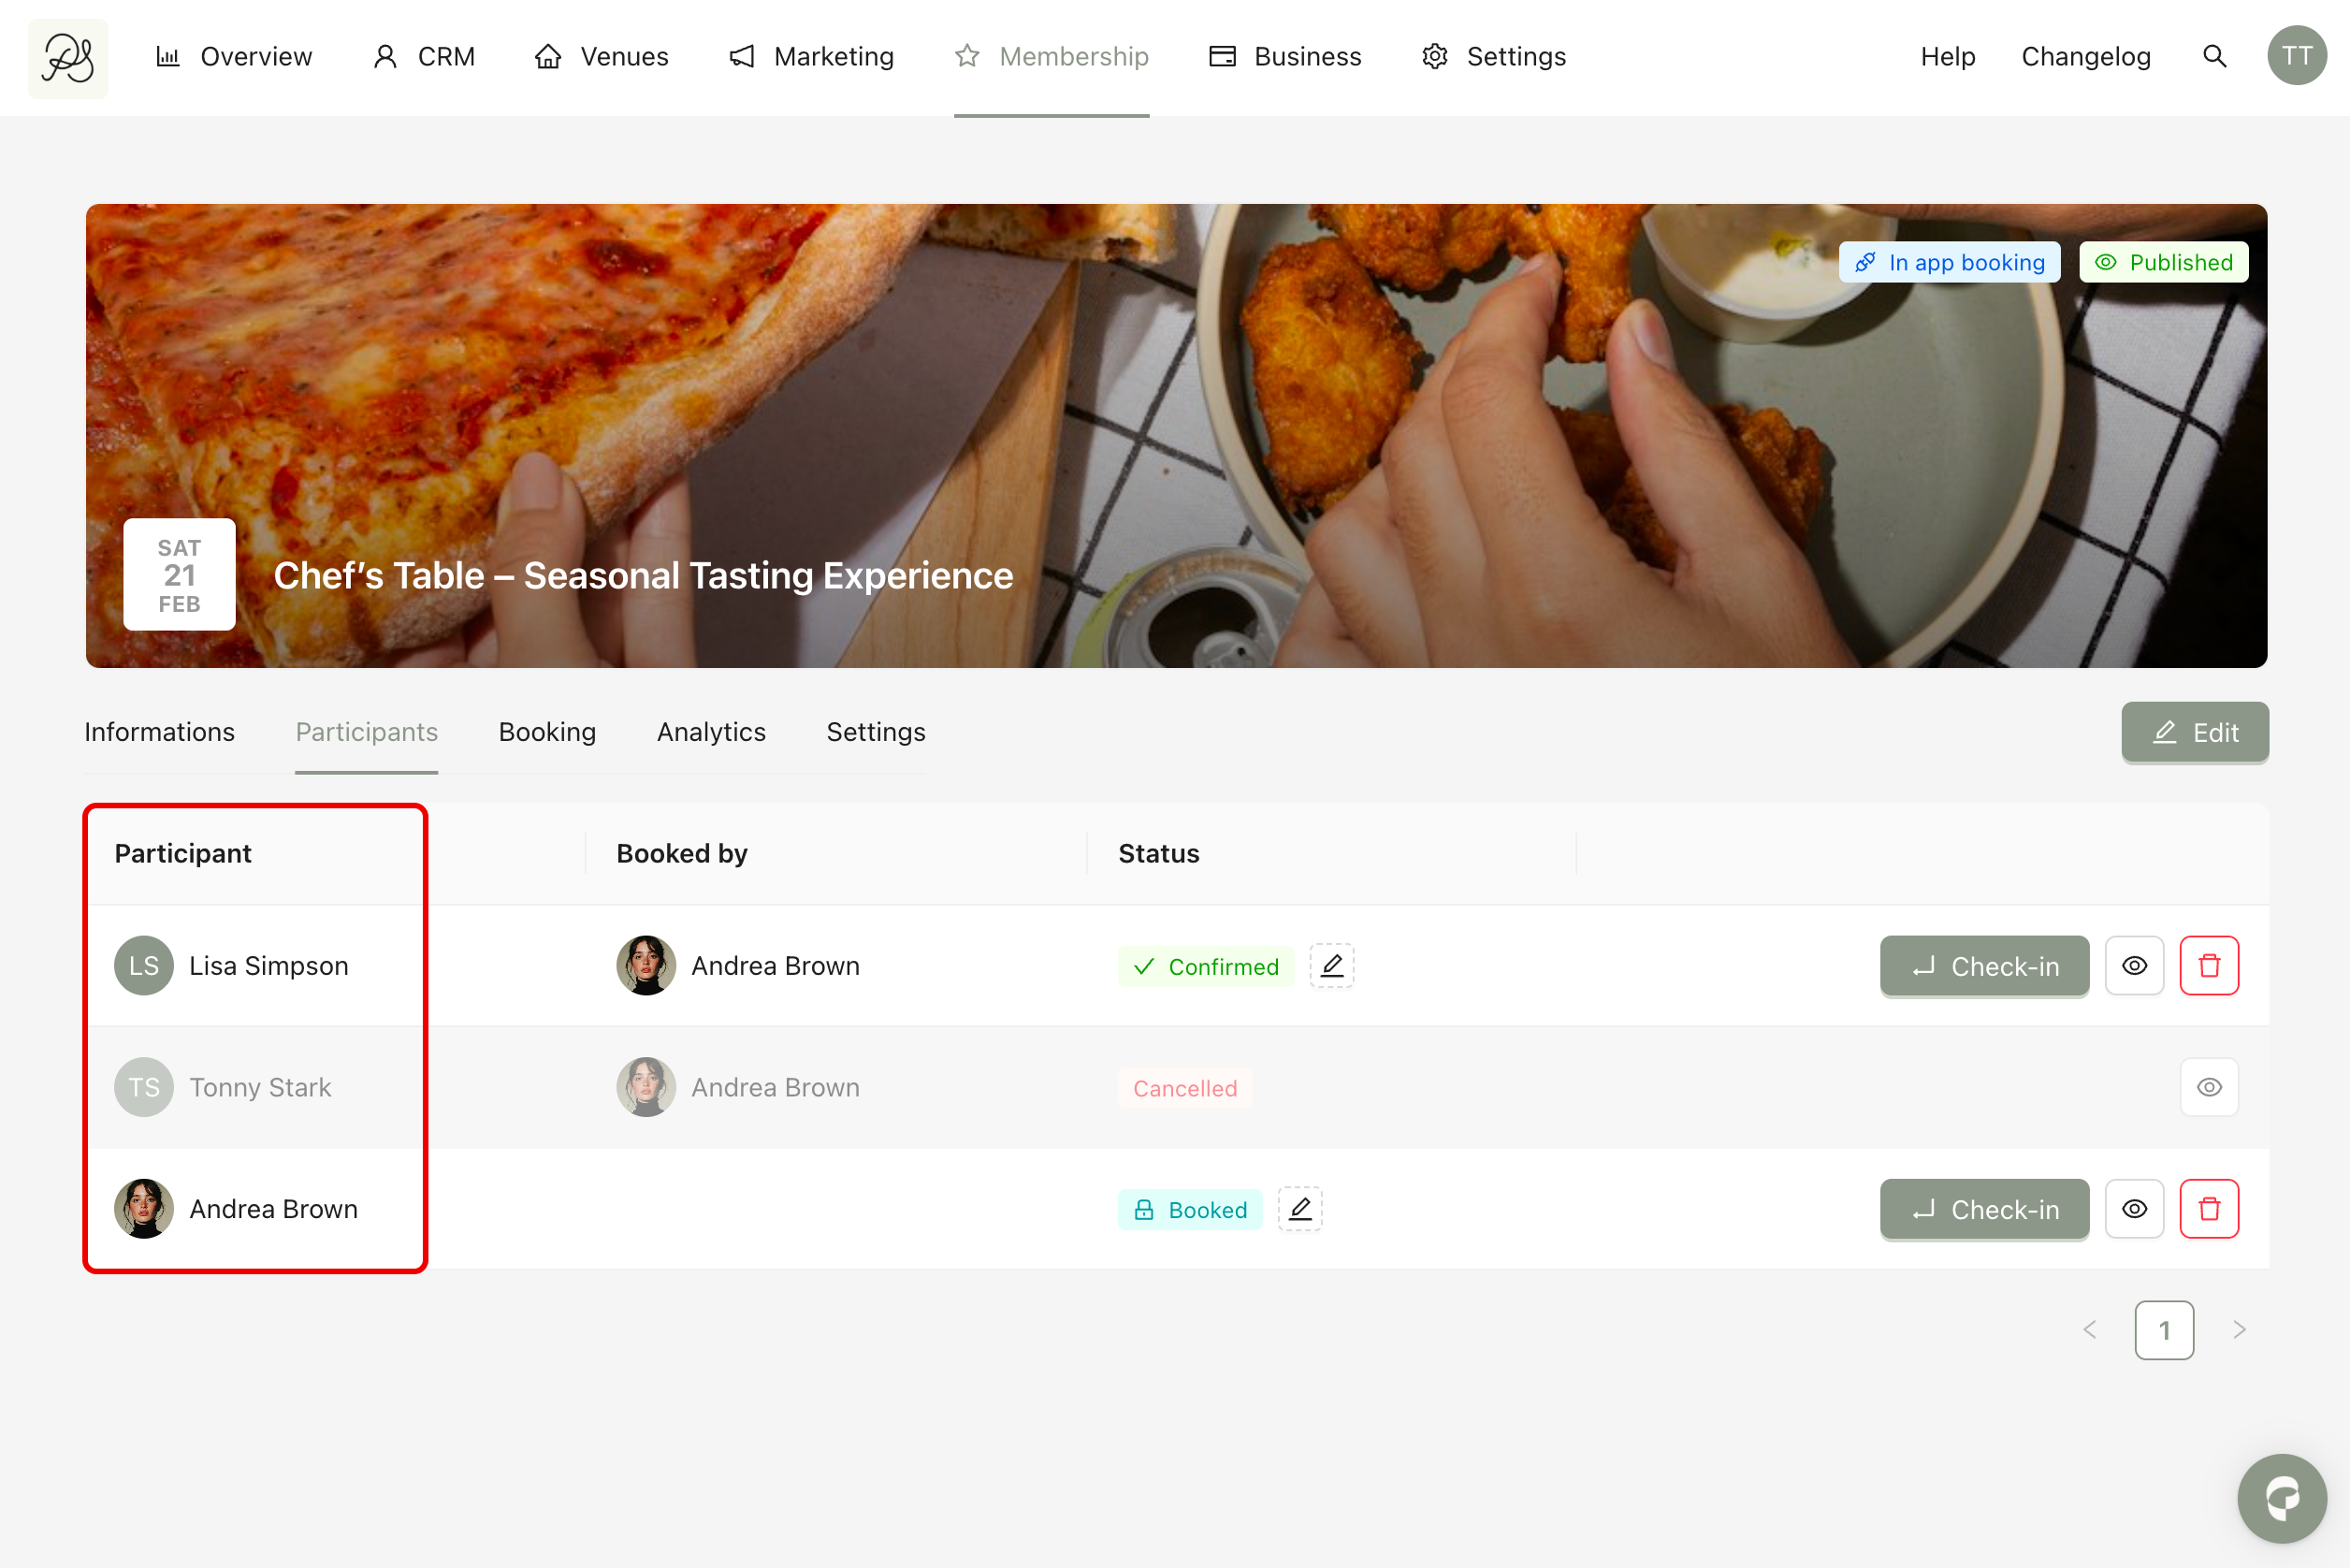
Each row represents one participant.
Participant: Displays the name of the attendee.
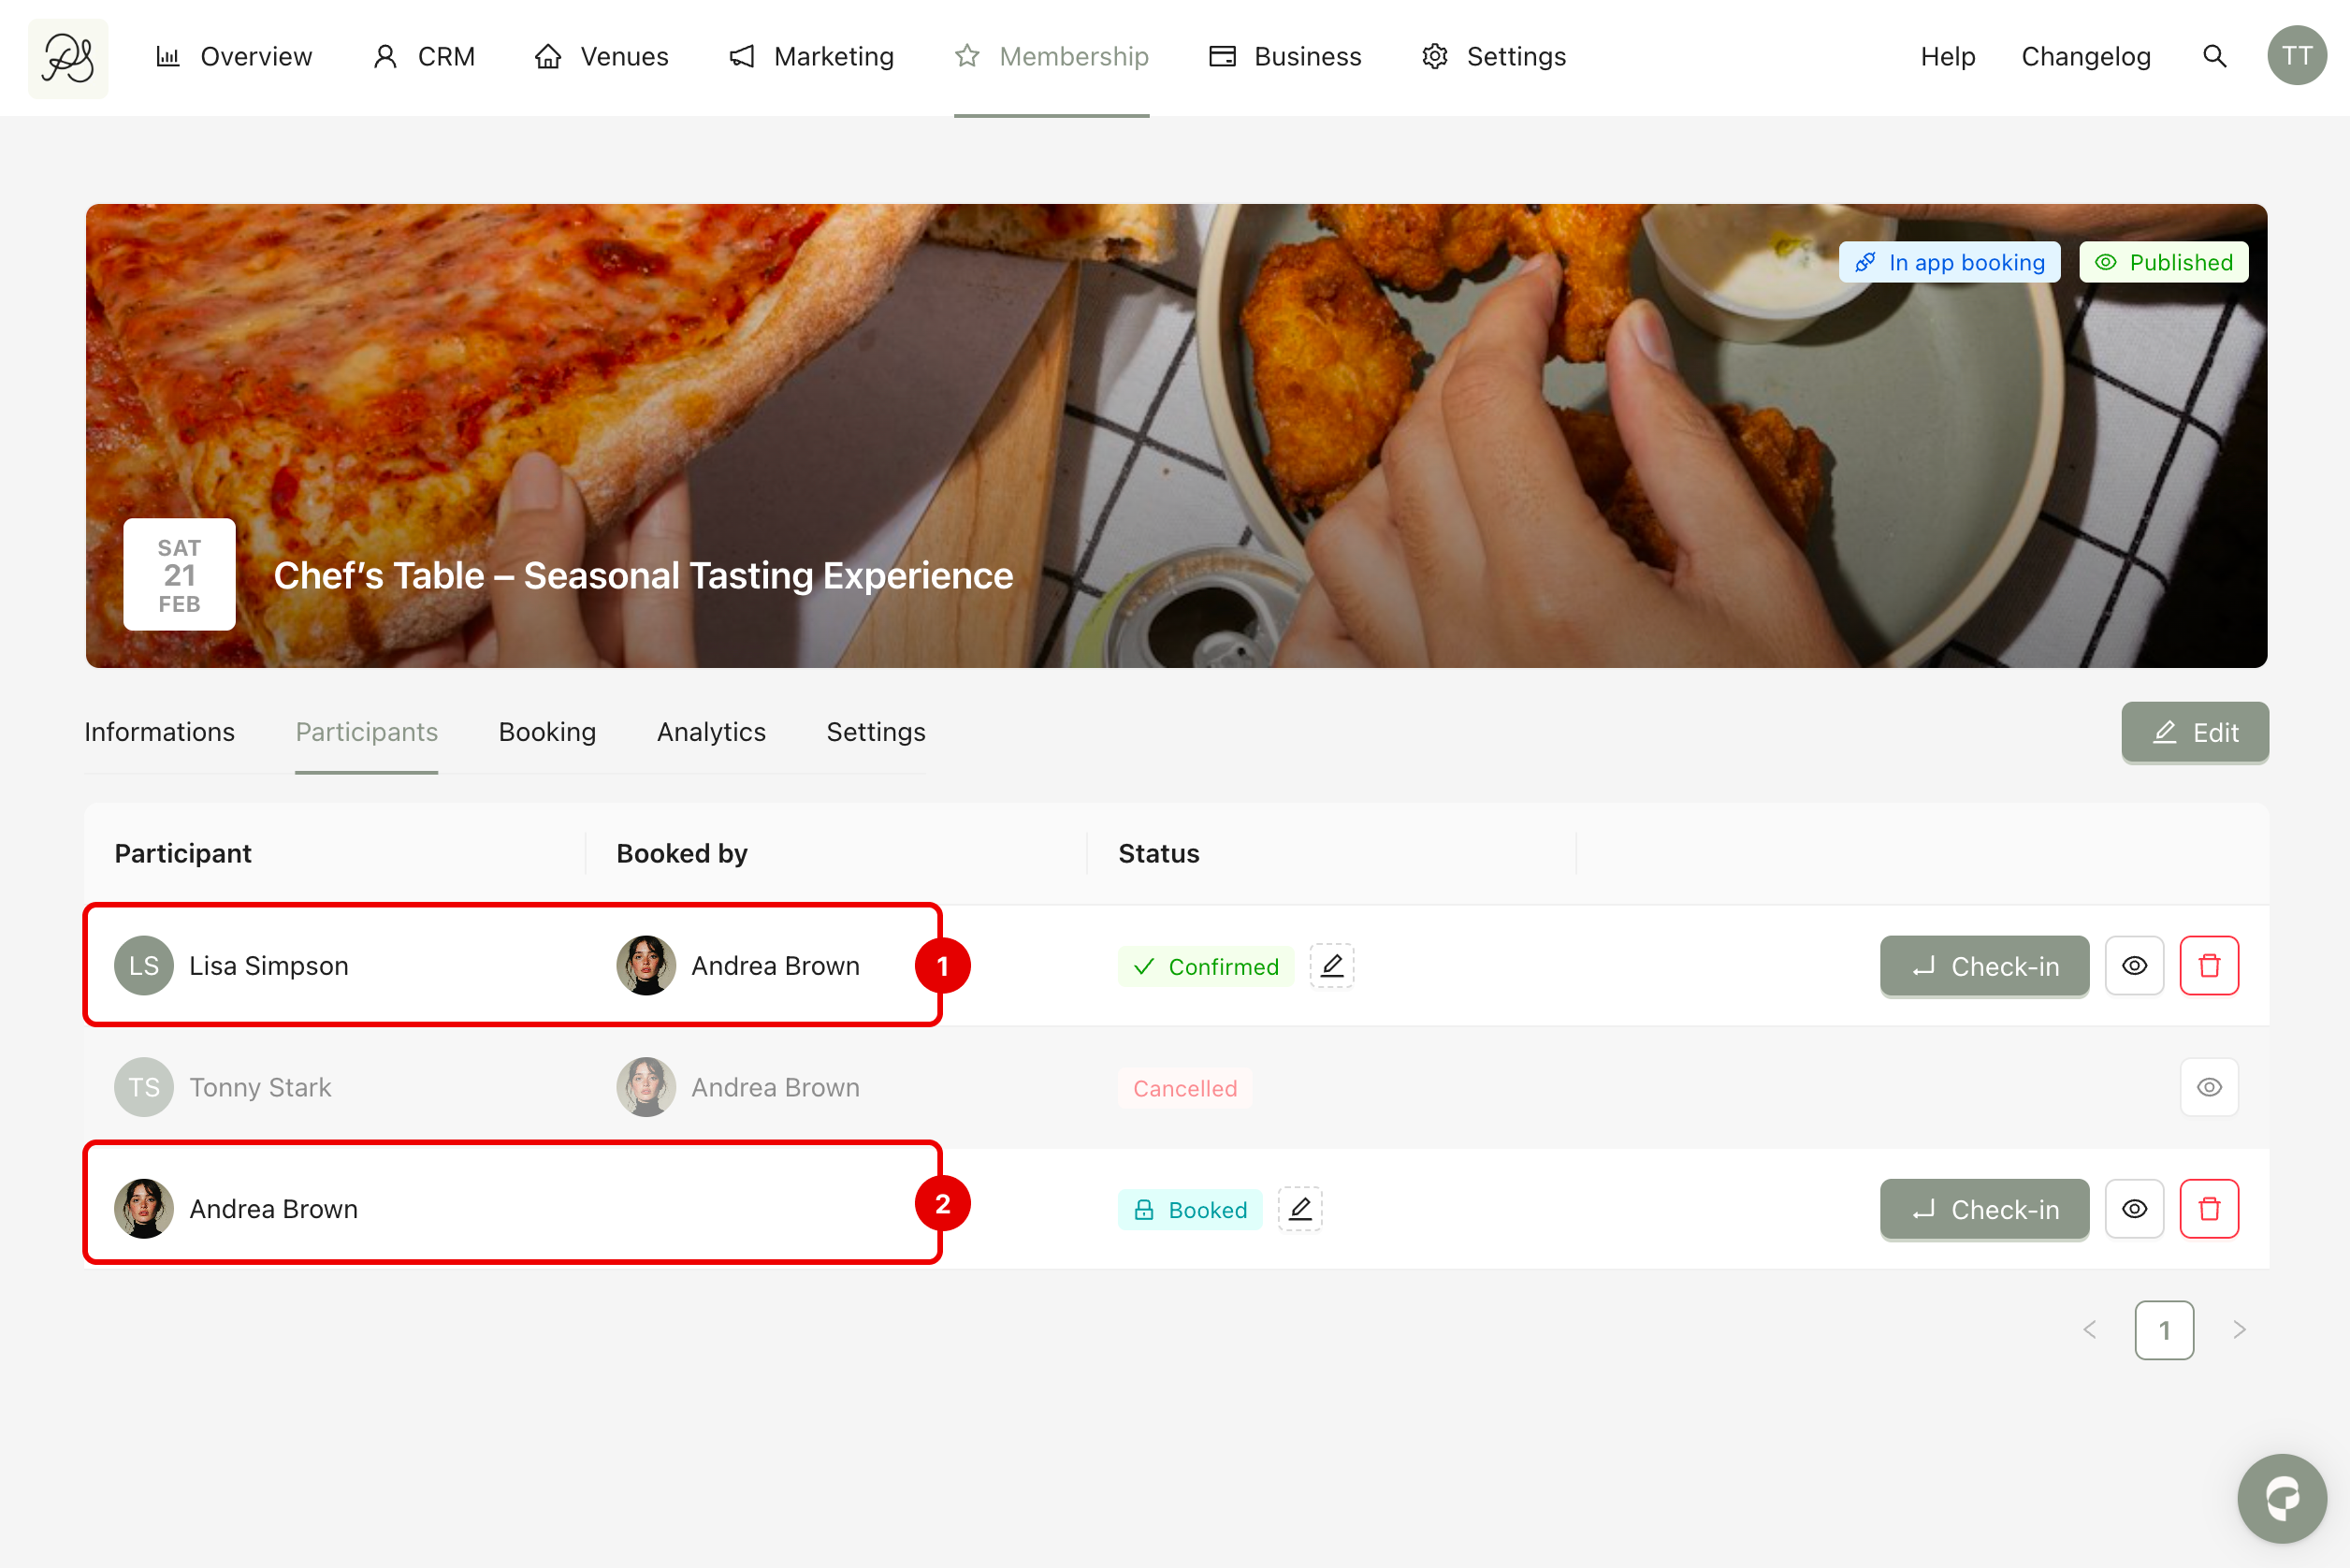
Booked by: Shows the member who made the booking. If the participant is a guest, it shows the name of the member who invited them (1). If the column is blank, it means the participant is a member who booked for themselves (2).
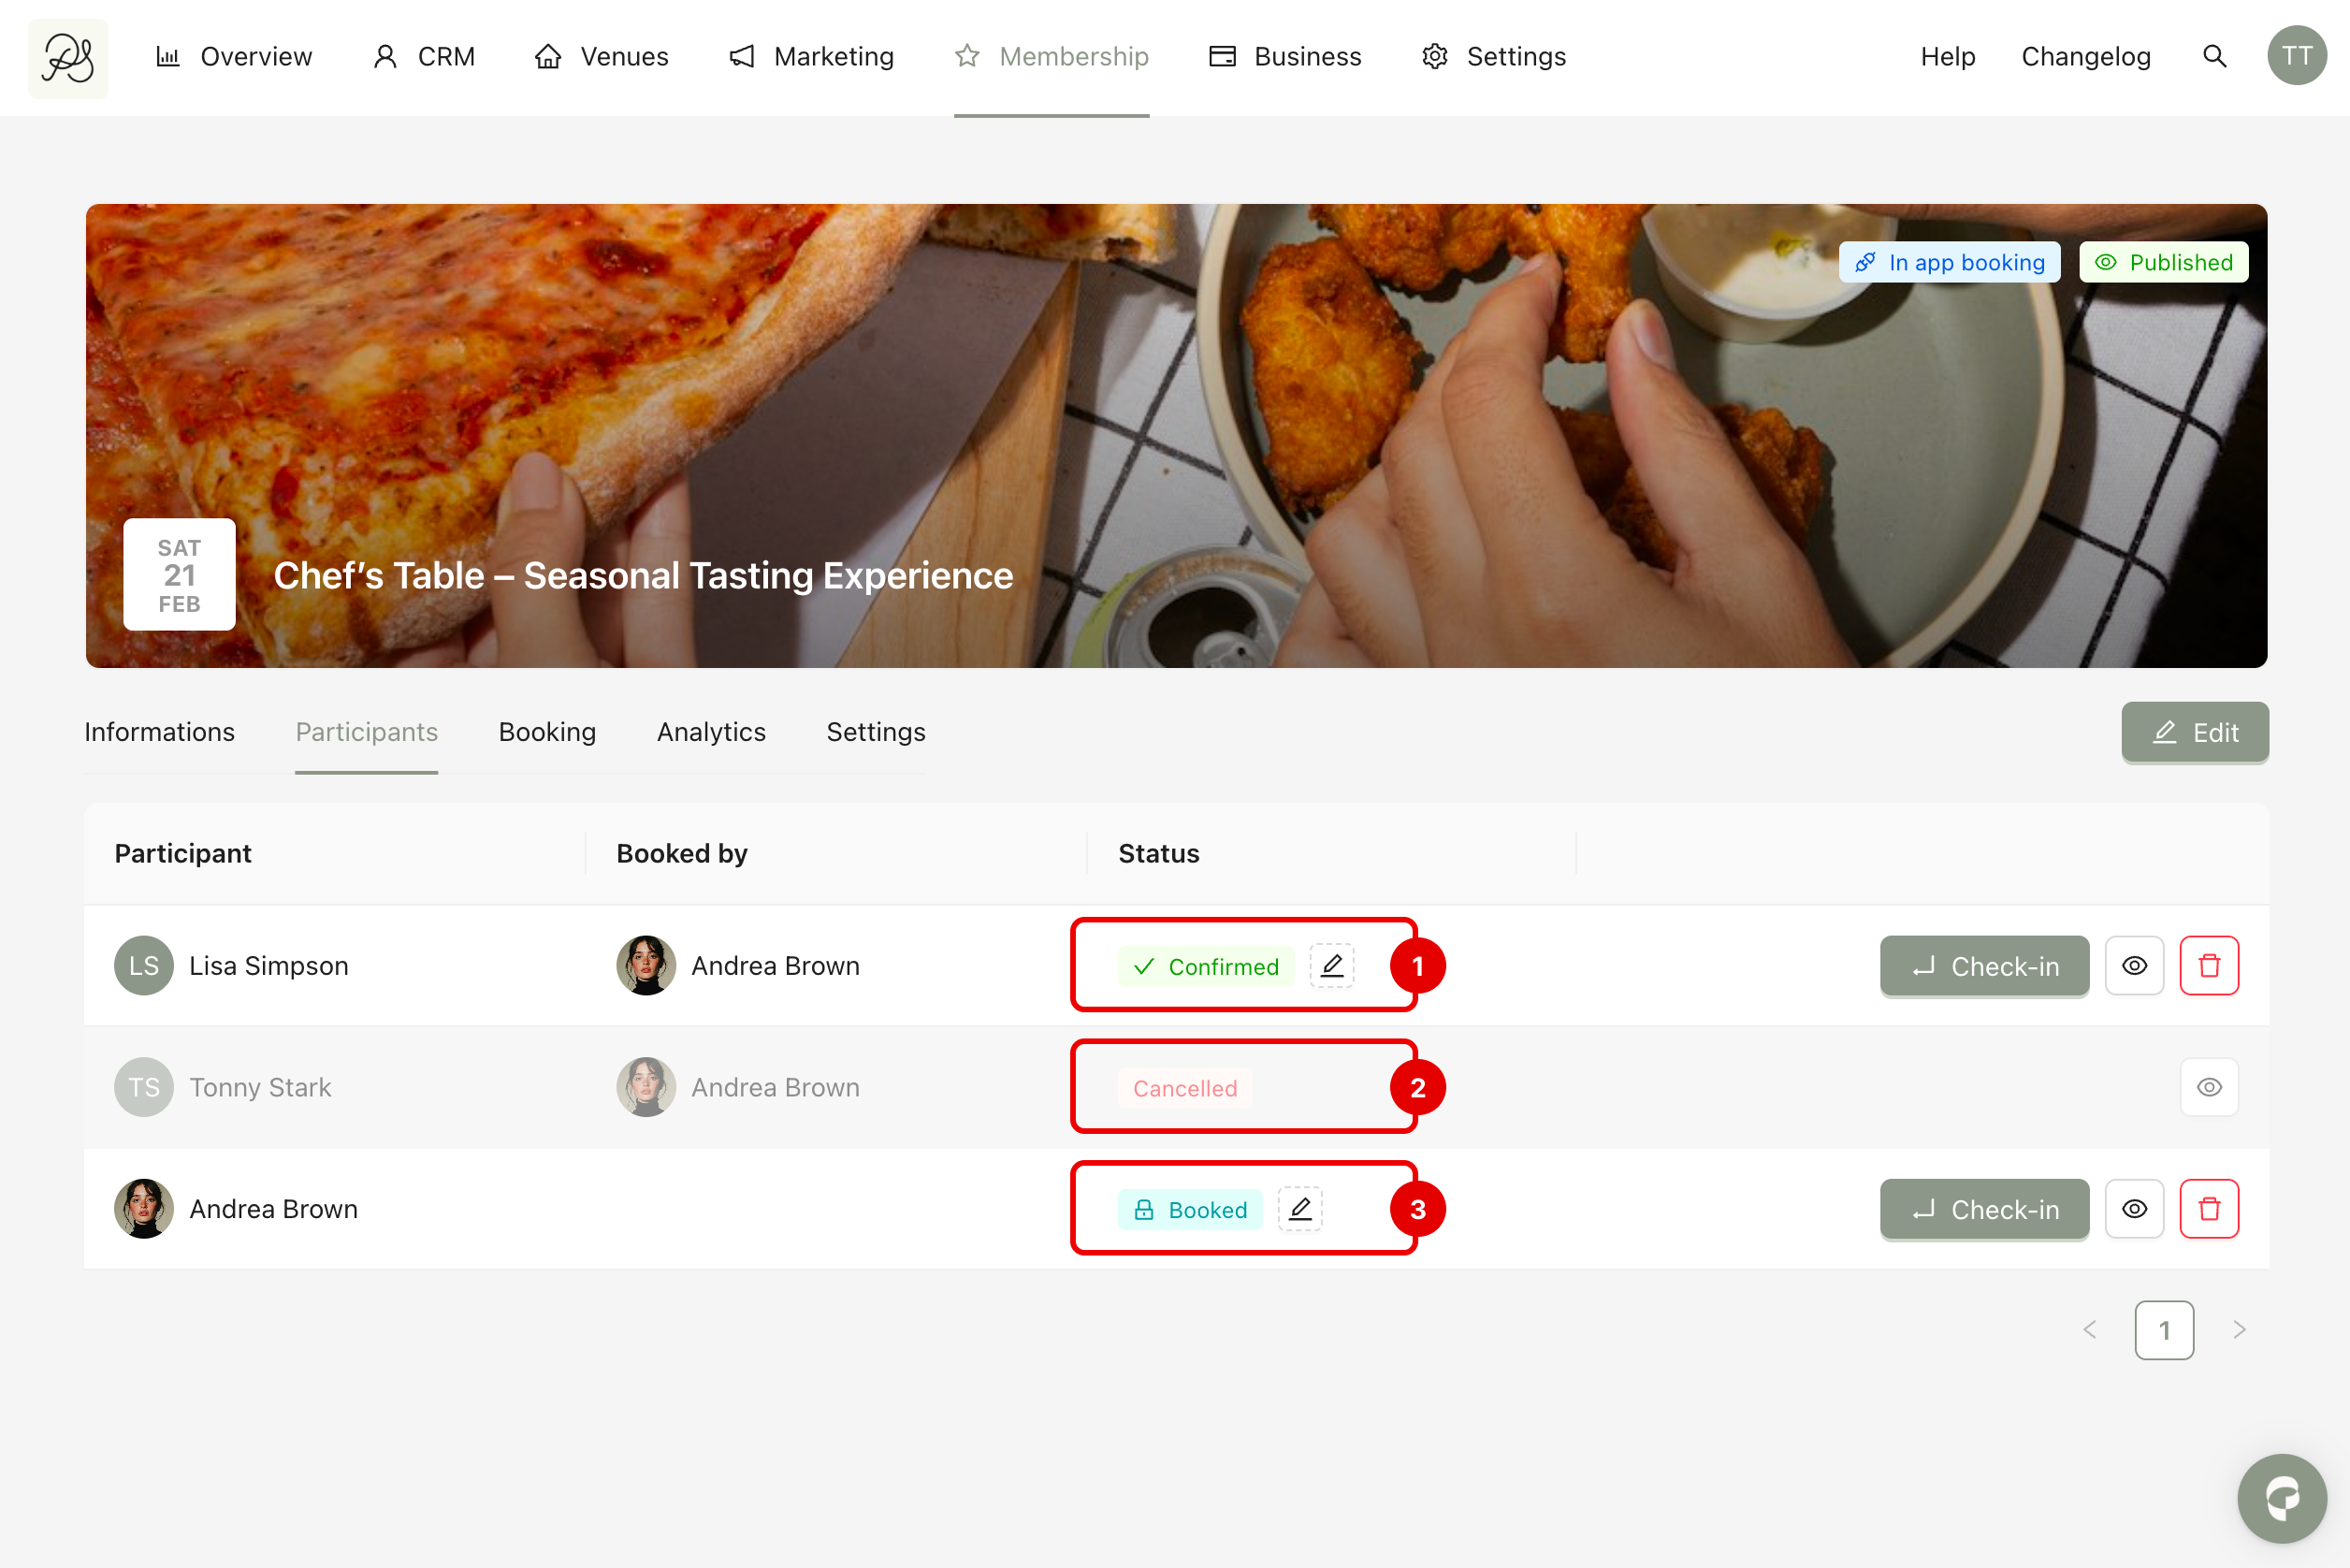
Status: Indicates the participation status. By default, there are three statuses:
Booked (3) means the reservation exists but has not yet been confirmed.
Confirmed (1) means the booking has been confirmed.
Cancelled (2) means the booking has been cancelled.

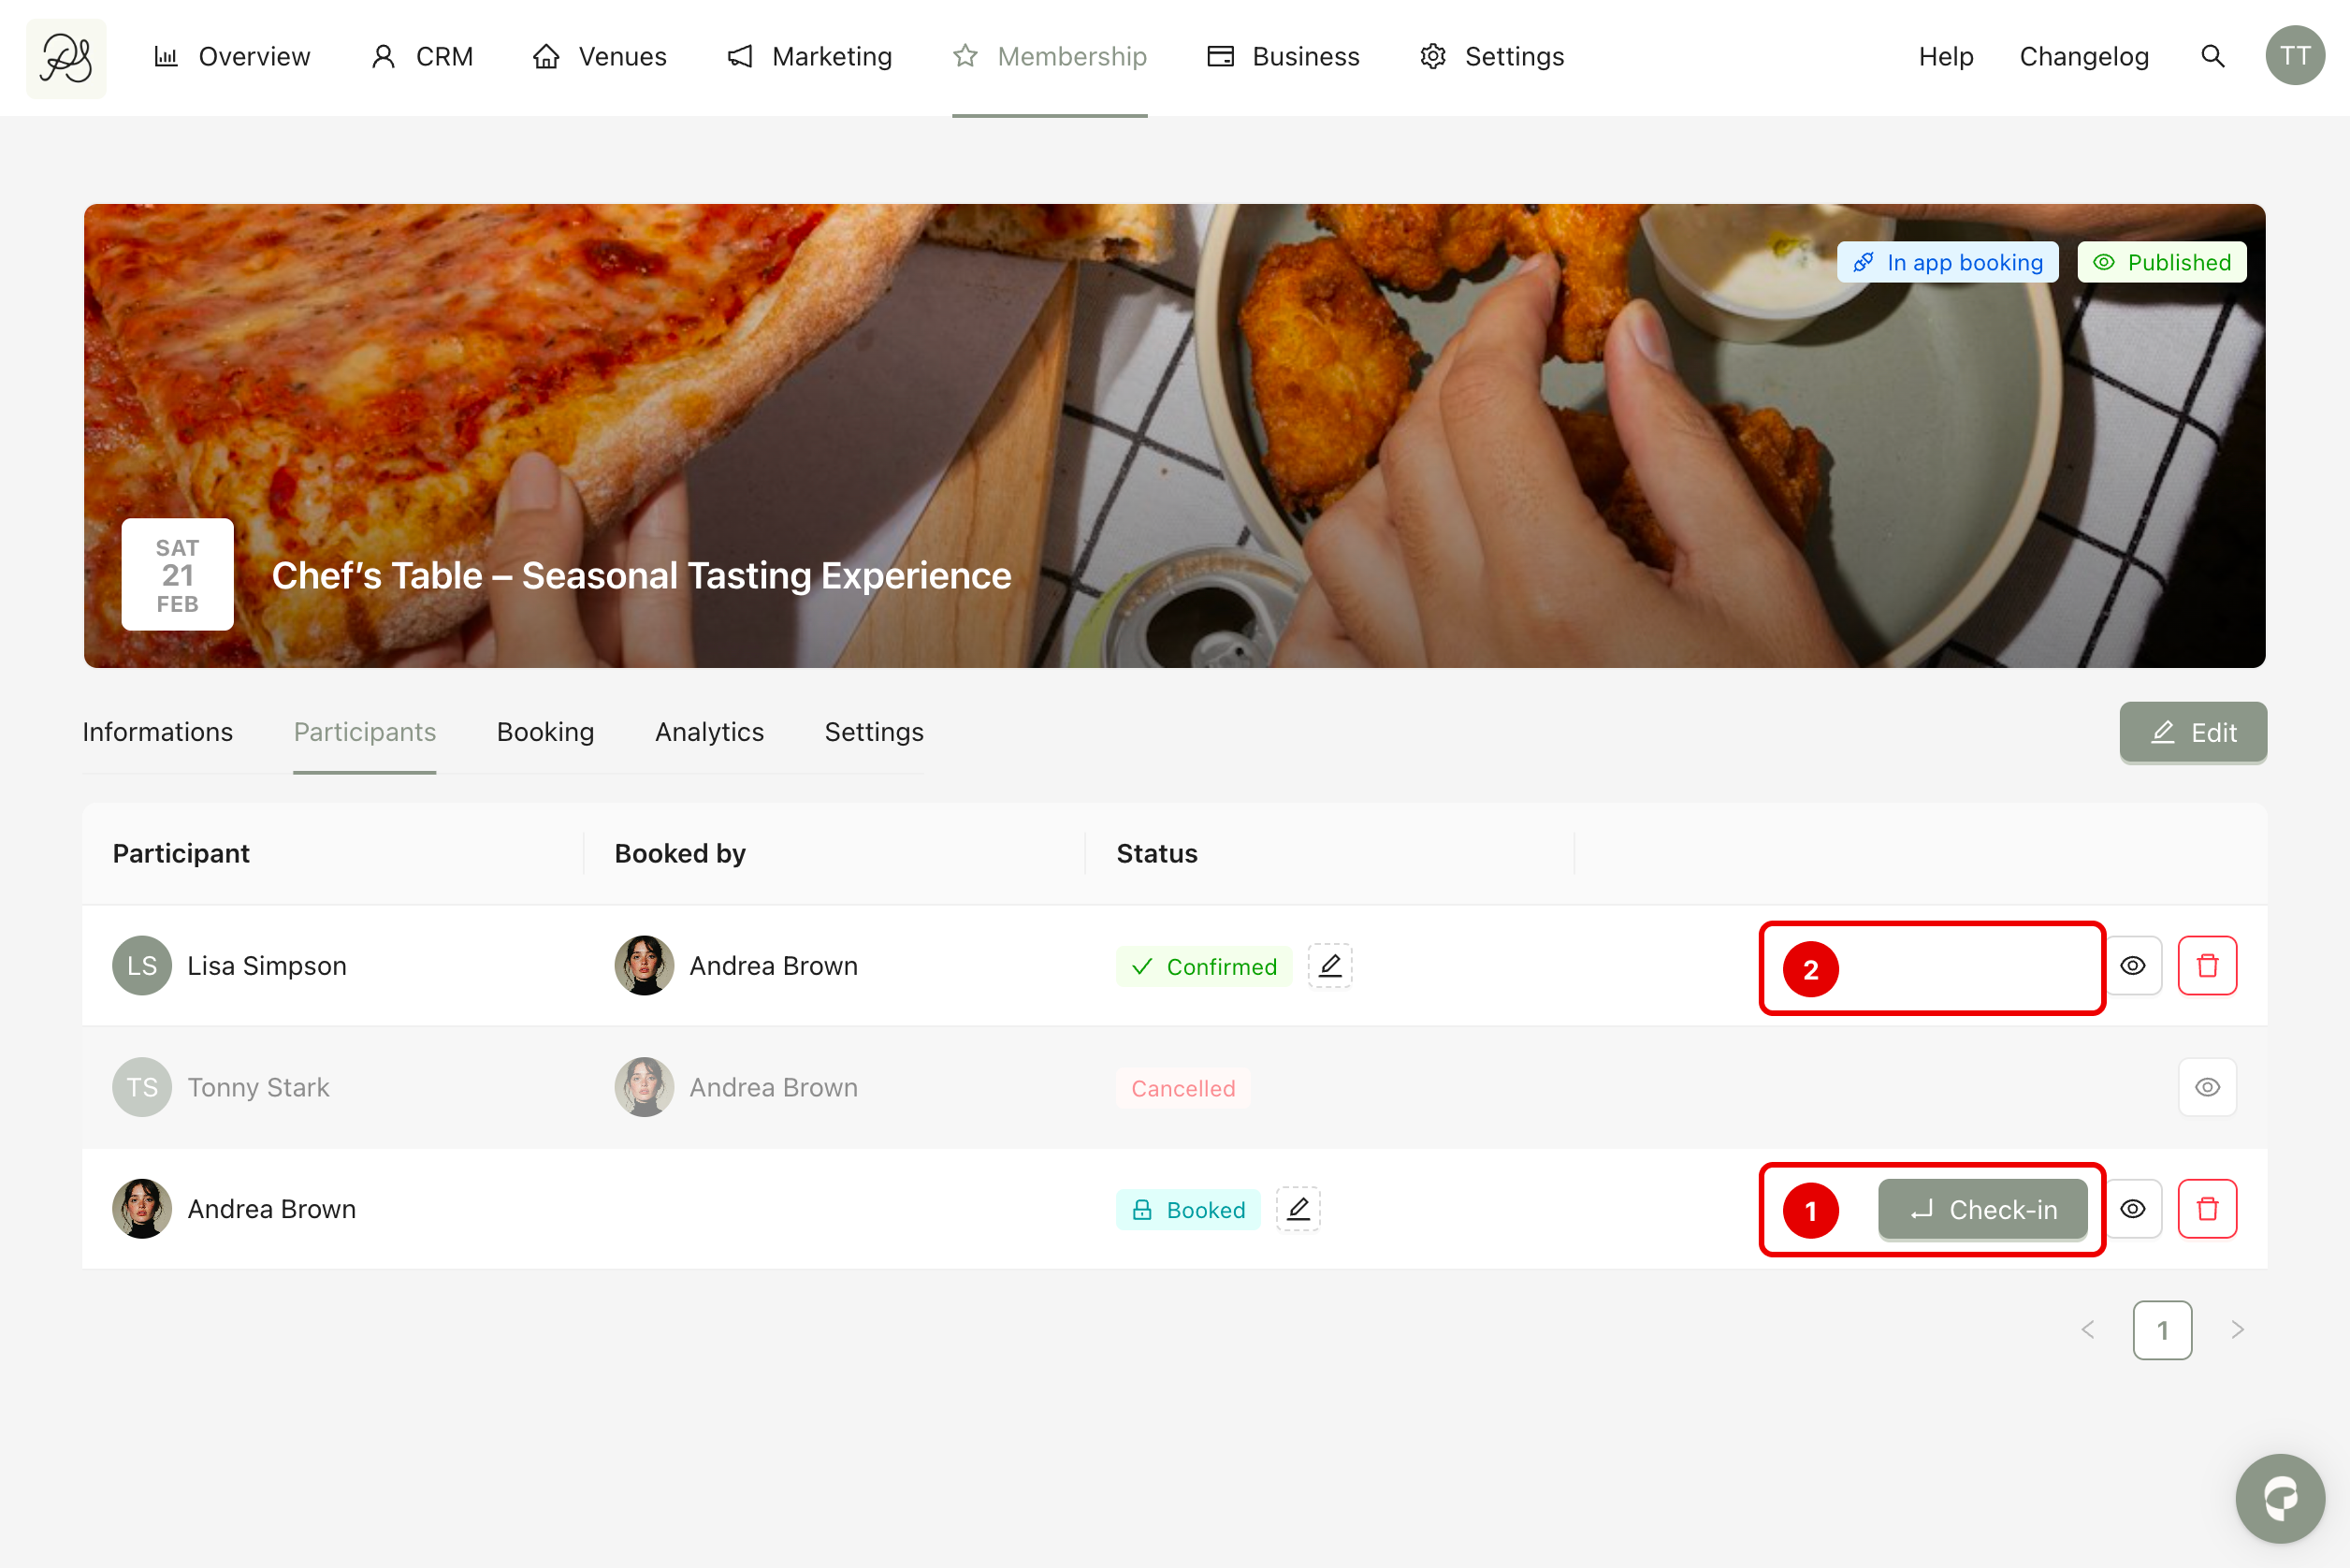
Check-In Button
On the right side of each row, you will see a Check-in button. When a participant arrives at the event, you can click Check-in on the spot.
After check-in, the button will disappear, which means the attendee has been successfully checked in. This helps you track attendance in real time and review it after the event.
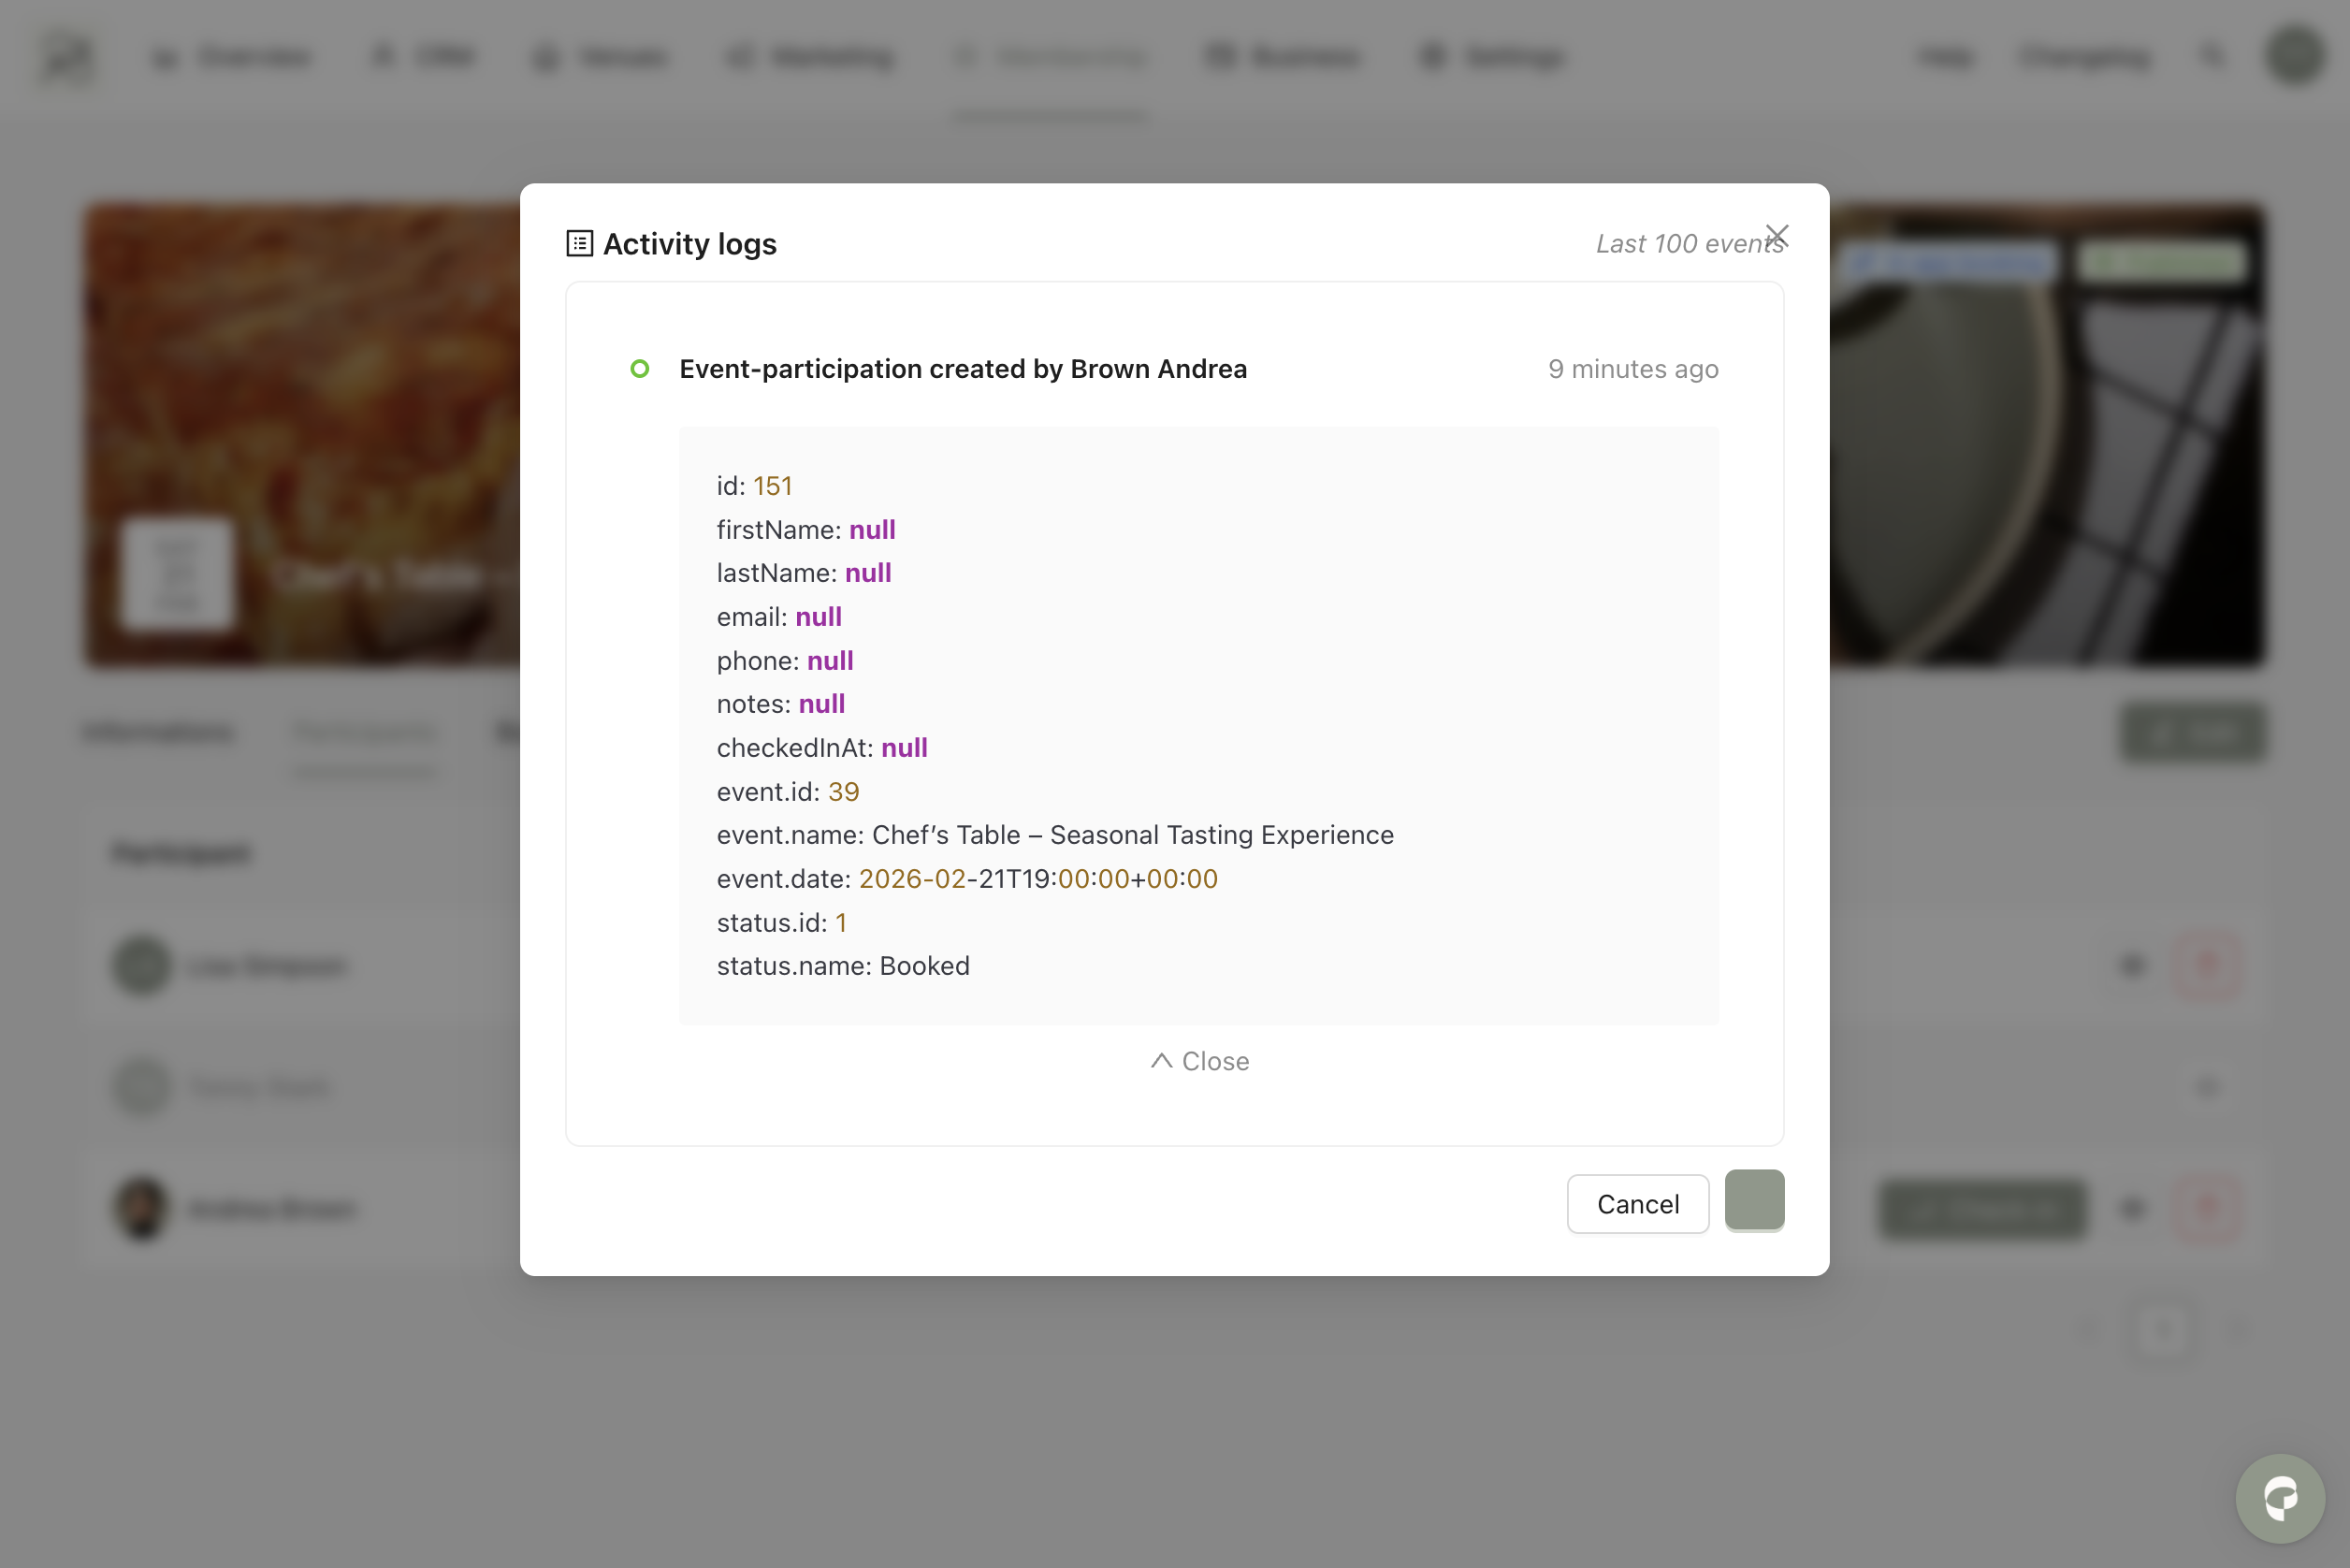
View Activity Logs
You can click the eye icon to open the participant’s activity logs. The activity log records important actions such as:
When a participation was created
When a check-in was performed
Who performed the action (admin or system)
The exact date and time of the action
Remove a Participant
If necessary, you can remove a participant by clicking the bin (delete) icon (1). After deletion, the status in the dashboard will change to Canceled (2).
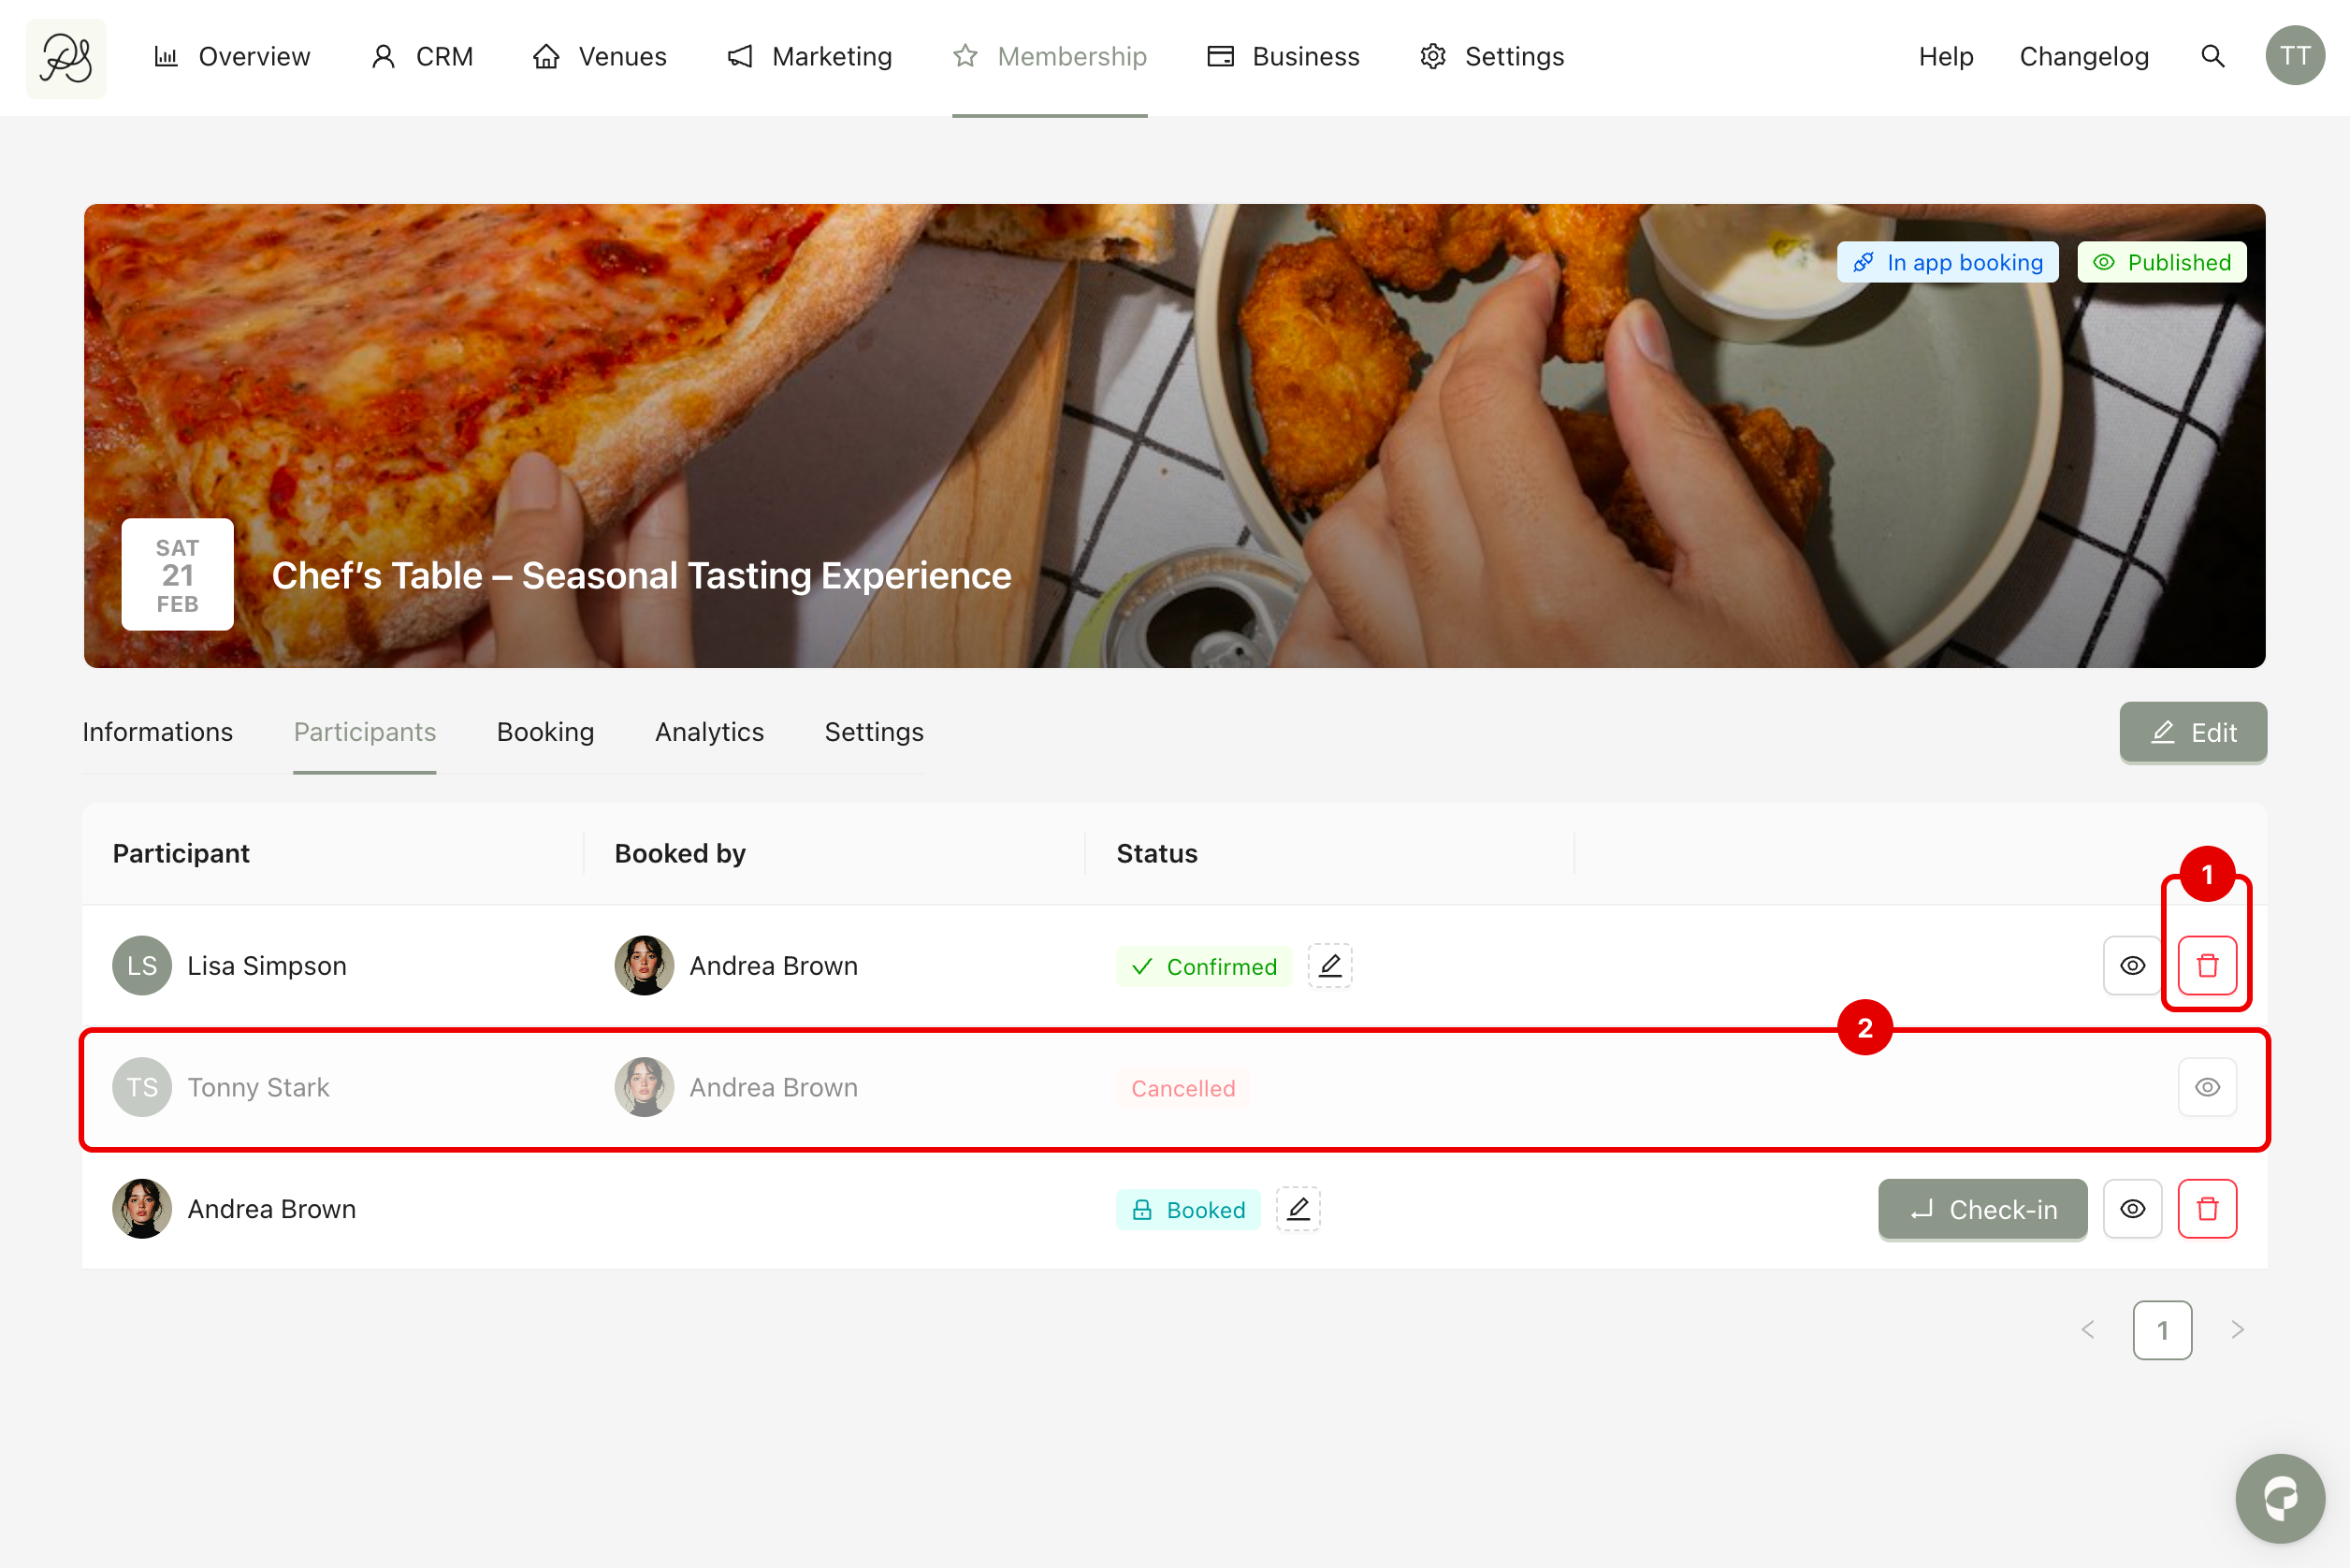
In the mobile application, the booking will also be canceled and will return to its initial state, as if the event had not been booked yet.