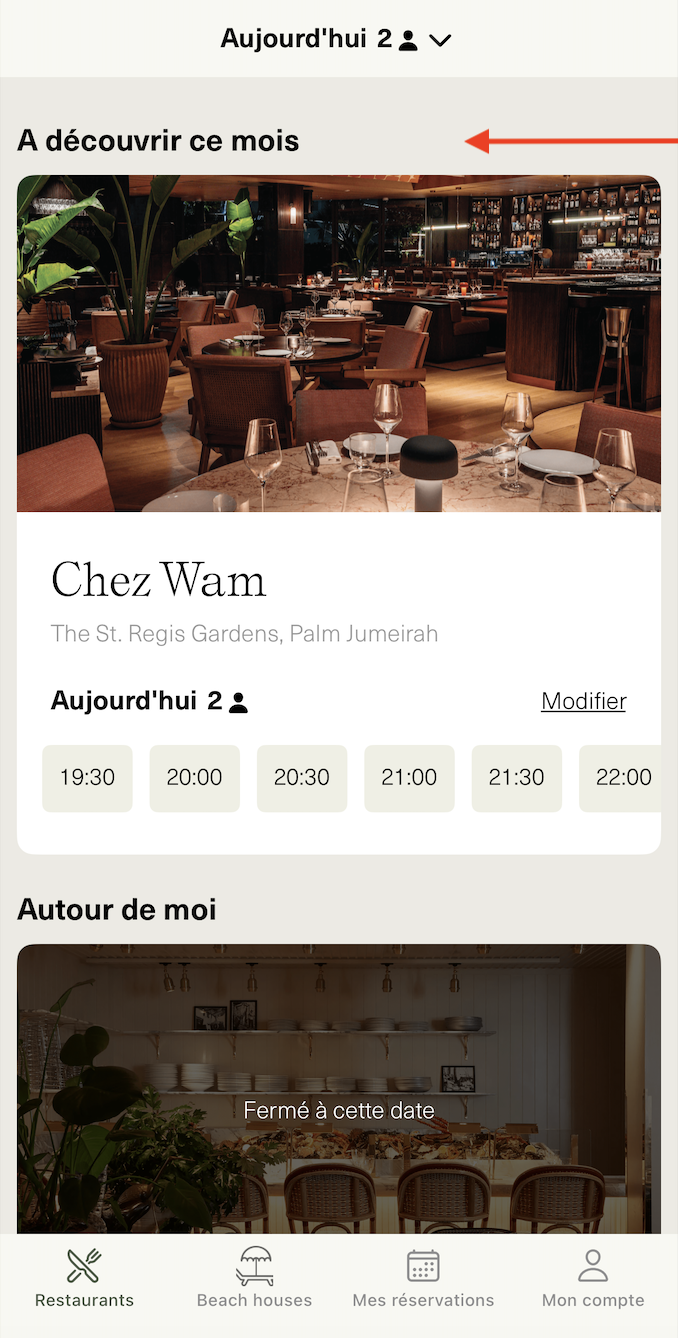
A Featured Venue allows you to highlight the venue of your choice, which will appear first when users open the app.
You can feature multiple venues, schedule them in advance, and view your history directly from your dashboard.
Make sure you are in the Marketing section :
Click on Featured Venue.
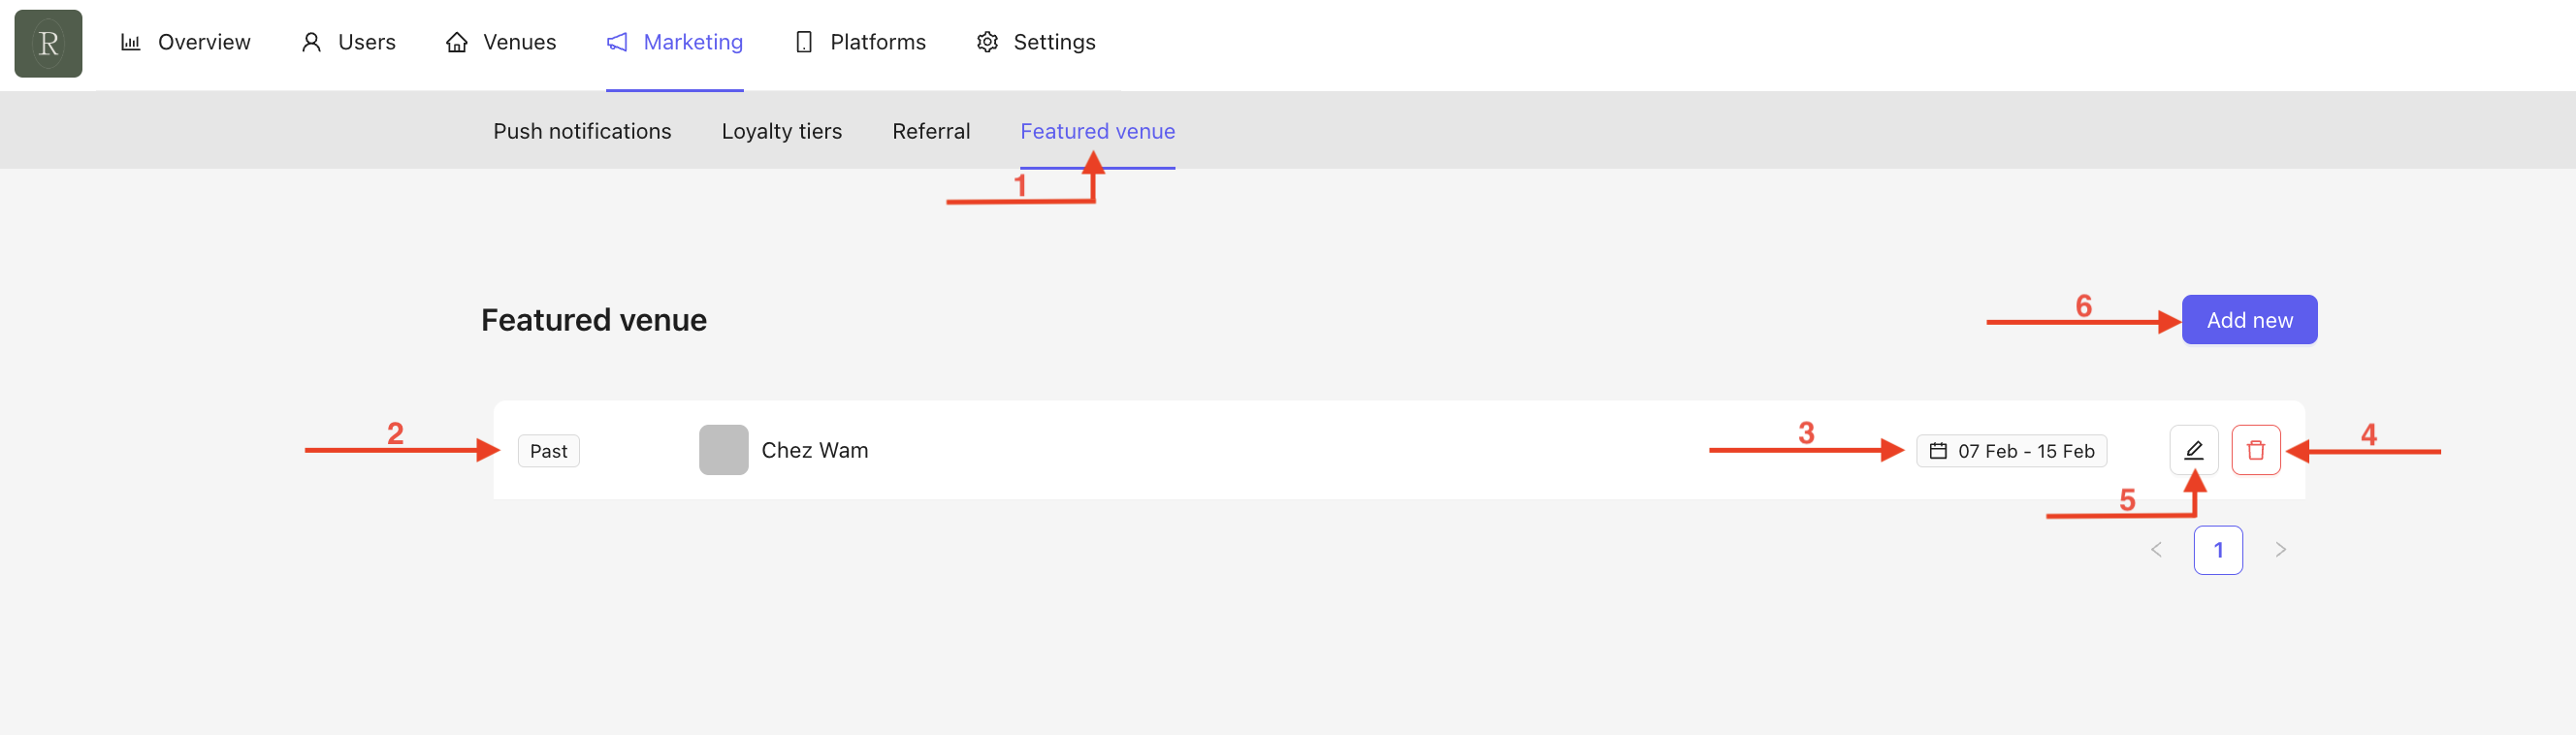
You will see an overview of all your Featured Venues, including past, live, and upcoming ones.
The dates of the Featured Venues are displayed.
You can delete a Featured Venue at any time by clicking on the trash icon.
You can edit your Featured Venue at any time.
Create a new Featured Venue by clicking on Add New.
When clicking on Add New, a pop-up will appear. Fill in the following fields :

Title in the selected languages.
If all required languages are not completed, the creation will not be valid.
Select the time period for featuring your venue using the calendar.
A start date and an end date are mandatory.
Select the venue you want to feature.
From the homepage, click on the edit icon, and the same pop-up as in the creation process will appear :
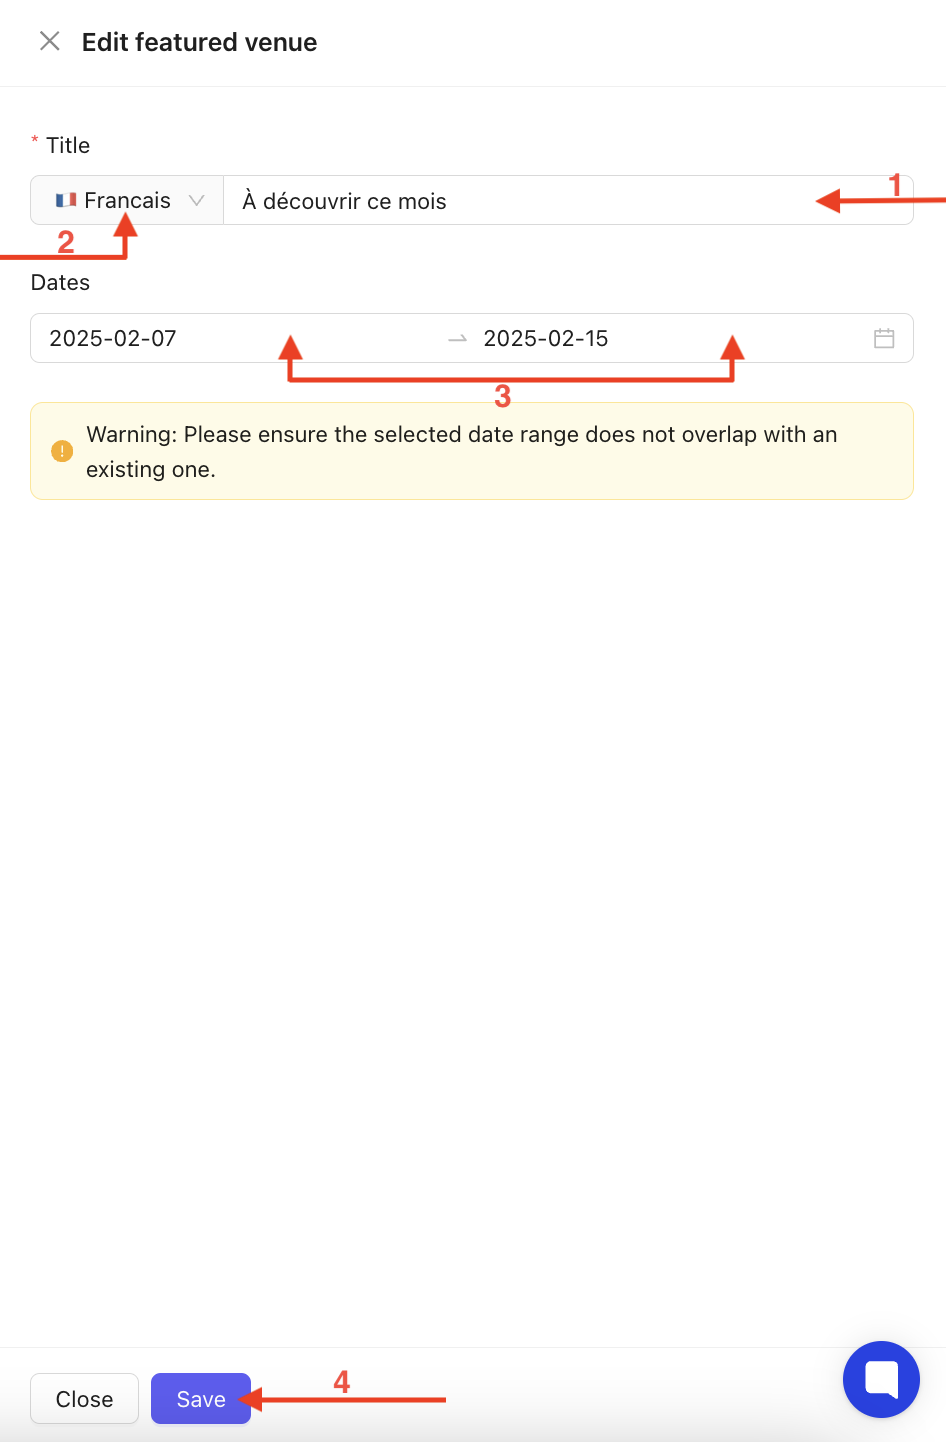
Edit the title text.
Make sure to complete it in both languages using the dropdown menu.
Adjust the featuring period using the calendar (start and end date).
Don’t forget to click Save to confirm your changes.
Visual appearance of a Featured Venue in the App :
The Featured Venue feature is a powerful tool that allows you to highlight a venue of your choice and ensure it appears first when users open the app. By offering the ability to schedule multiple venues in advance and track their history, this feature provides flexibility and enhanced visibility for your locations. With easy setup and real-time modifications, you maintain full control over your promotions, ensuring an optimized user experience and increased engagement.
