The Balances and Credits feature allows you to grant members both monetary value and predefined benefits that they can use throughout their membership.
You can provide members with:
A balance: a monetary amount that members can spend on your services (for example, dining, activities, or upgrades)
Credits: predefined benefits or items (such as room upgrades, spa access, or complimentary services)
These balances and credits are displayed directly in the mobile application and that be used for your services.
Step 1: Go to Settings → Programs, then select the program you want to configure.
Step 2: Go to the Balance and Credits tab. Here, you can configure a balance only, credits only, or both, depending on your business needs.
To create a balance:
Step 2.1: Click on Add new balance. A configuration modal will appear.
Step 2.2: In the modal, fill in the following information:
Balance name (available in all supported languages)
Currency (for example: EUR, USD)
Amount granted to members
Once all fields are completed, click Save.
Step 2.3: After saving, the balance will appear in the “Balance granted upon activation” section. From here, you can adjust the granted amount or add others balances if your program requires different types of spending.
Step 2.4: Once your configuration is complete, click Save in the Balance section to apply your changes.
To Create Credits:
Credits represent specific benefits or services that members can use.
Step 2.1: In the “Credits granted upon activation” section, click on Create new item.
Step 2.2: In the modal, provide the following details:
Item name (in all languages)
Icon to visually represent the benefit
Color for easier identification in the application
Programs where this item should be available
After completing the configuration, click Save.
Step 2.3: If the item is assigned to the selected program, it will automatically appear in the Credits granted upon activation section. You can then define the quantity of credits granted to each member upon activation.
Step 2.4: Once all credit settings are complete, click Save in the Credits section.

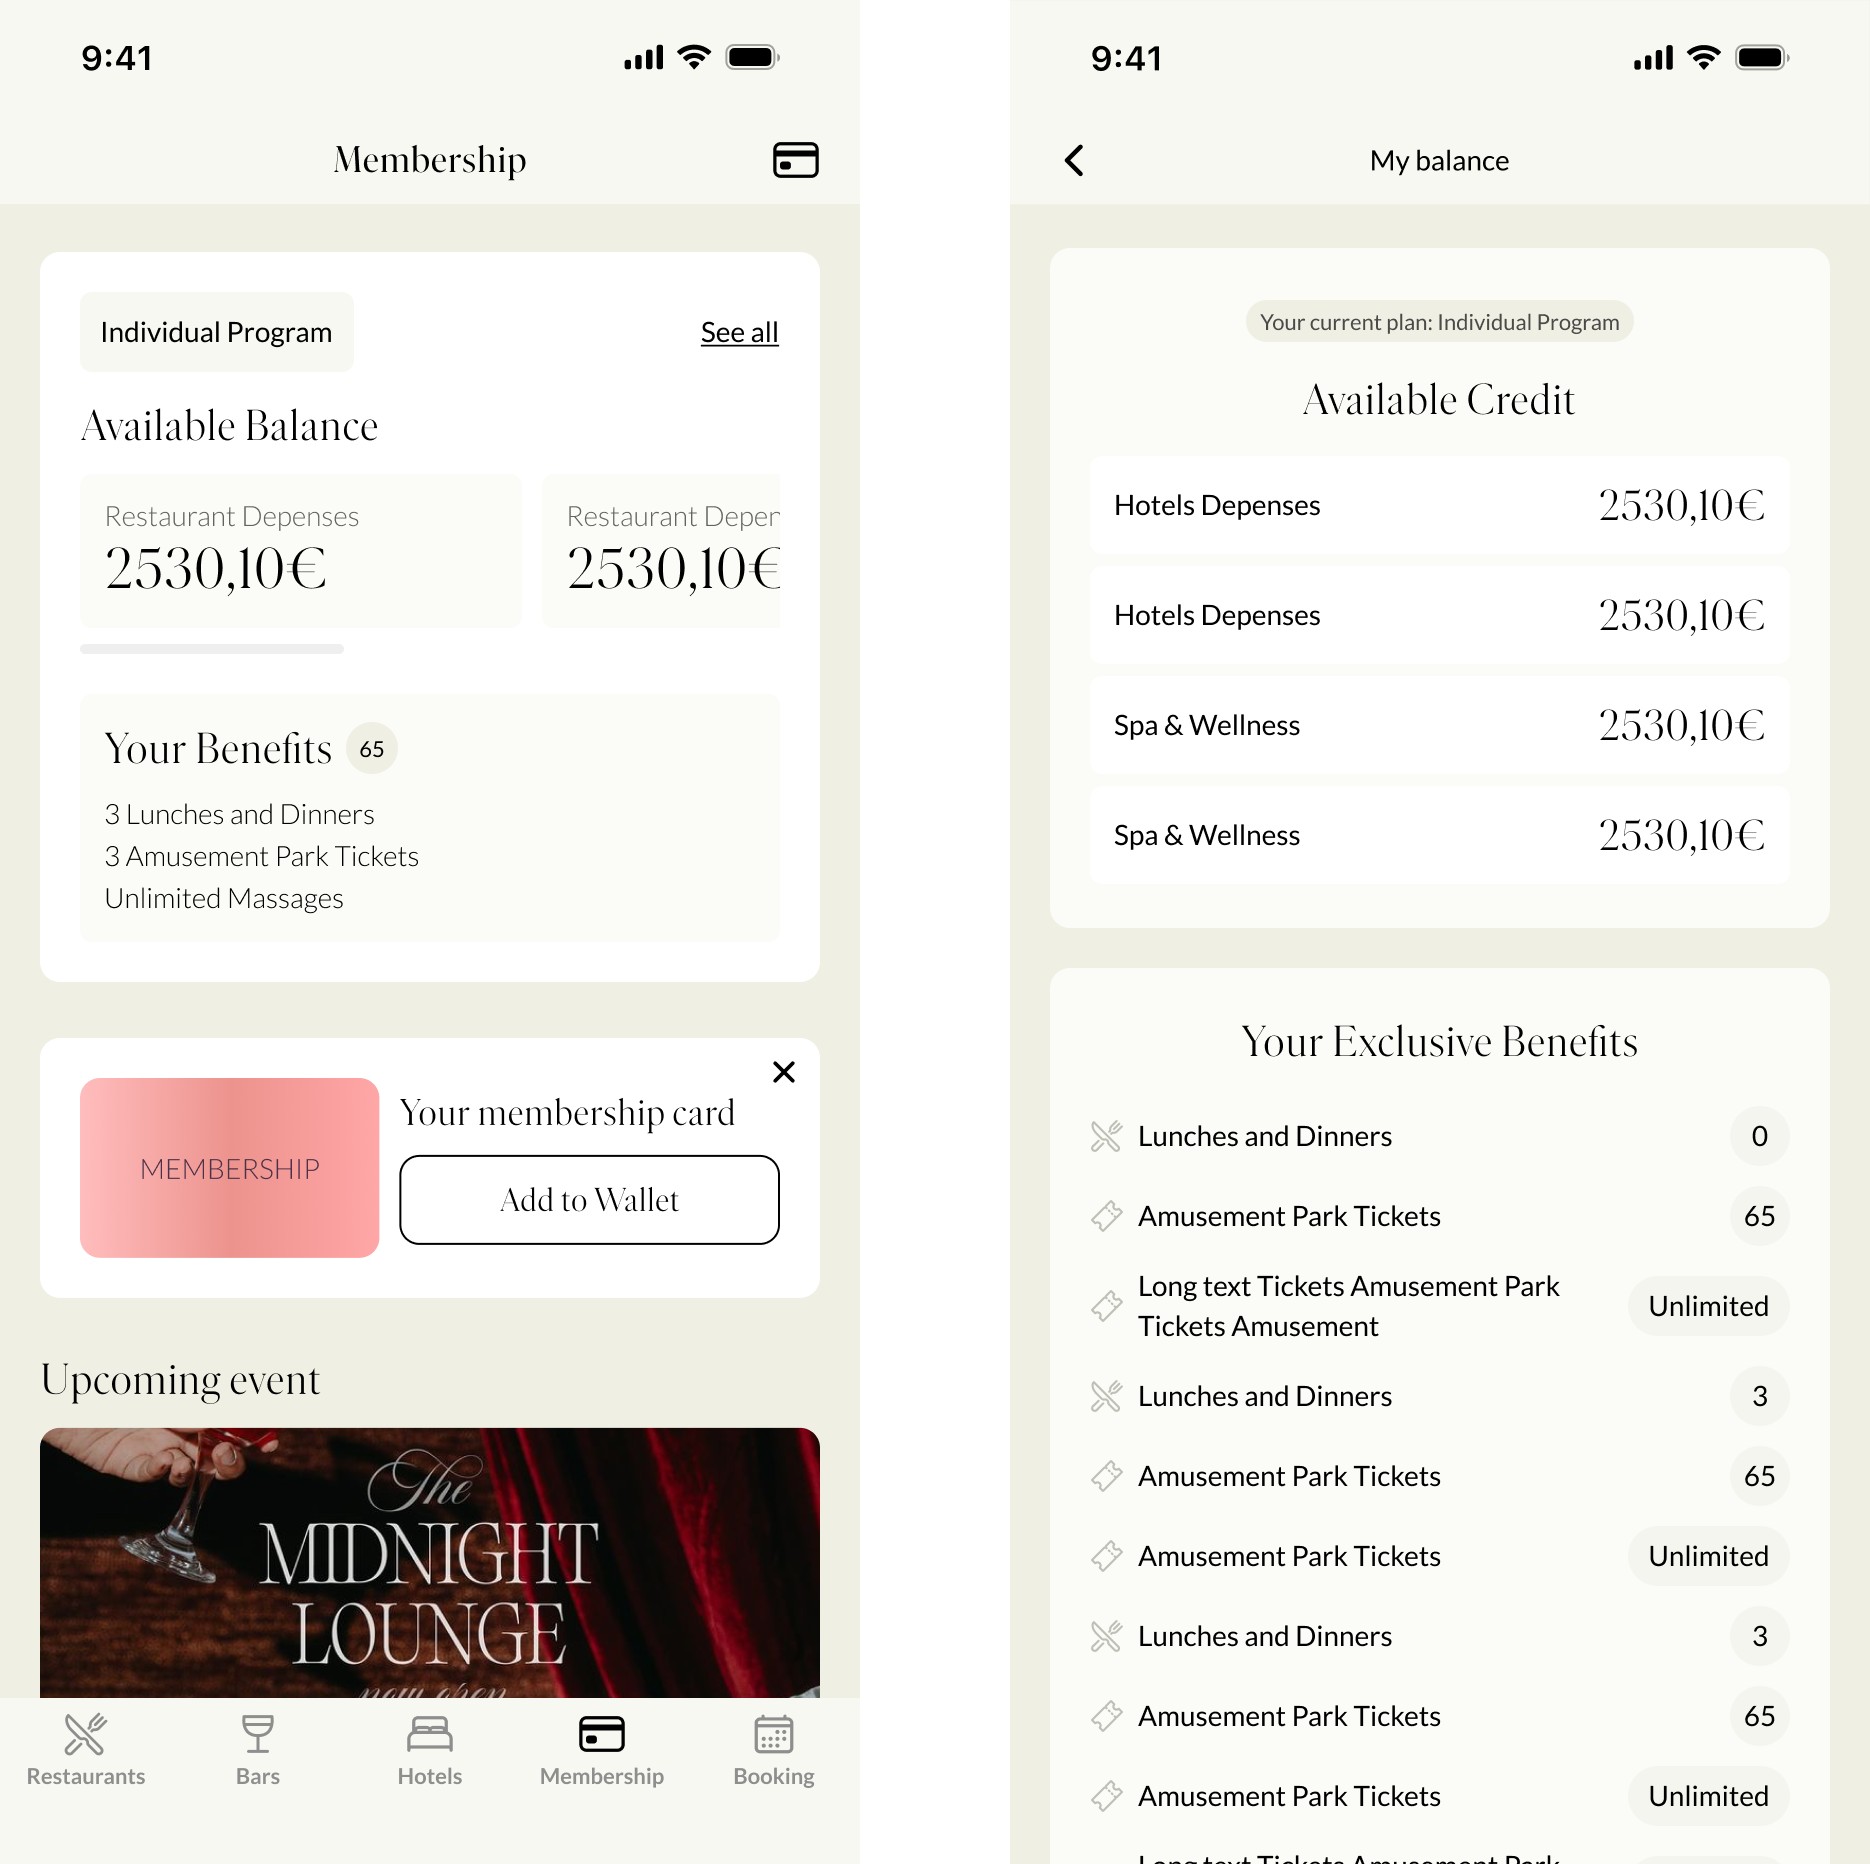
 Result in the Application
Members will be able to view their balance and available credits directly in the mobile application.
Step 1: Go to Settings → Membership → Balances and Credits. Locate the item you want to modify, then click Edit.
Step 2: In the edit modal, you can:
Update the item name
Change the icon and color
Assign the item to additional programs or remove it from existing ones
Step 3: Click Save to apply your updates. All changes will take effect immediately.
To delete an item, click the Delete button. Deletion is permanent. The item will be removed from all programs where it is currently applied and cannot be recovered.
In addition to program-level configuration, you can manage balances and credits individually for each member.
Step 1: Go to Membership → Members, then select the member you want to manage.
Step 2: Navigate to the Balances and Credits section within the member profile. You will see the member’s current balance and their available credits
Step 3: You can manually update the balance amount and the quantity of each credit.
Step 4: After making your changes, click Save. The updates will be immediately reflected in the member’s mobile application.
