Event participation statuses allow you to manage and track members’ attendance for each event.
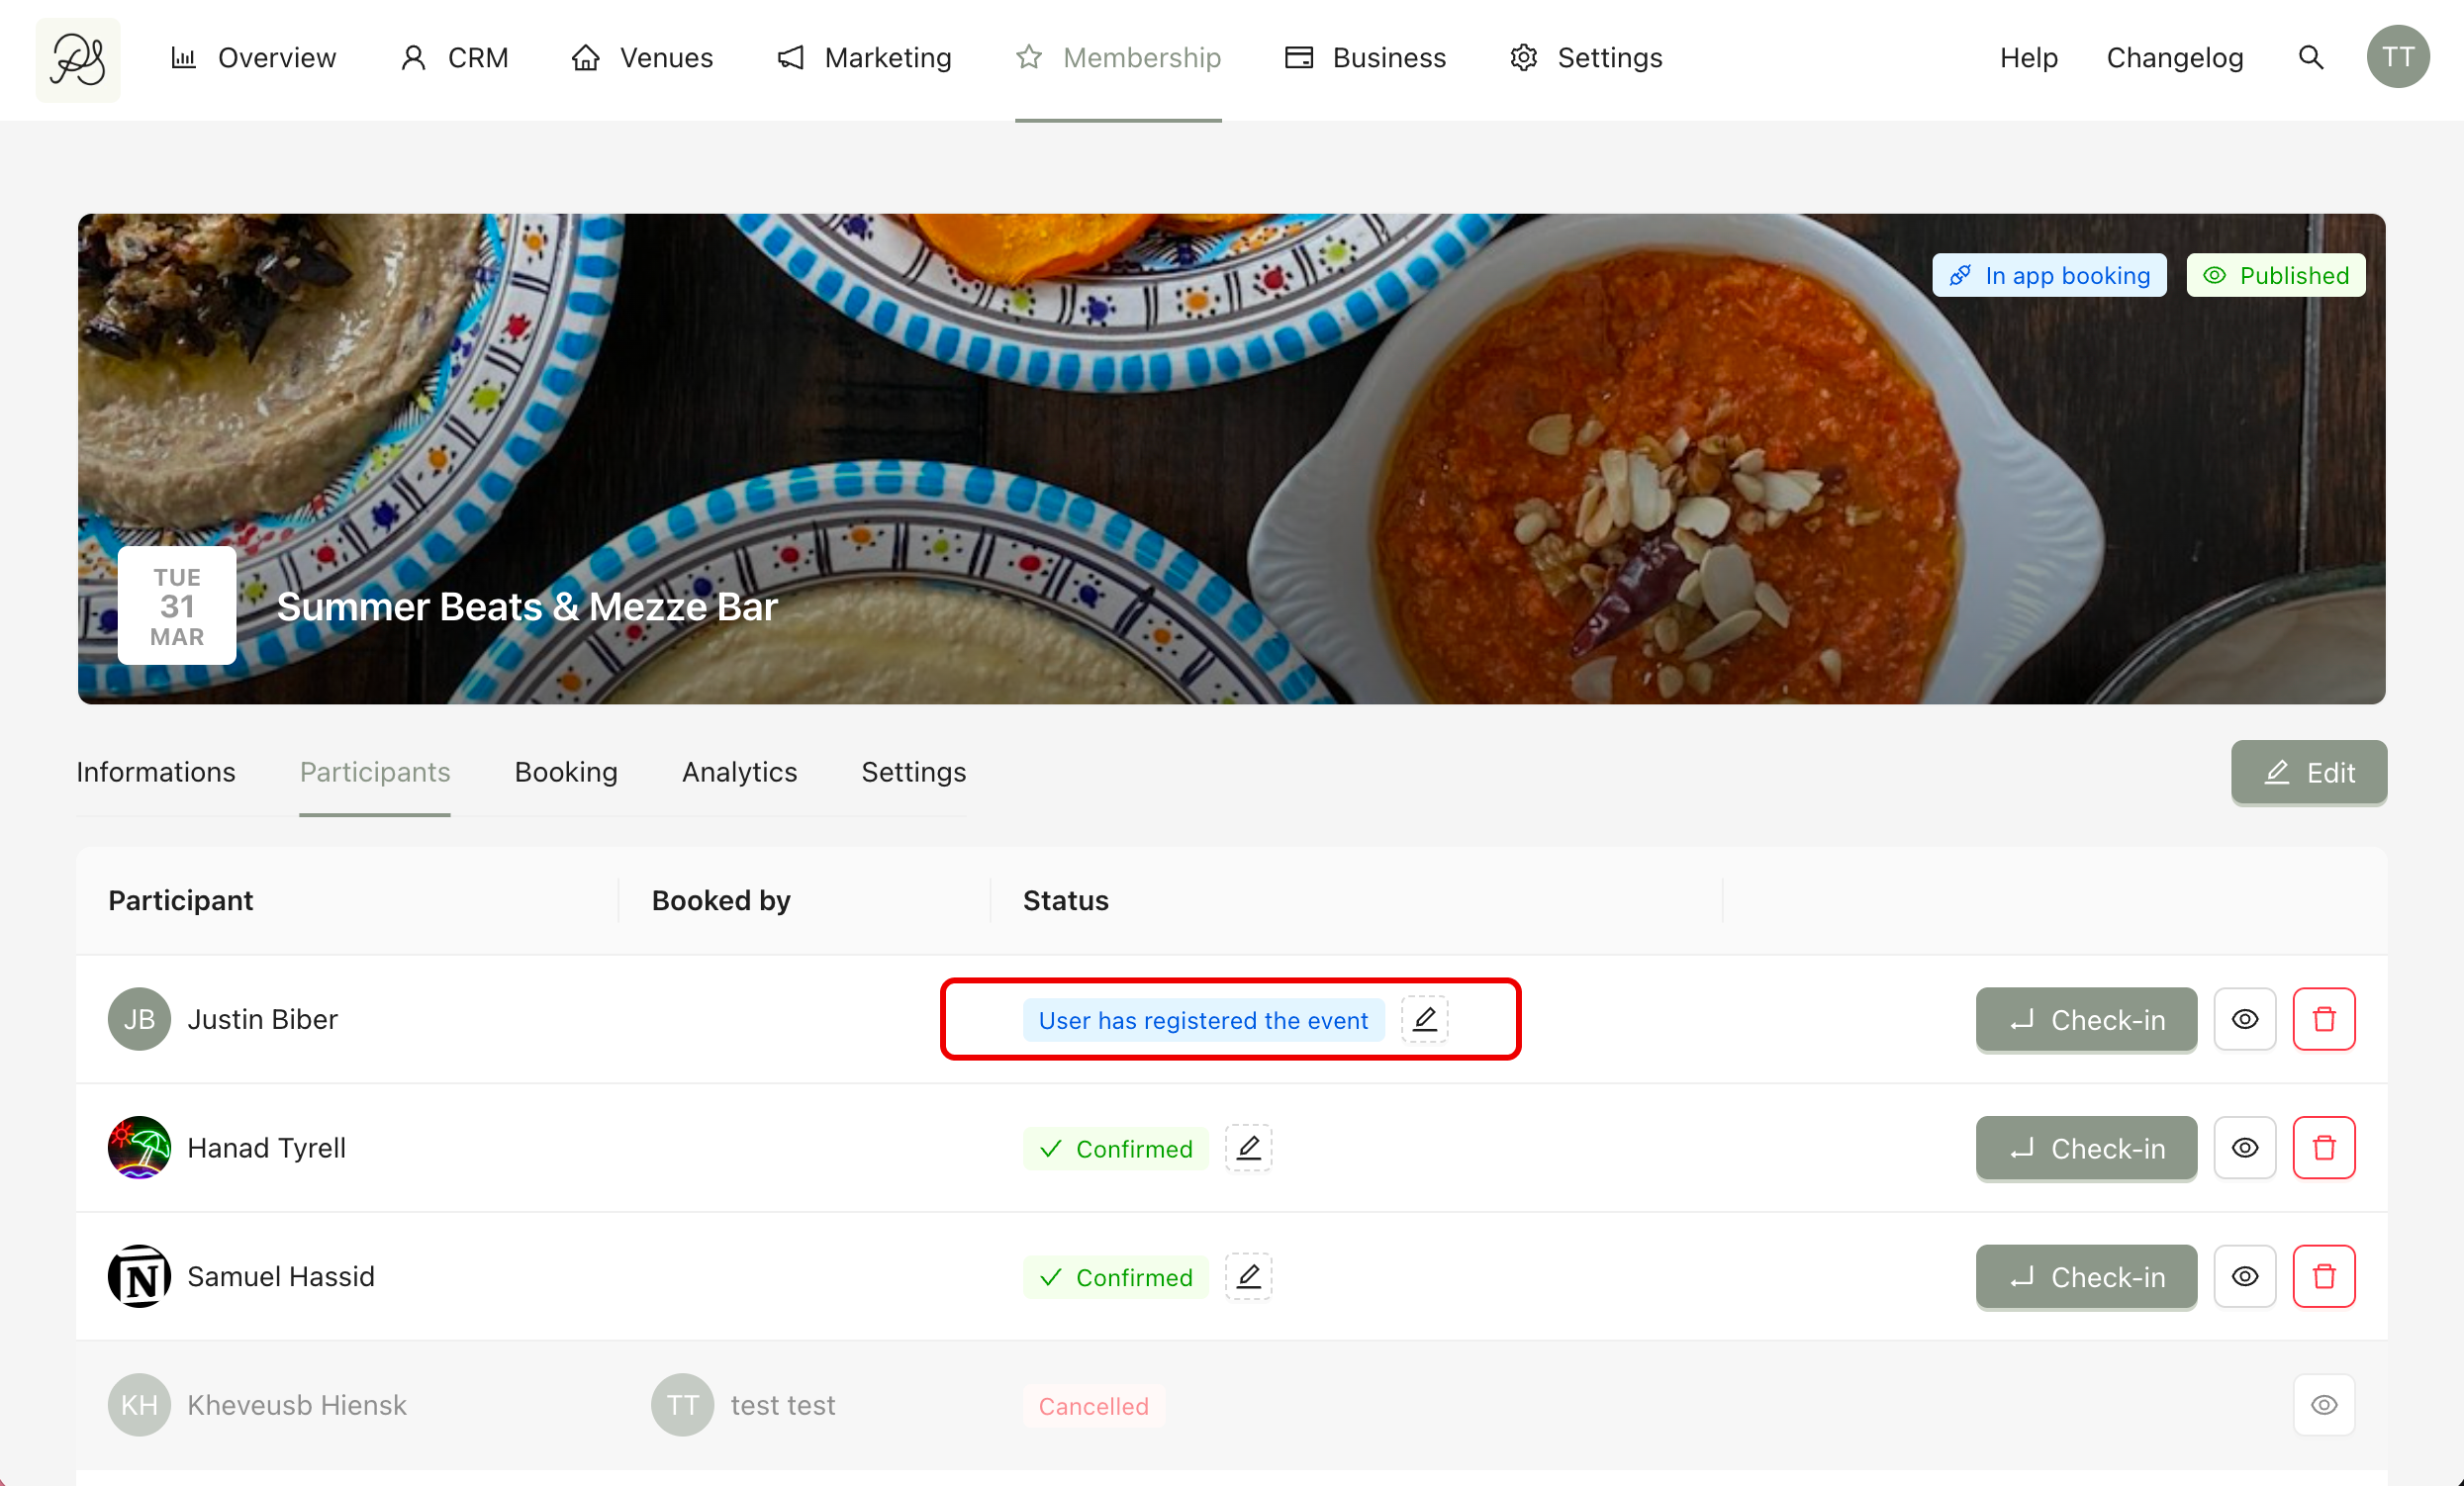
You can follow the status of every participant directly from the Participants tab in the event detail page. This helps you understand who has registered, confirmed, or cancelled their participation.
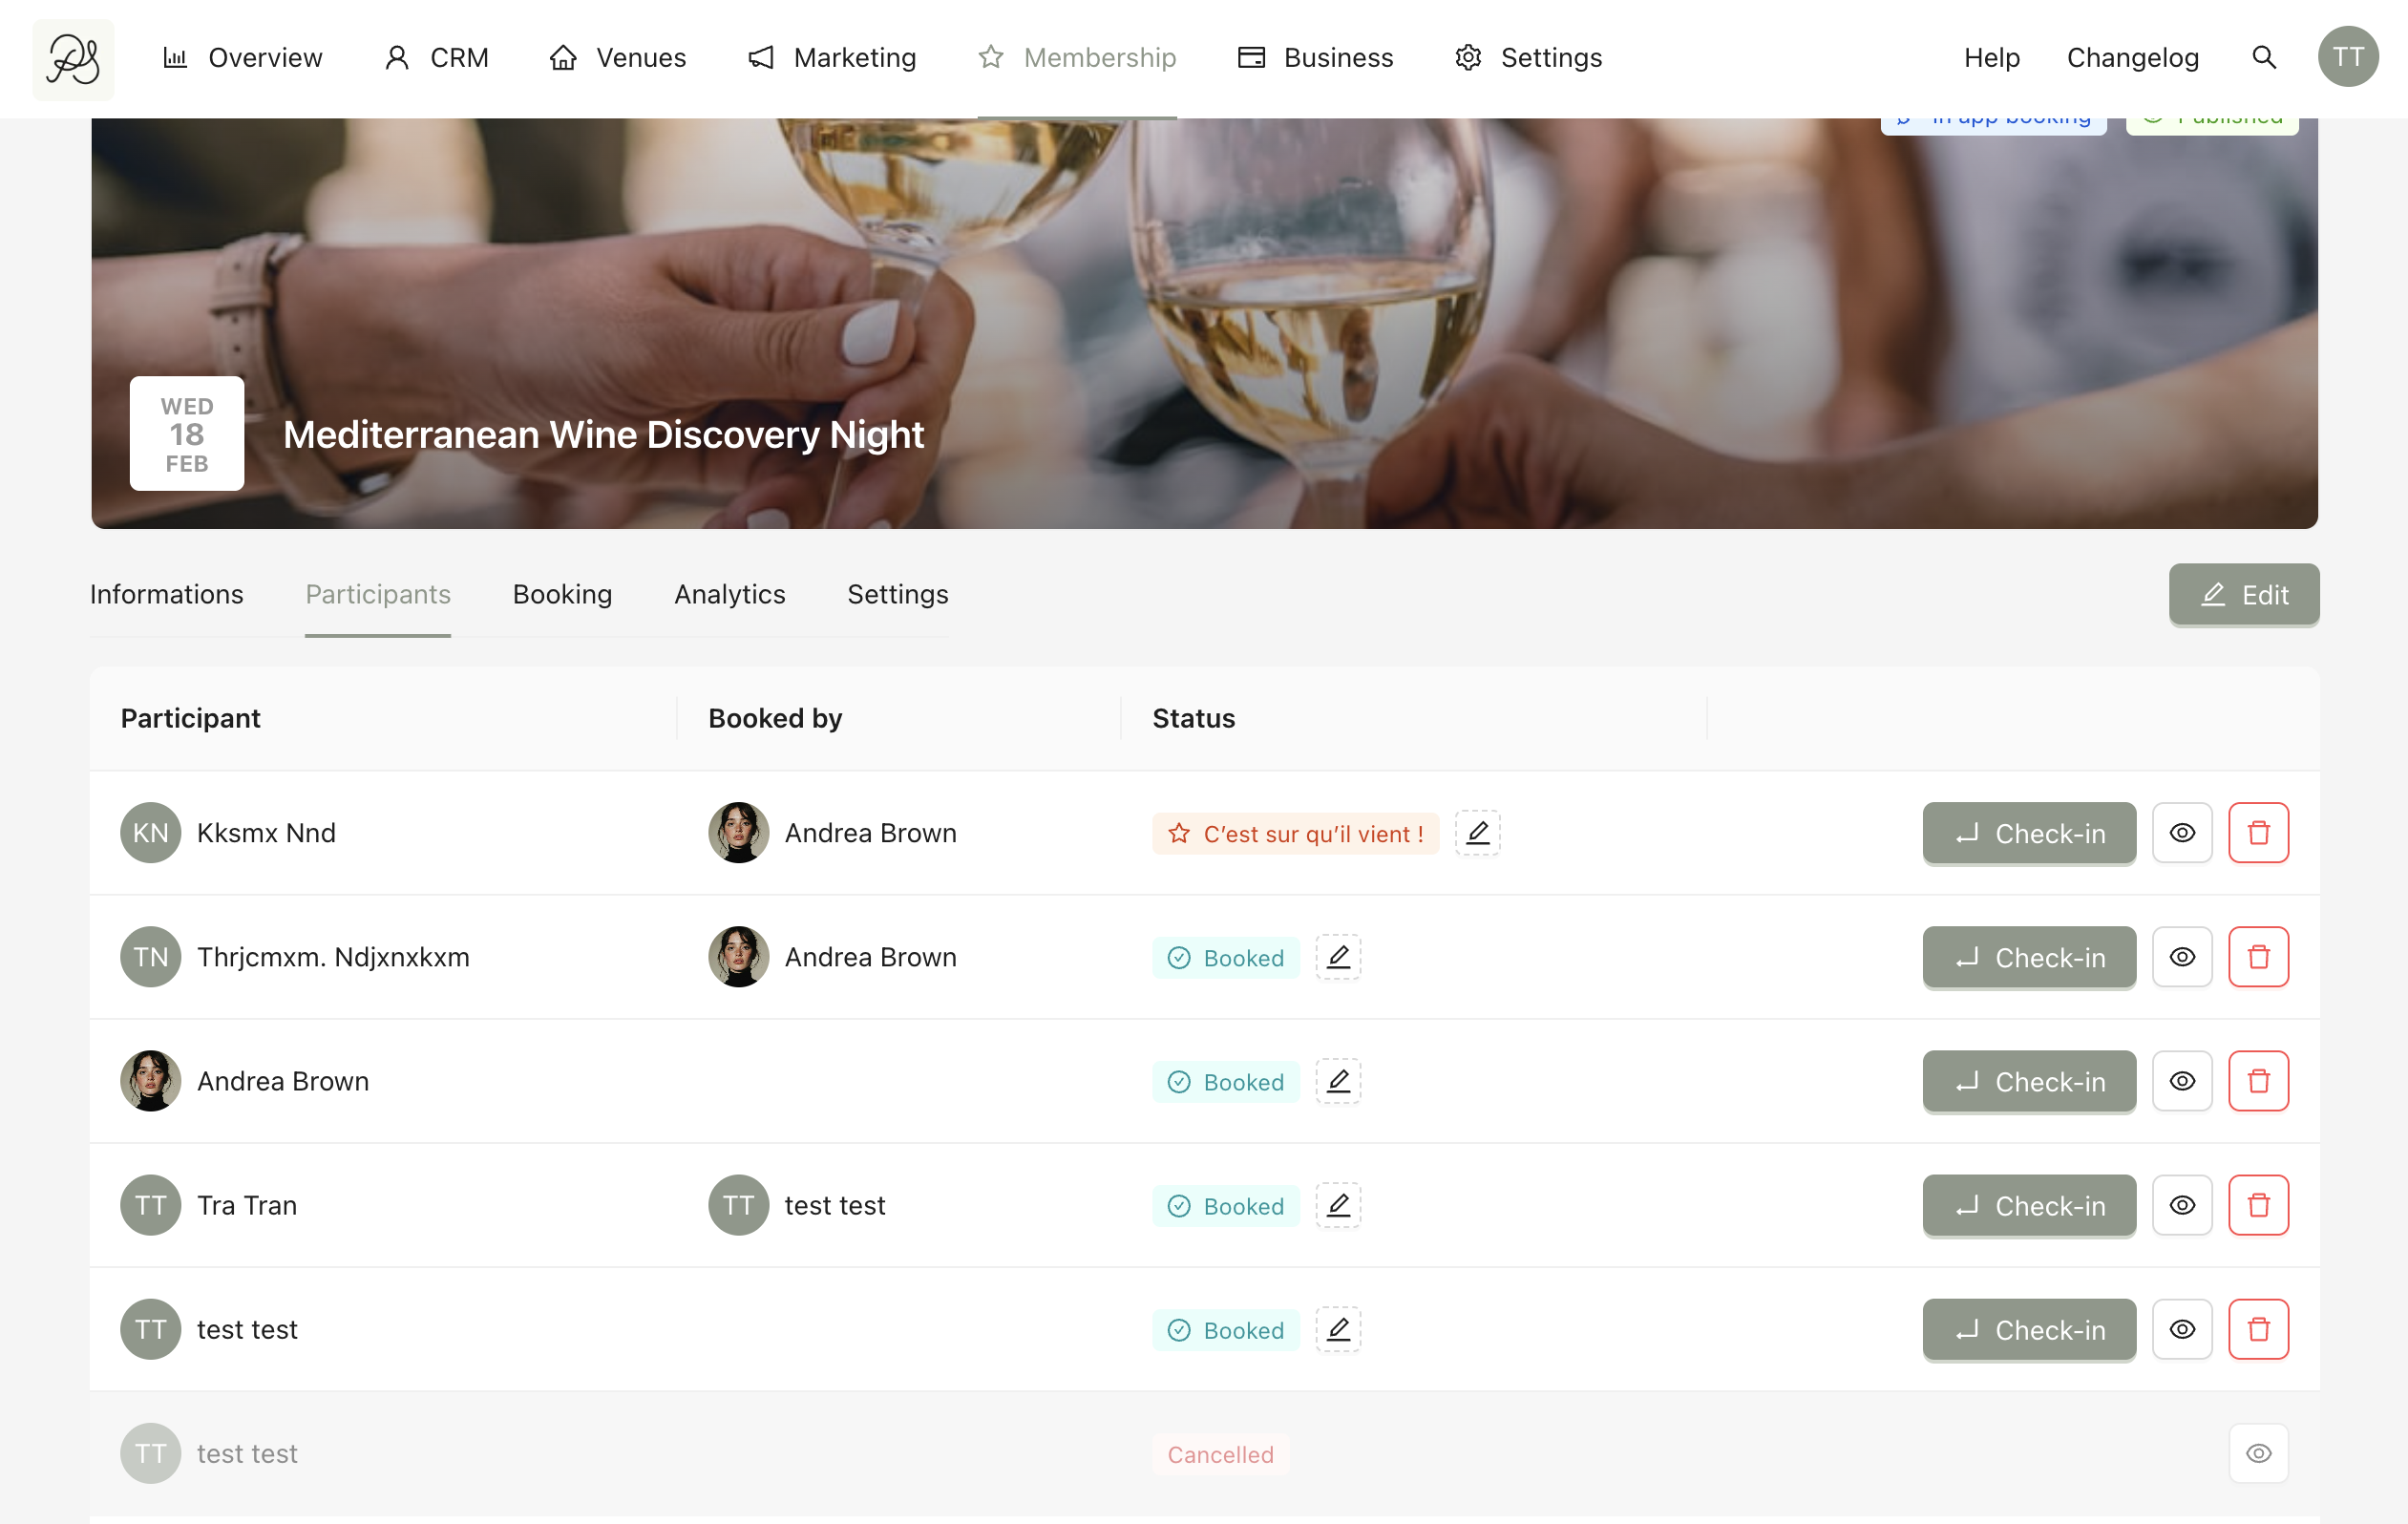
There are 3 main default statuses for members. Each status corresponds to a specific action performed by the member in the application:
Booked: When a user registers for an event.
Confirmed: When a user confirms they will attend the event.
Cancelled: When a user cancels their participation in the event.
1.1 Booked
When a member registers for an event in the application (1), their status in the Participants tab automatically changes to Booked. This corresponds to the status Booked in the dashboard (2).
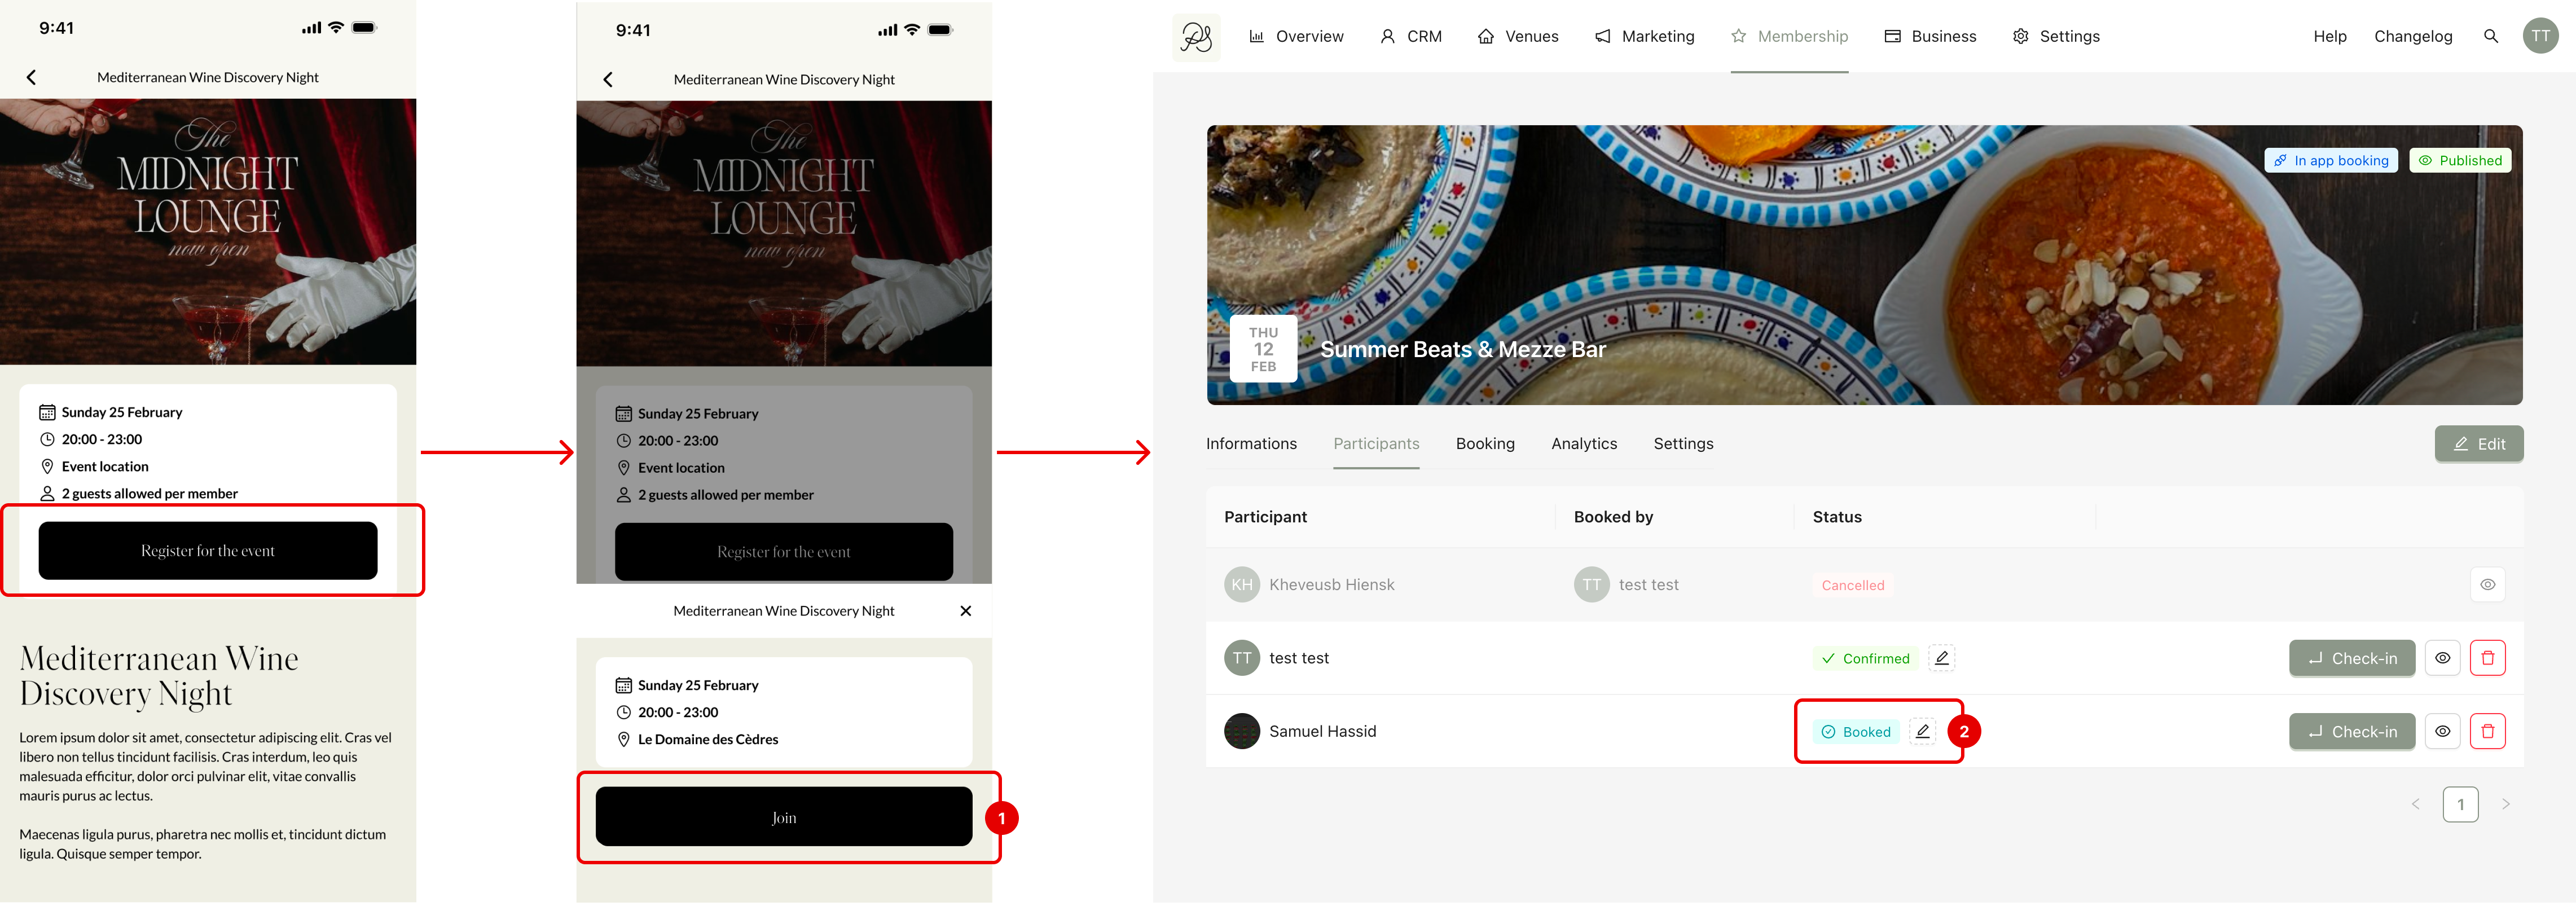
By default, this status is linked to the action when user clicks the button Join in the app.
However, you can customize the name of the status, the icon, the color of the badge (Read the instruction in 2.2 Edit a Status in this article). For example, you can rename “Booked” to “Registered” and choose a yellow color.
You can also replace Booked with another custom status. This means when a member registers, they will NOT be marked as “Booked” anymore, they will be assigned your custom status instead. To do this, refer to 2.4 Define a Default Status.
1.2 Confirmed
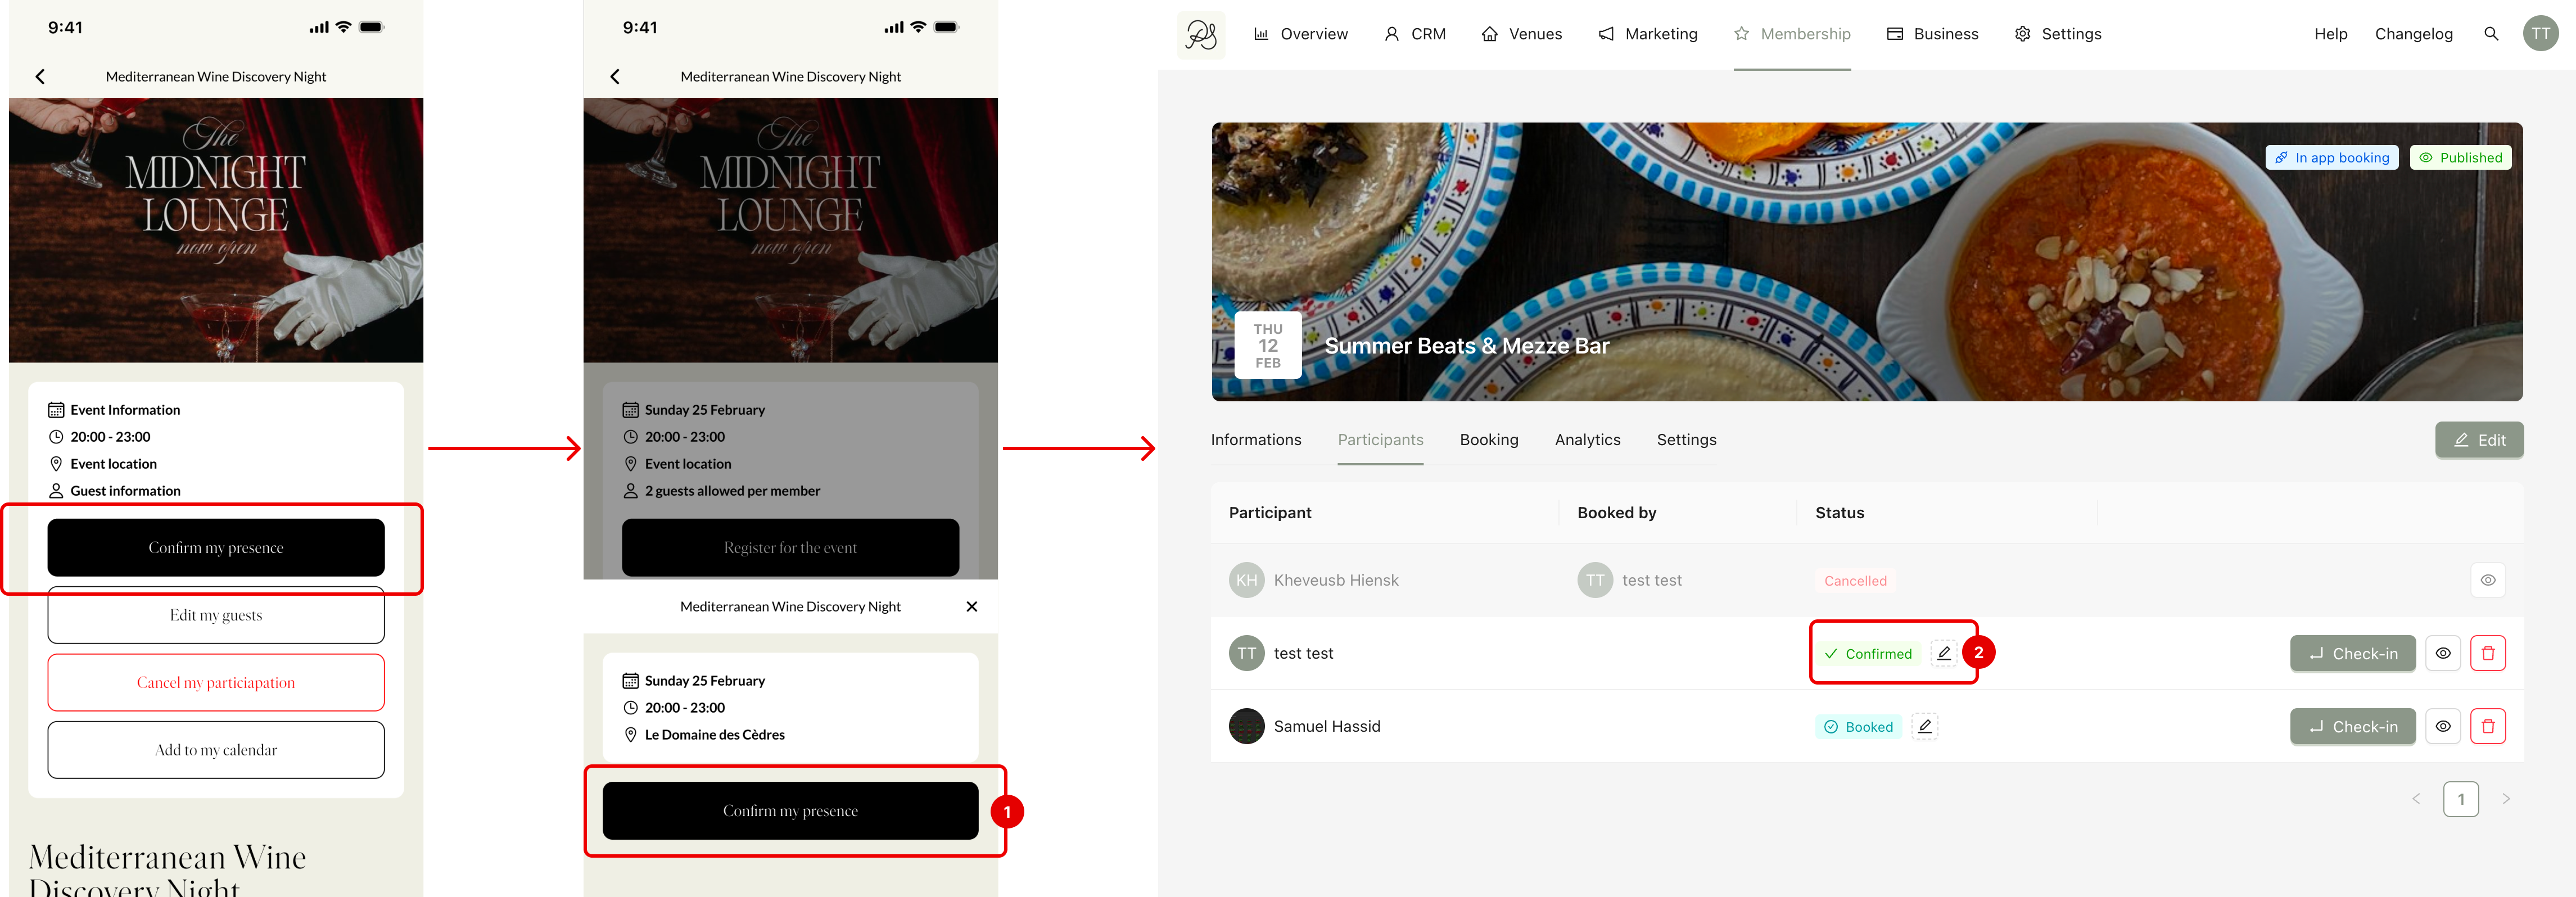
When members confirm that they will attend the event (by clicking the confirm button in the application), their status in the Participants tab changes to Confirmed. This corresponds to the status Confirmed in the dashboard.
By default, this status is linked to the confirmation action in the app. However, you can change which status is linked to the confirmation action. You can also configure confirmation notifications.
To configure it:
Step 1: Go to the tab Membership notification (1) → Confirmation notifications (2).
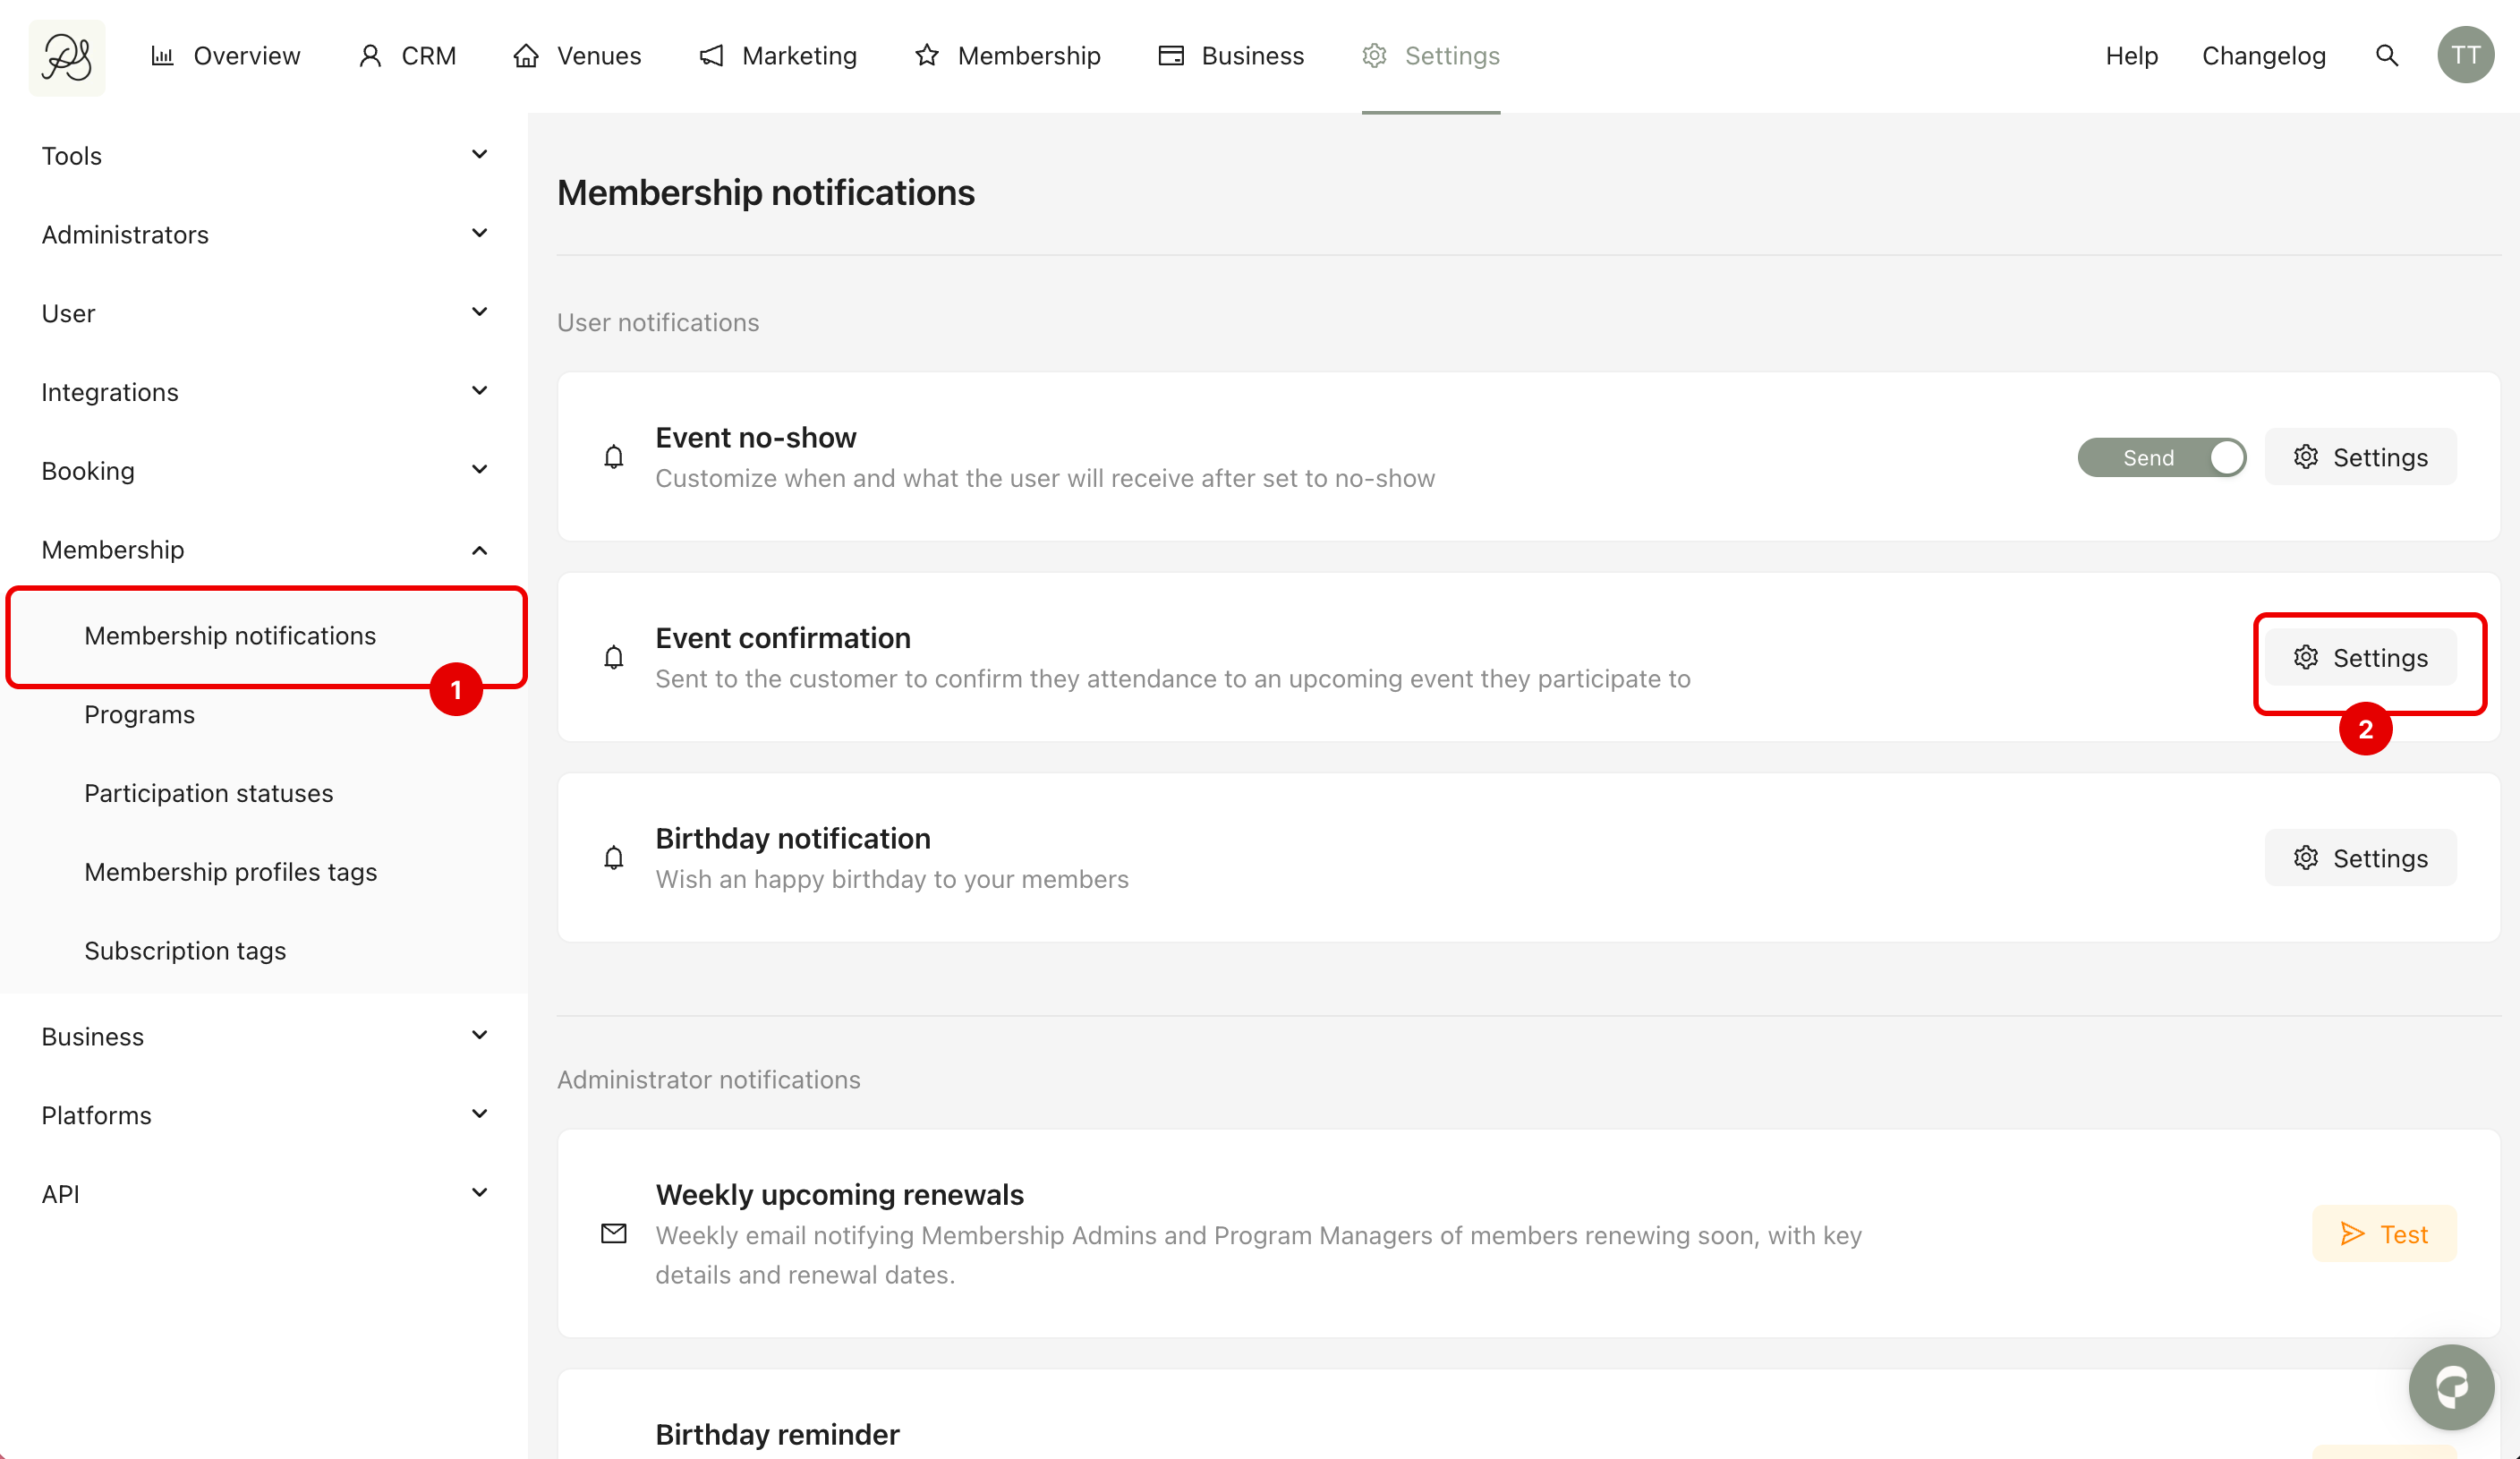
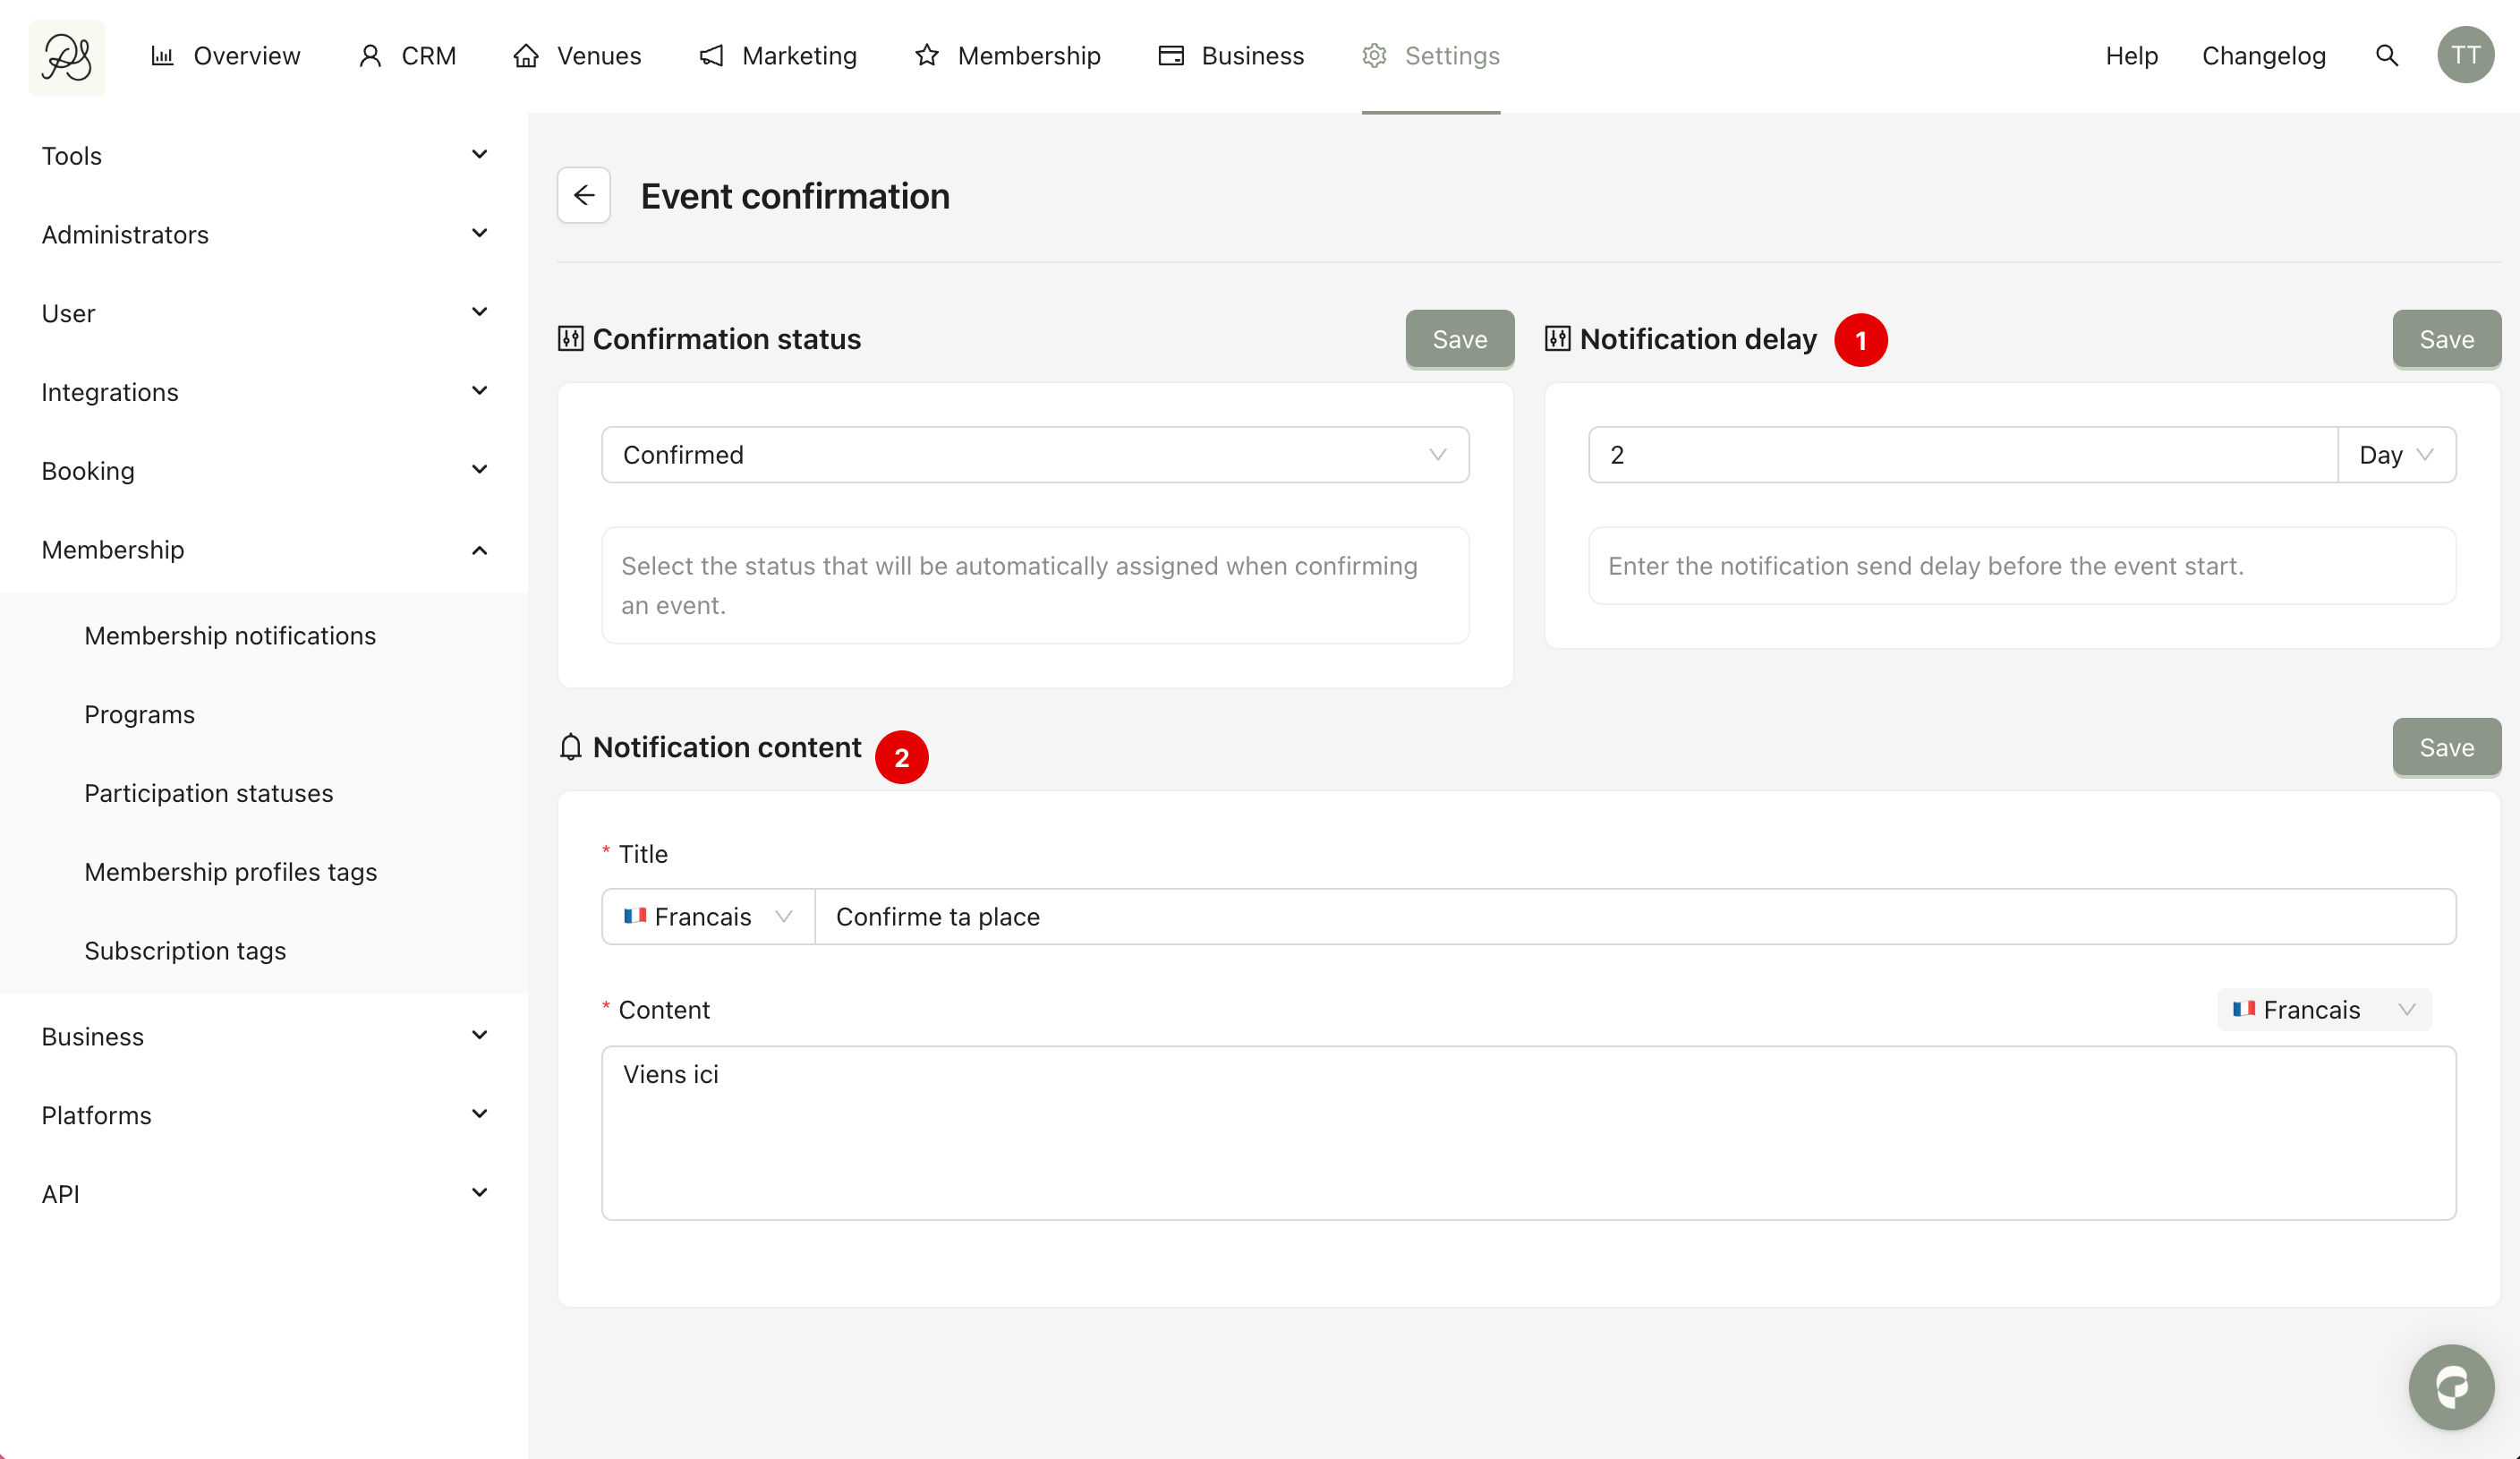
Step 2: Choose the Confirmation status, this is the status that will be triggered when the member clicks confirm.
If you do not want to use the default “Confirmed” status, you can select another status (for example, “Confirm to come”) (2). To learn how to create a new custom status, go to 2.1 Create a Custom Status below.
If you choose the status “Booked” (3) (The Booked by default) as the confirmation status, it means that when a member books the event, they are automatically considered confirmed. In that case, there will be no confirmation notification.
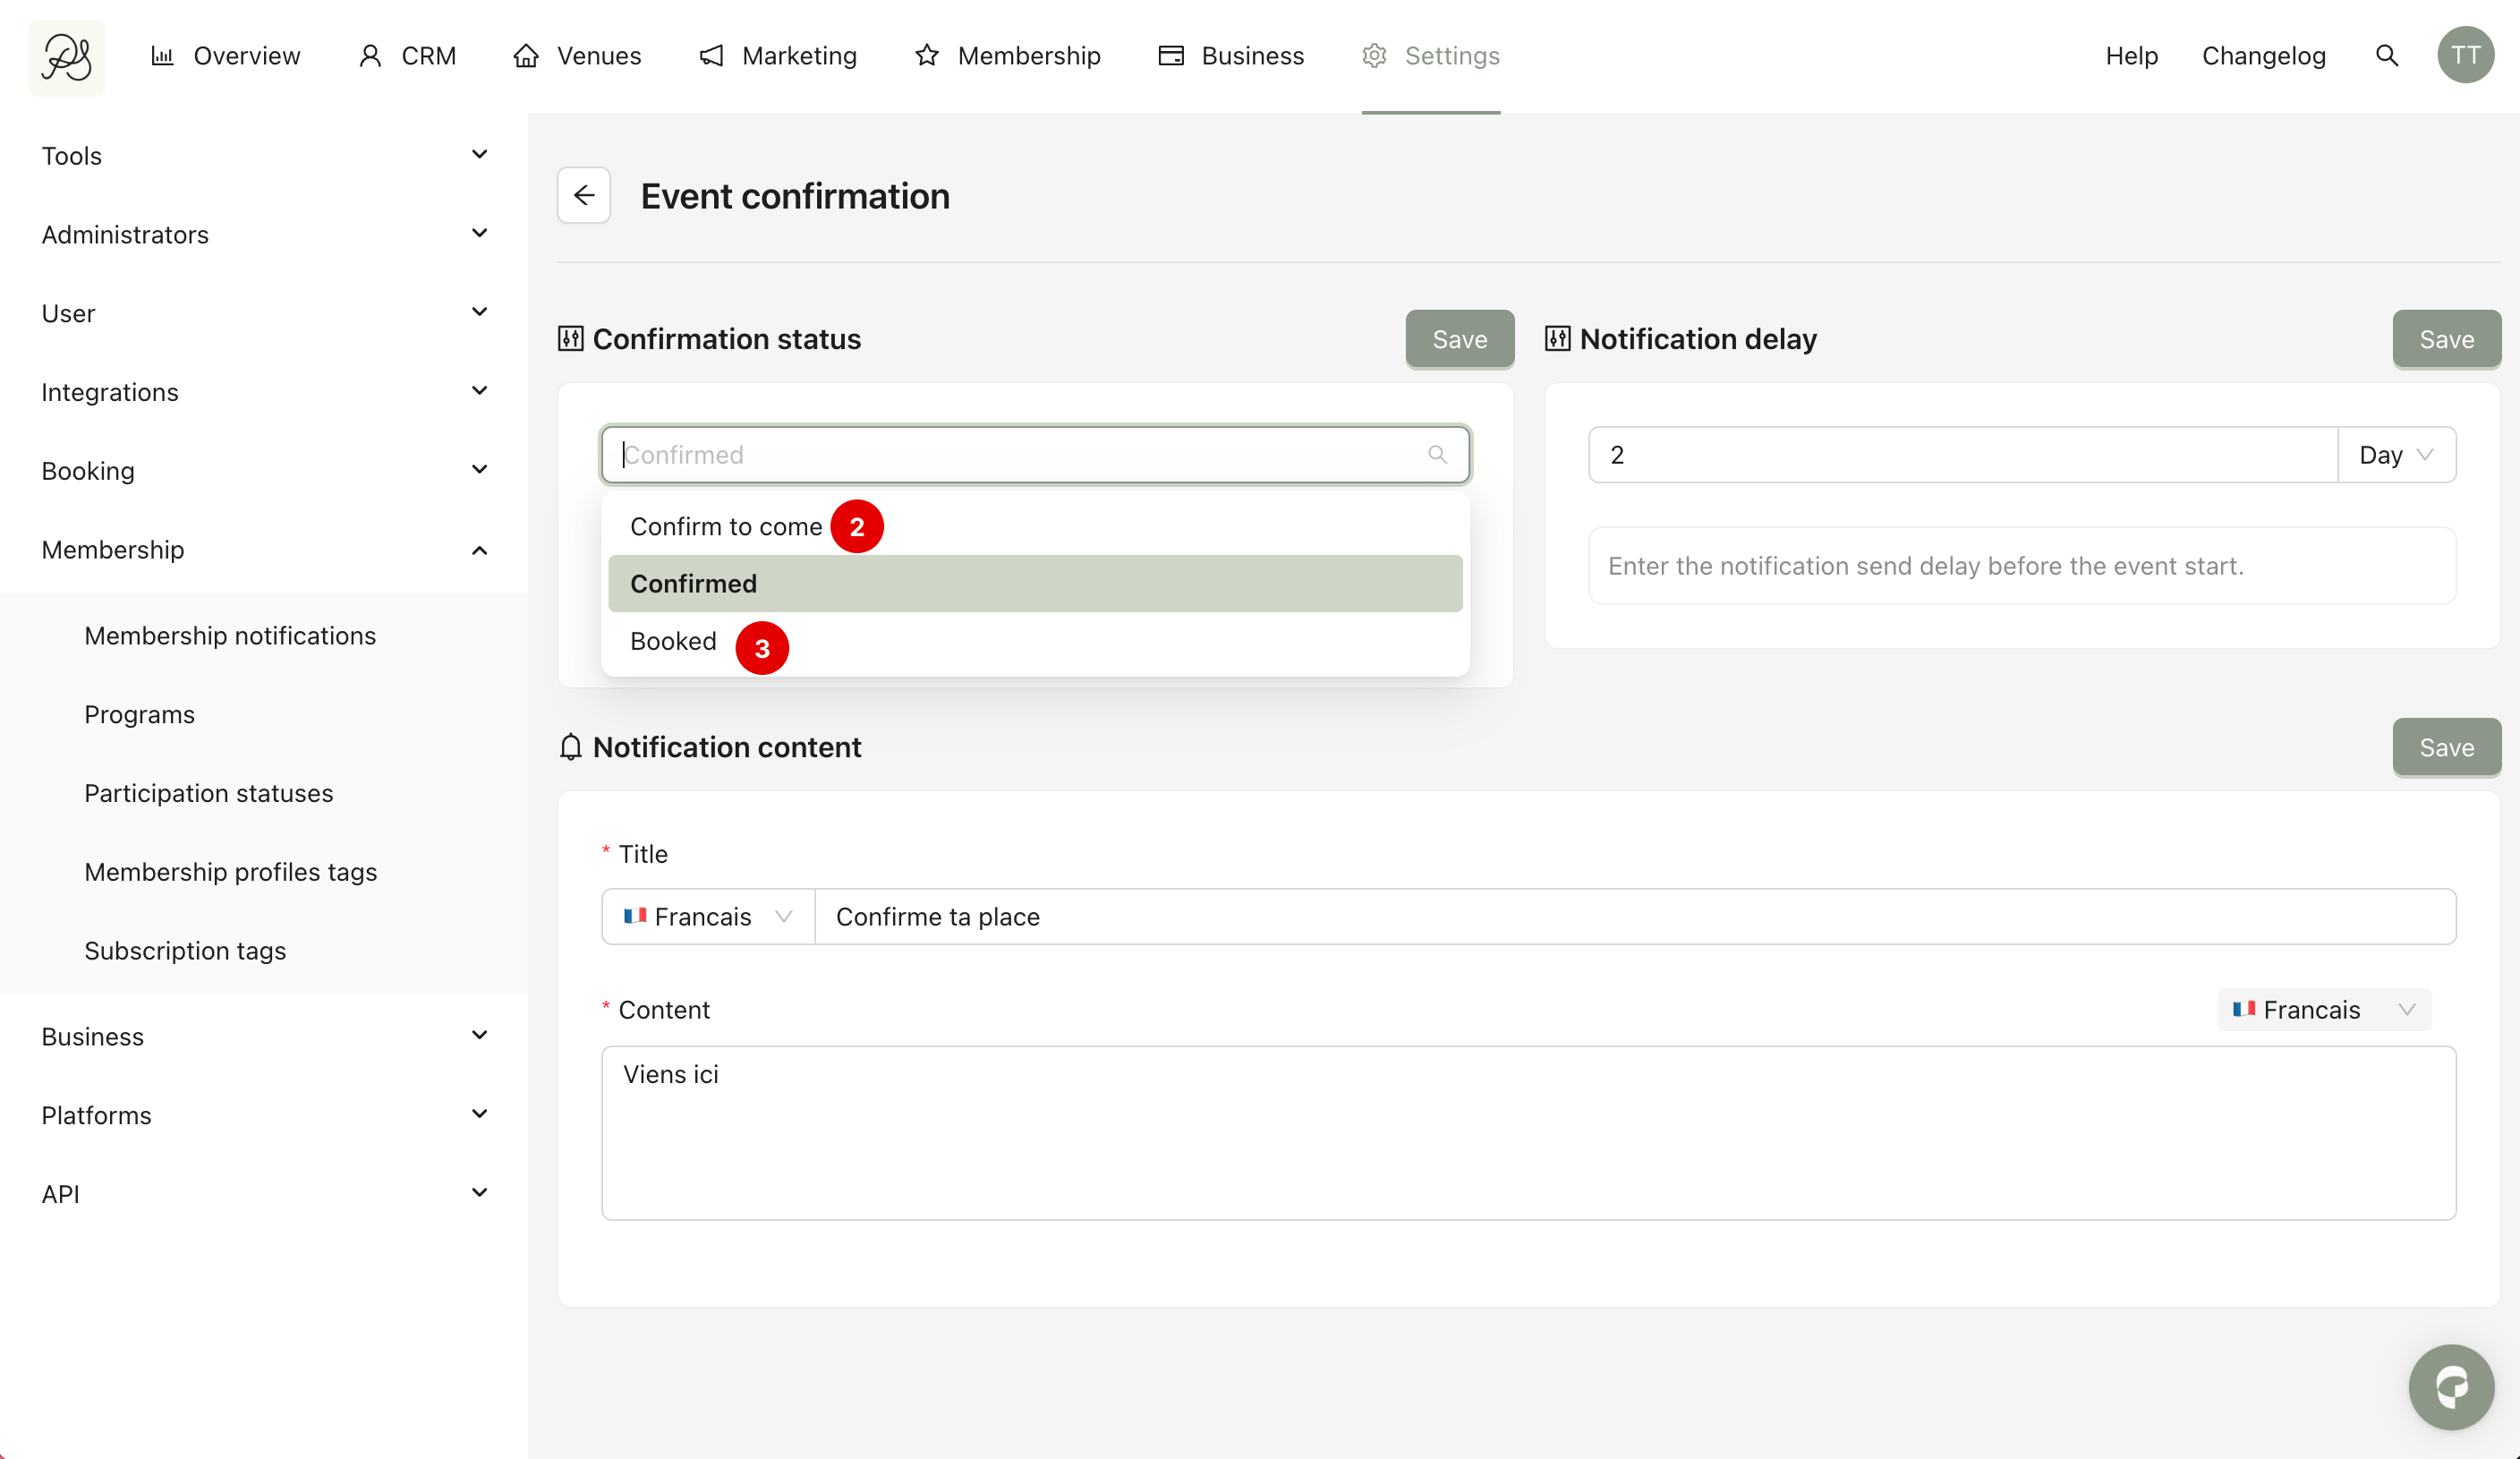
Step 3: You can also configure:
Notification delay: This defines how many days before the event the confirmation message will appear in the app. Example, if you set 2 days, the confirmation notification will appear when there are 2 days left before the event.
Notification content: The title and content of the notification popup that appears on the member’s phone.
After making changes in each section, click Save.
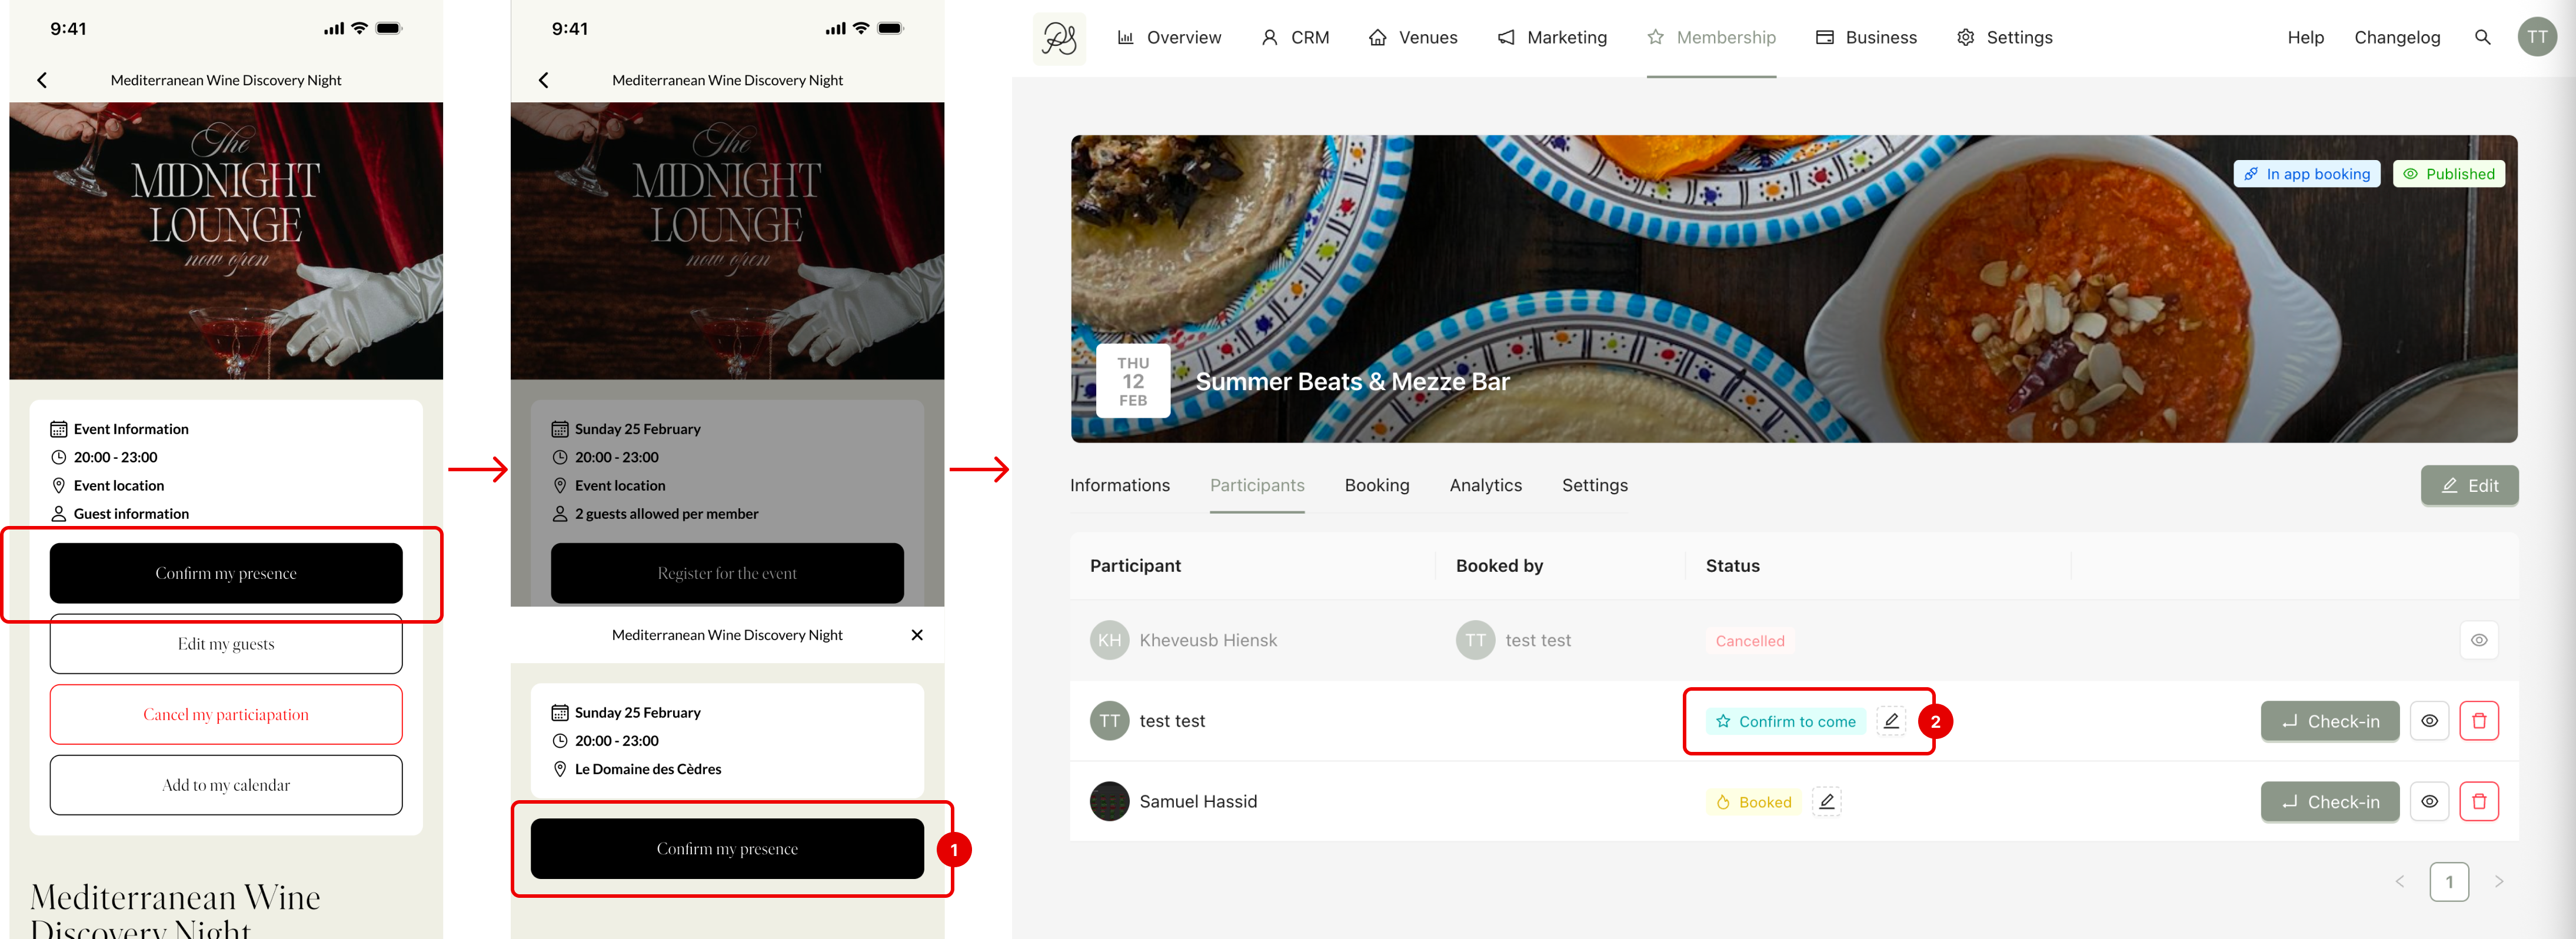
Result: When a member clicks confirm in the app (1), their status in the Participants tab will change to the selected confirmation status (for example, “Confirm to come”) (2).
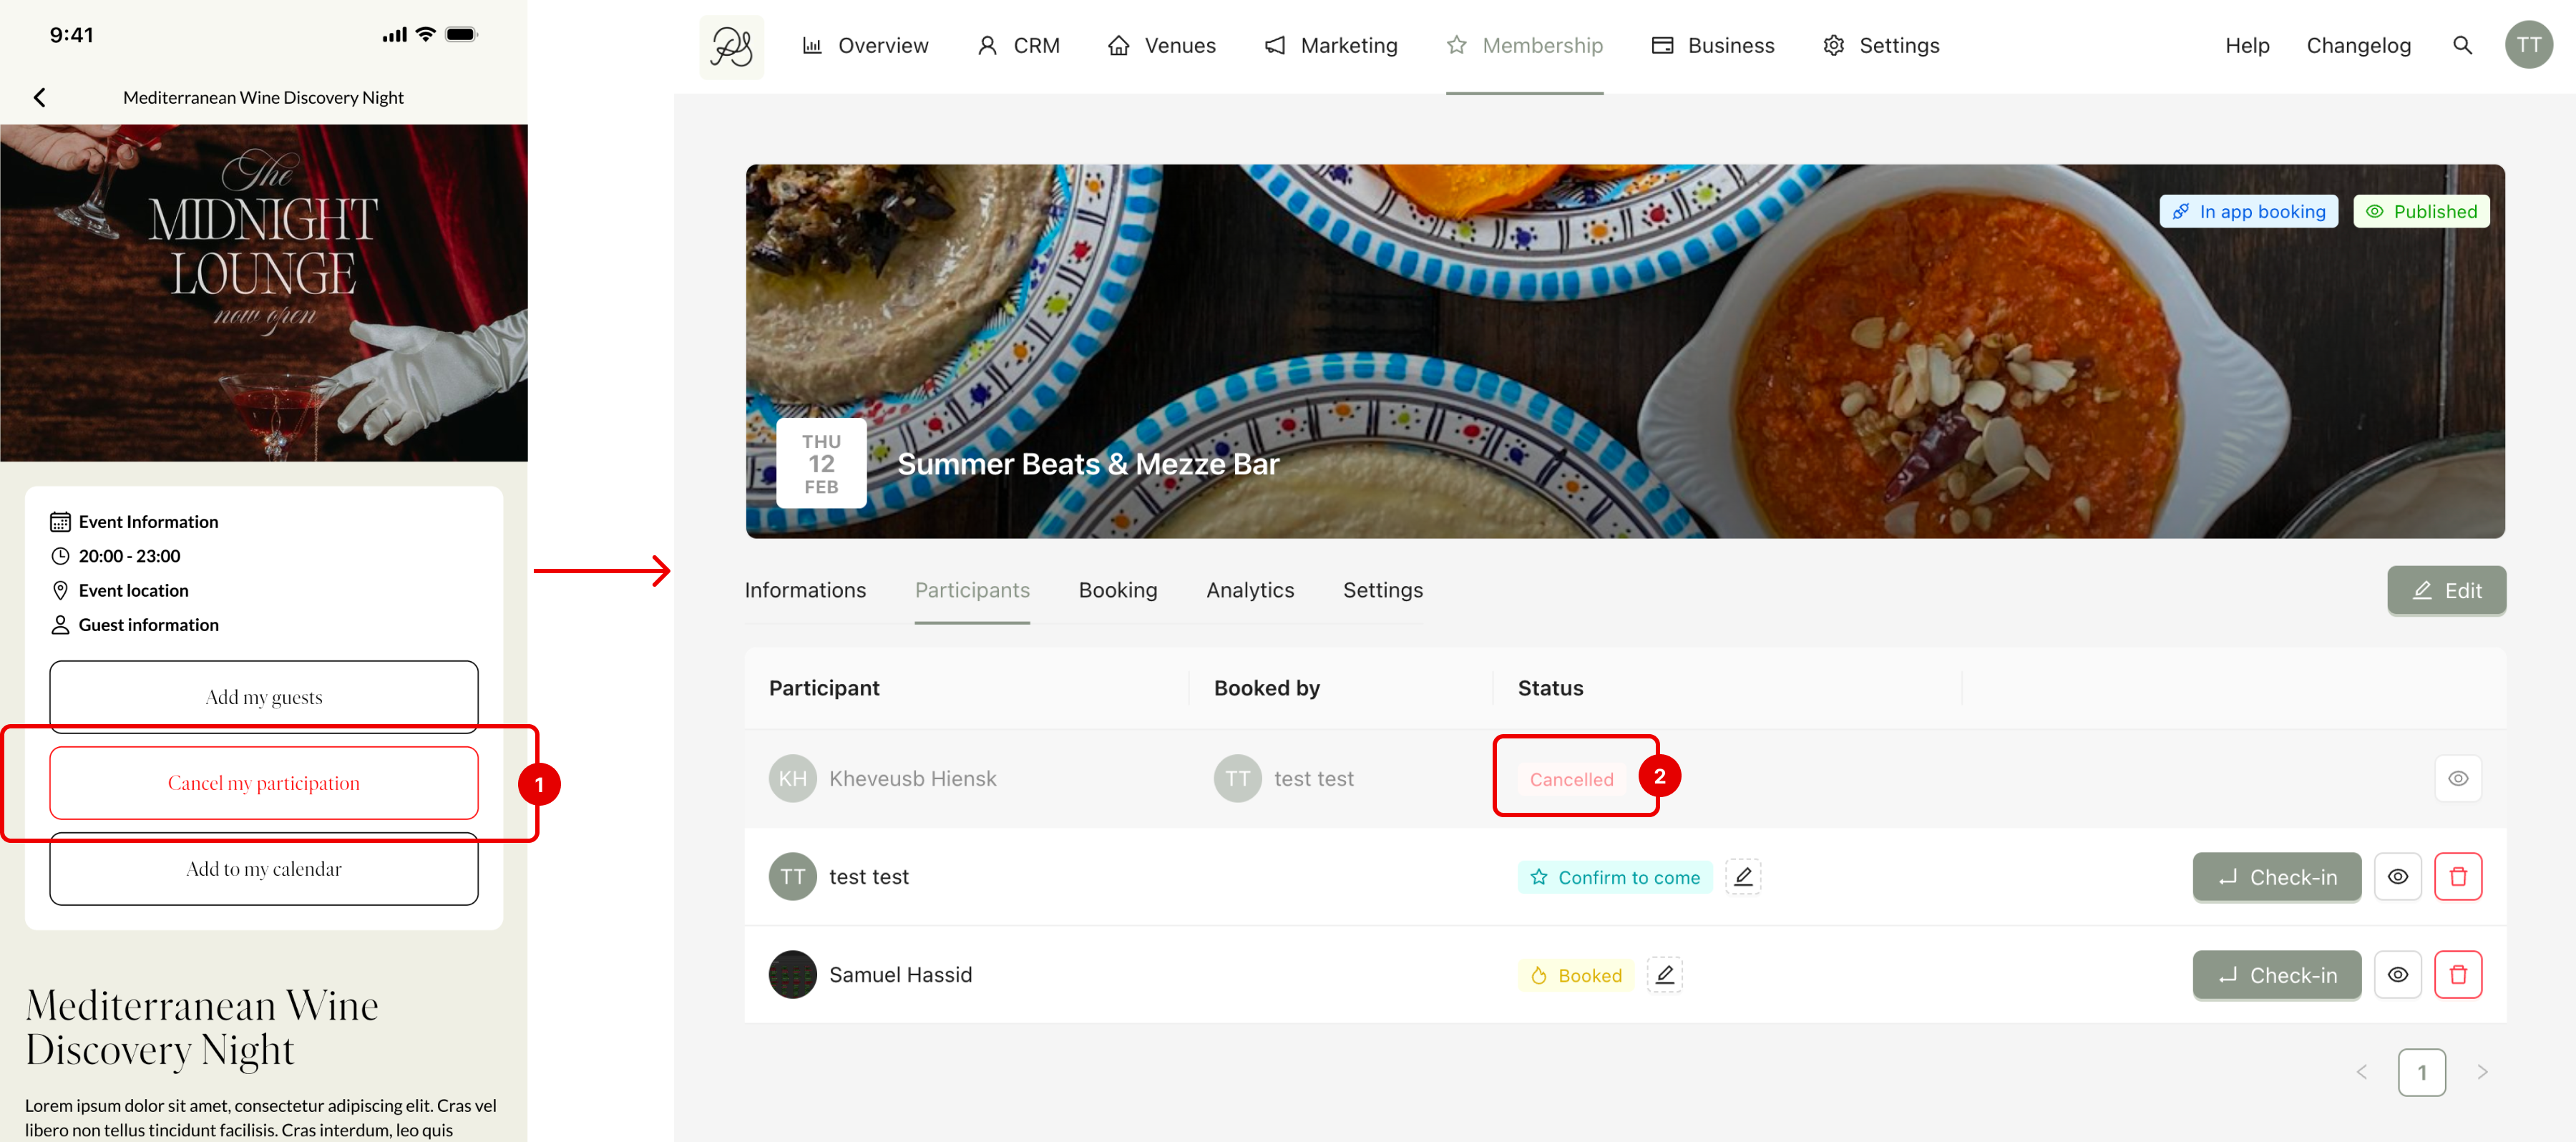
1.3 Cancelled
When a member cancels their participation in the application (1), the status in the Participants tab automatically changes to Cancelled (2).
This rule is fixed. You cannot change the rule that links cancellation to this status. You cannot change the text, icon, or color of this status from the dashboard. It will not appear in the Status List for customization.
Depending on your needs, you can add your own statuses to better manage event participation.
Custom statuses are not automatically linked to actions in the application unless you connect them manually (for example, as a confirmation status).
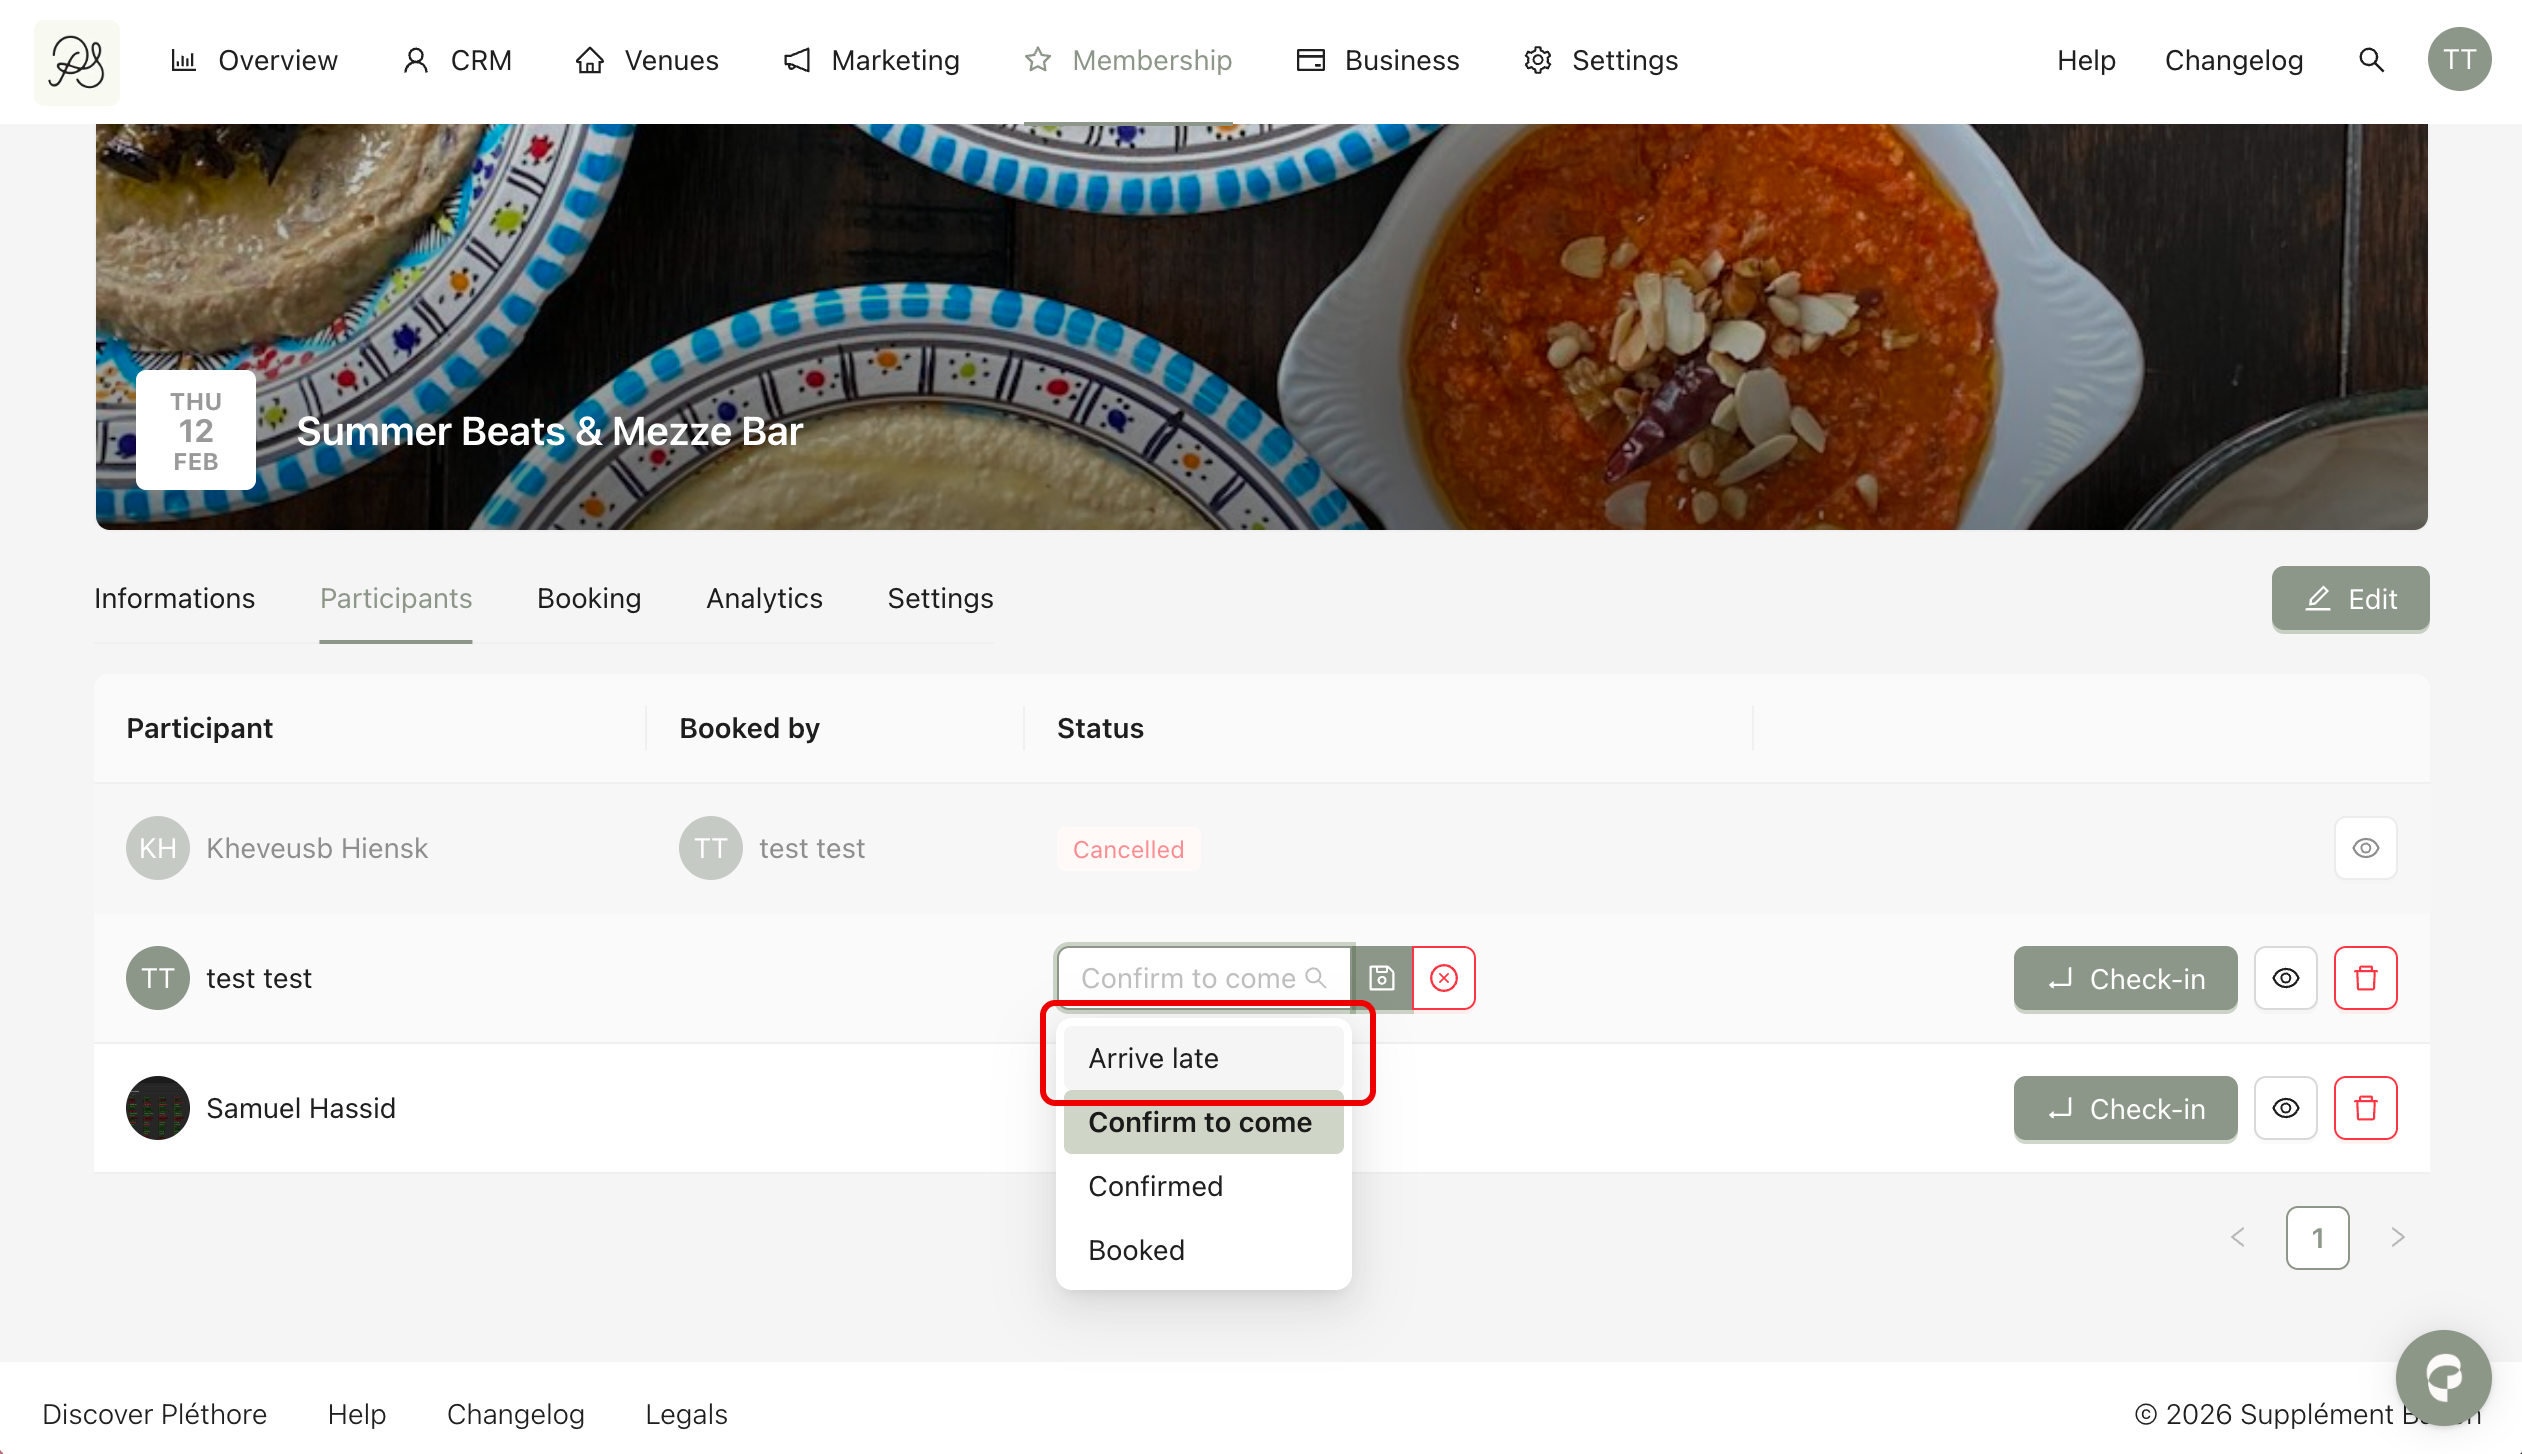
If they are not linked to confirmation, they will not be automatically triggered by app actions. You can use them manually to better track and manage participants (for example, to mark someone who arrived late, etc).
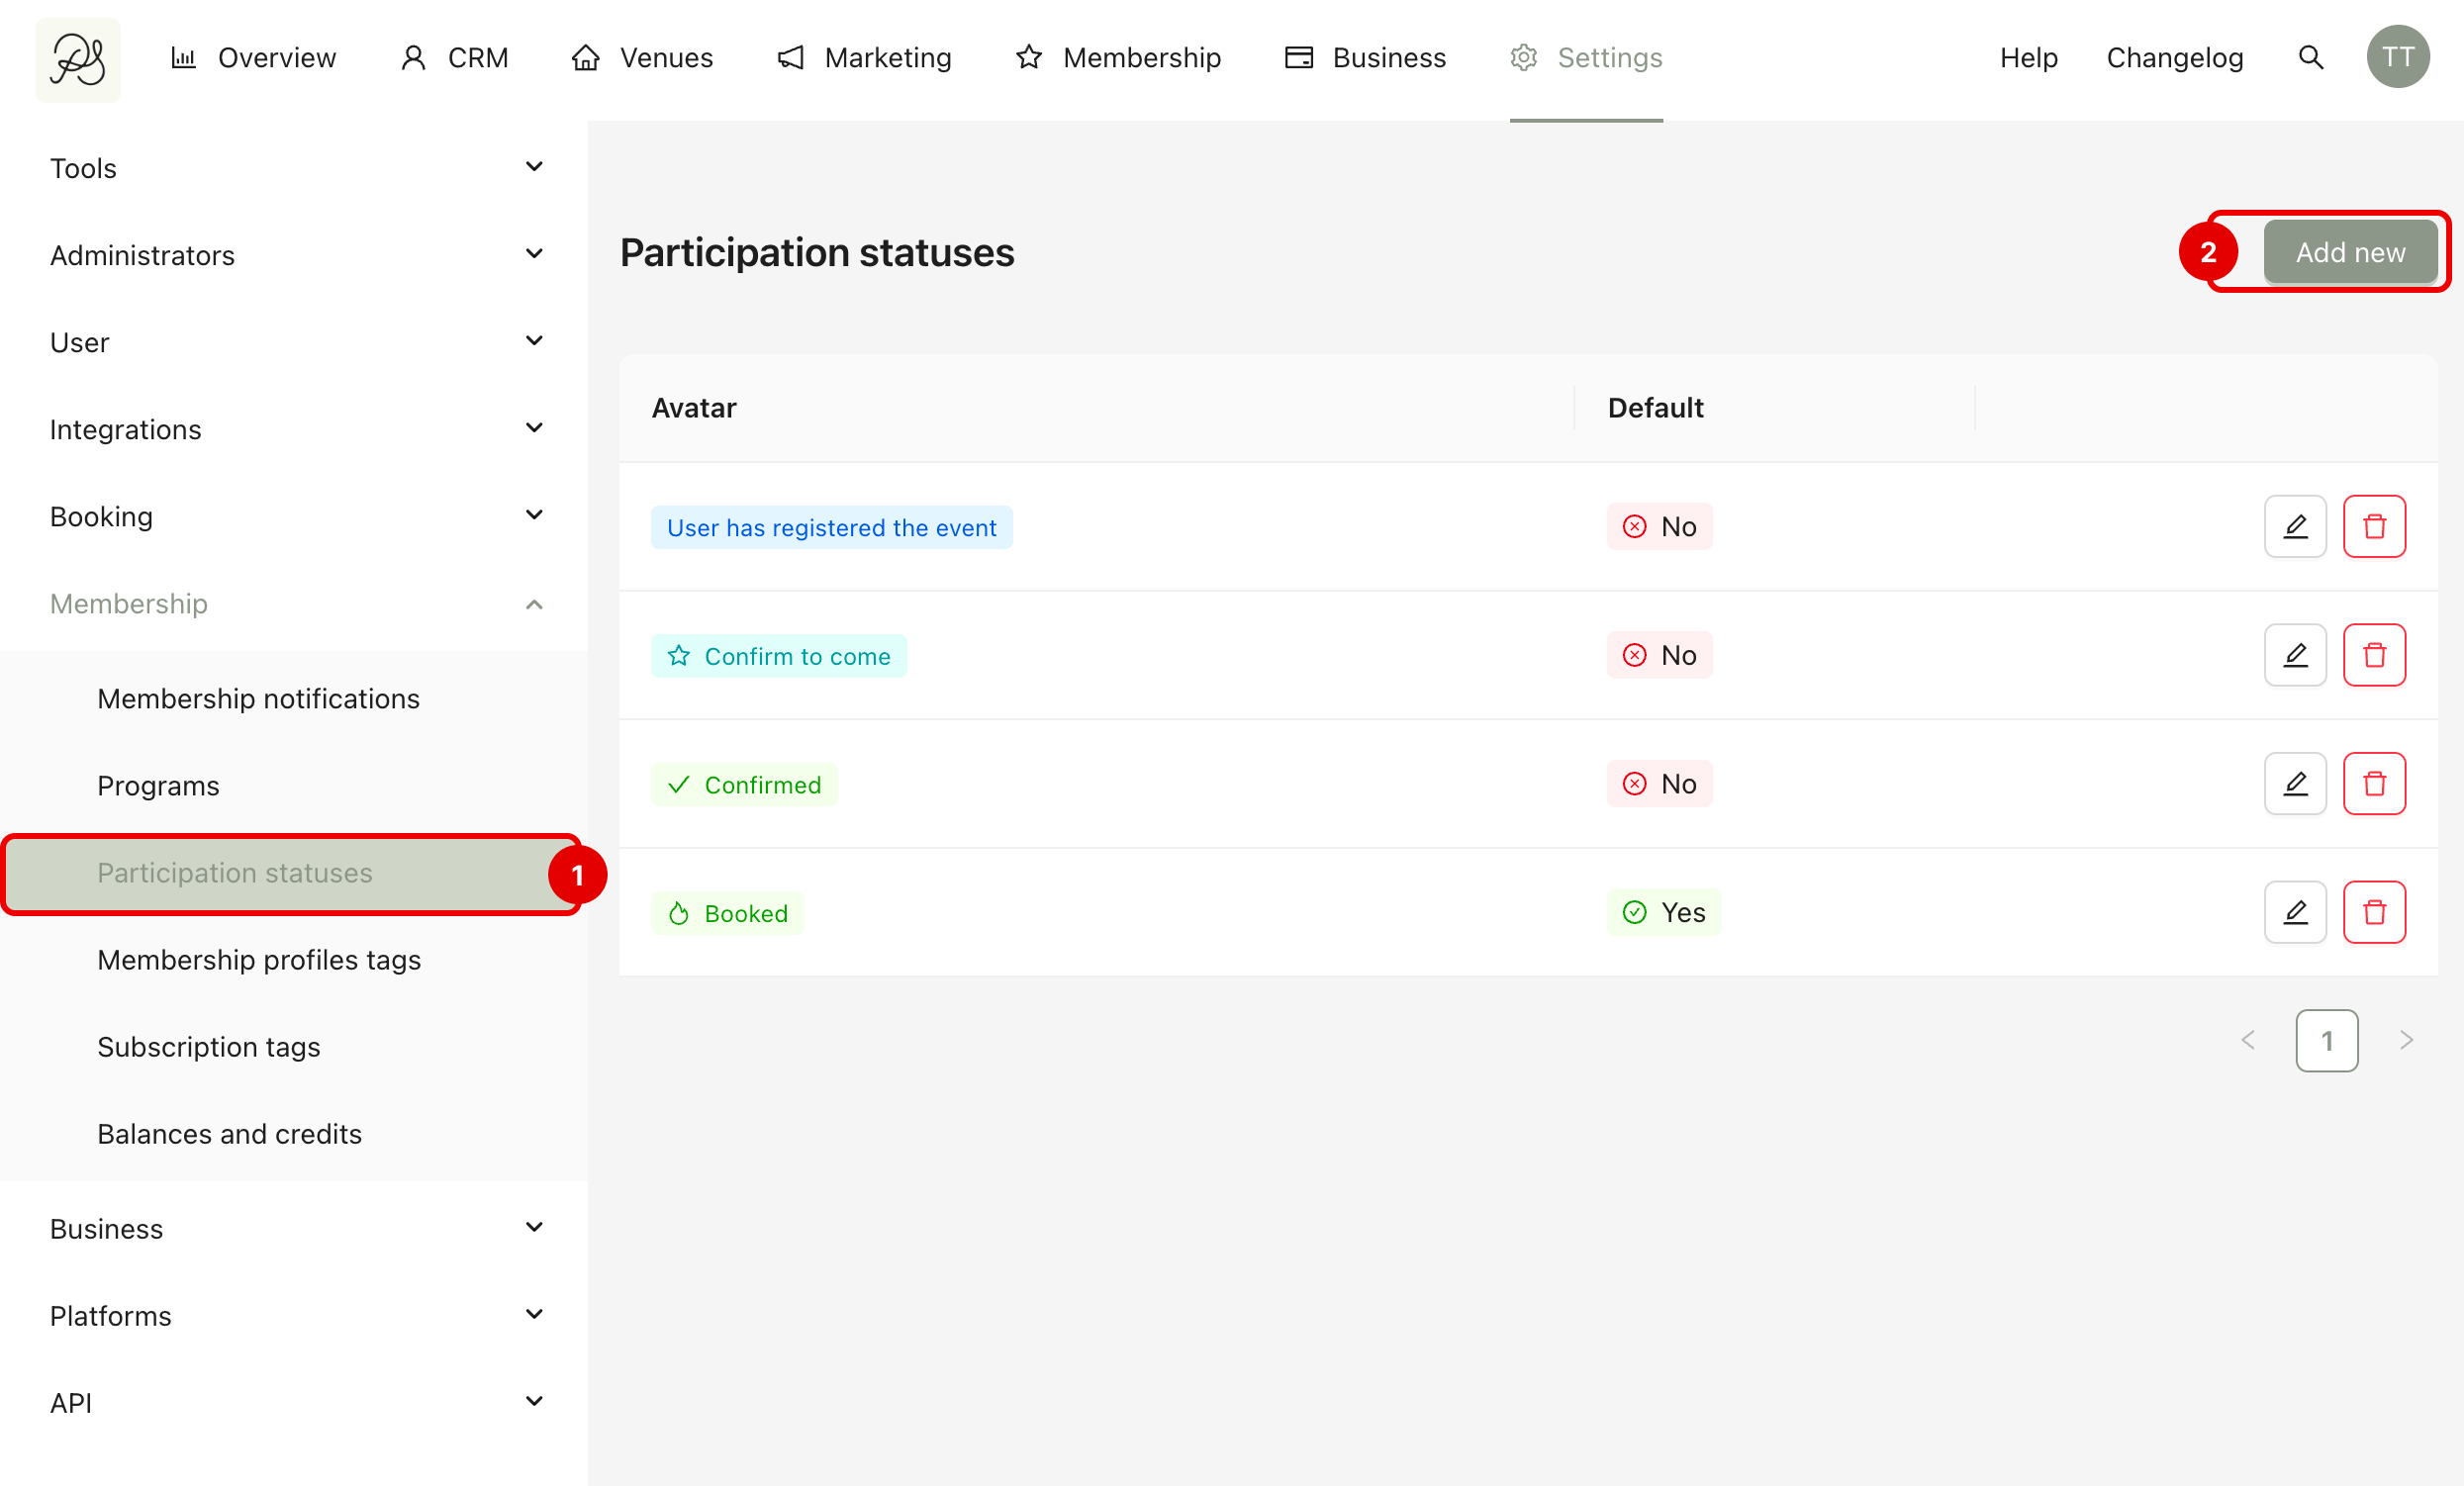
2.1 Create a Custom Status
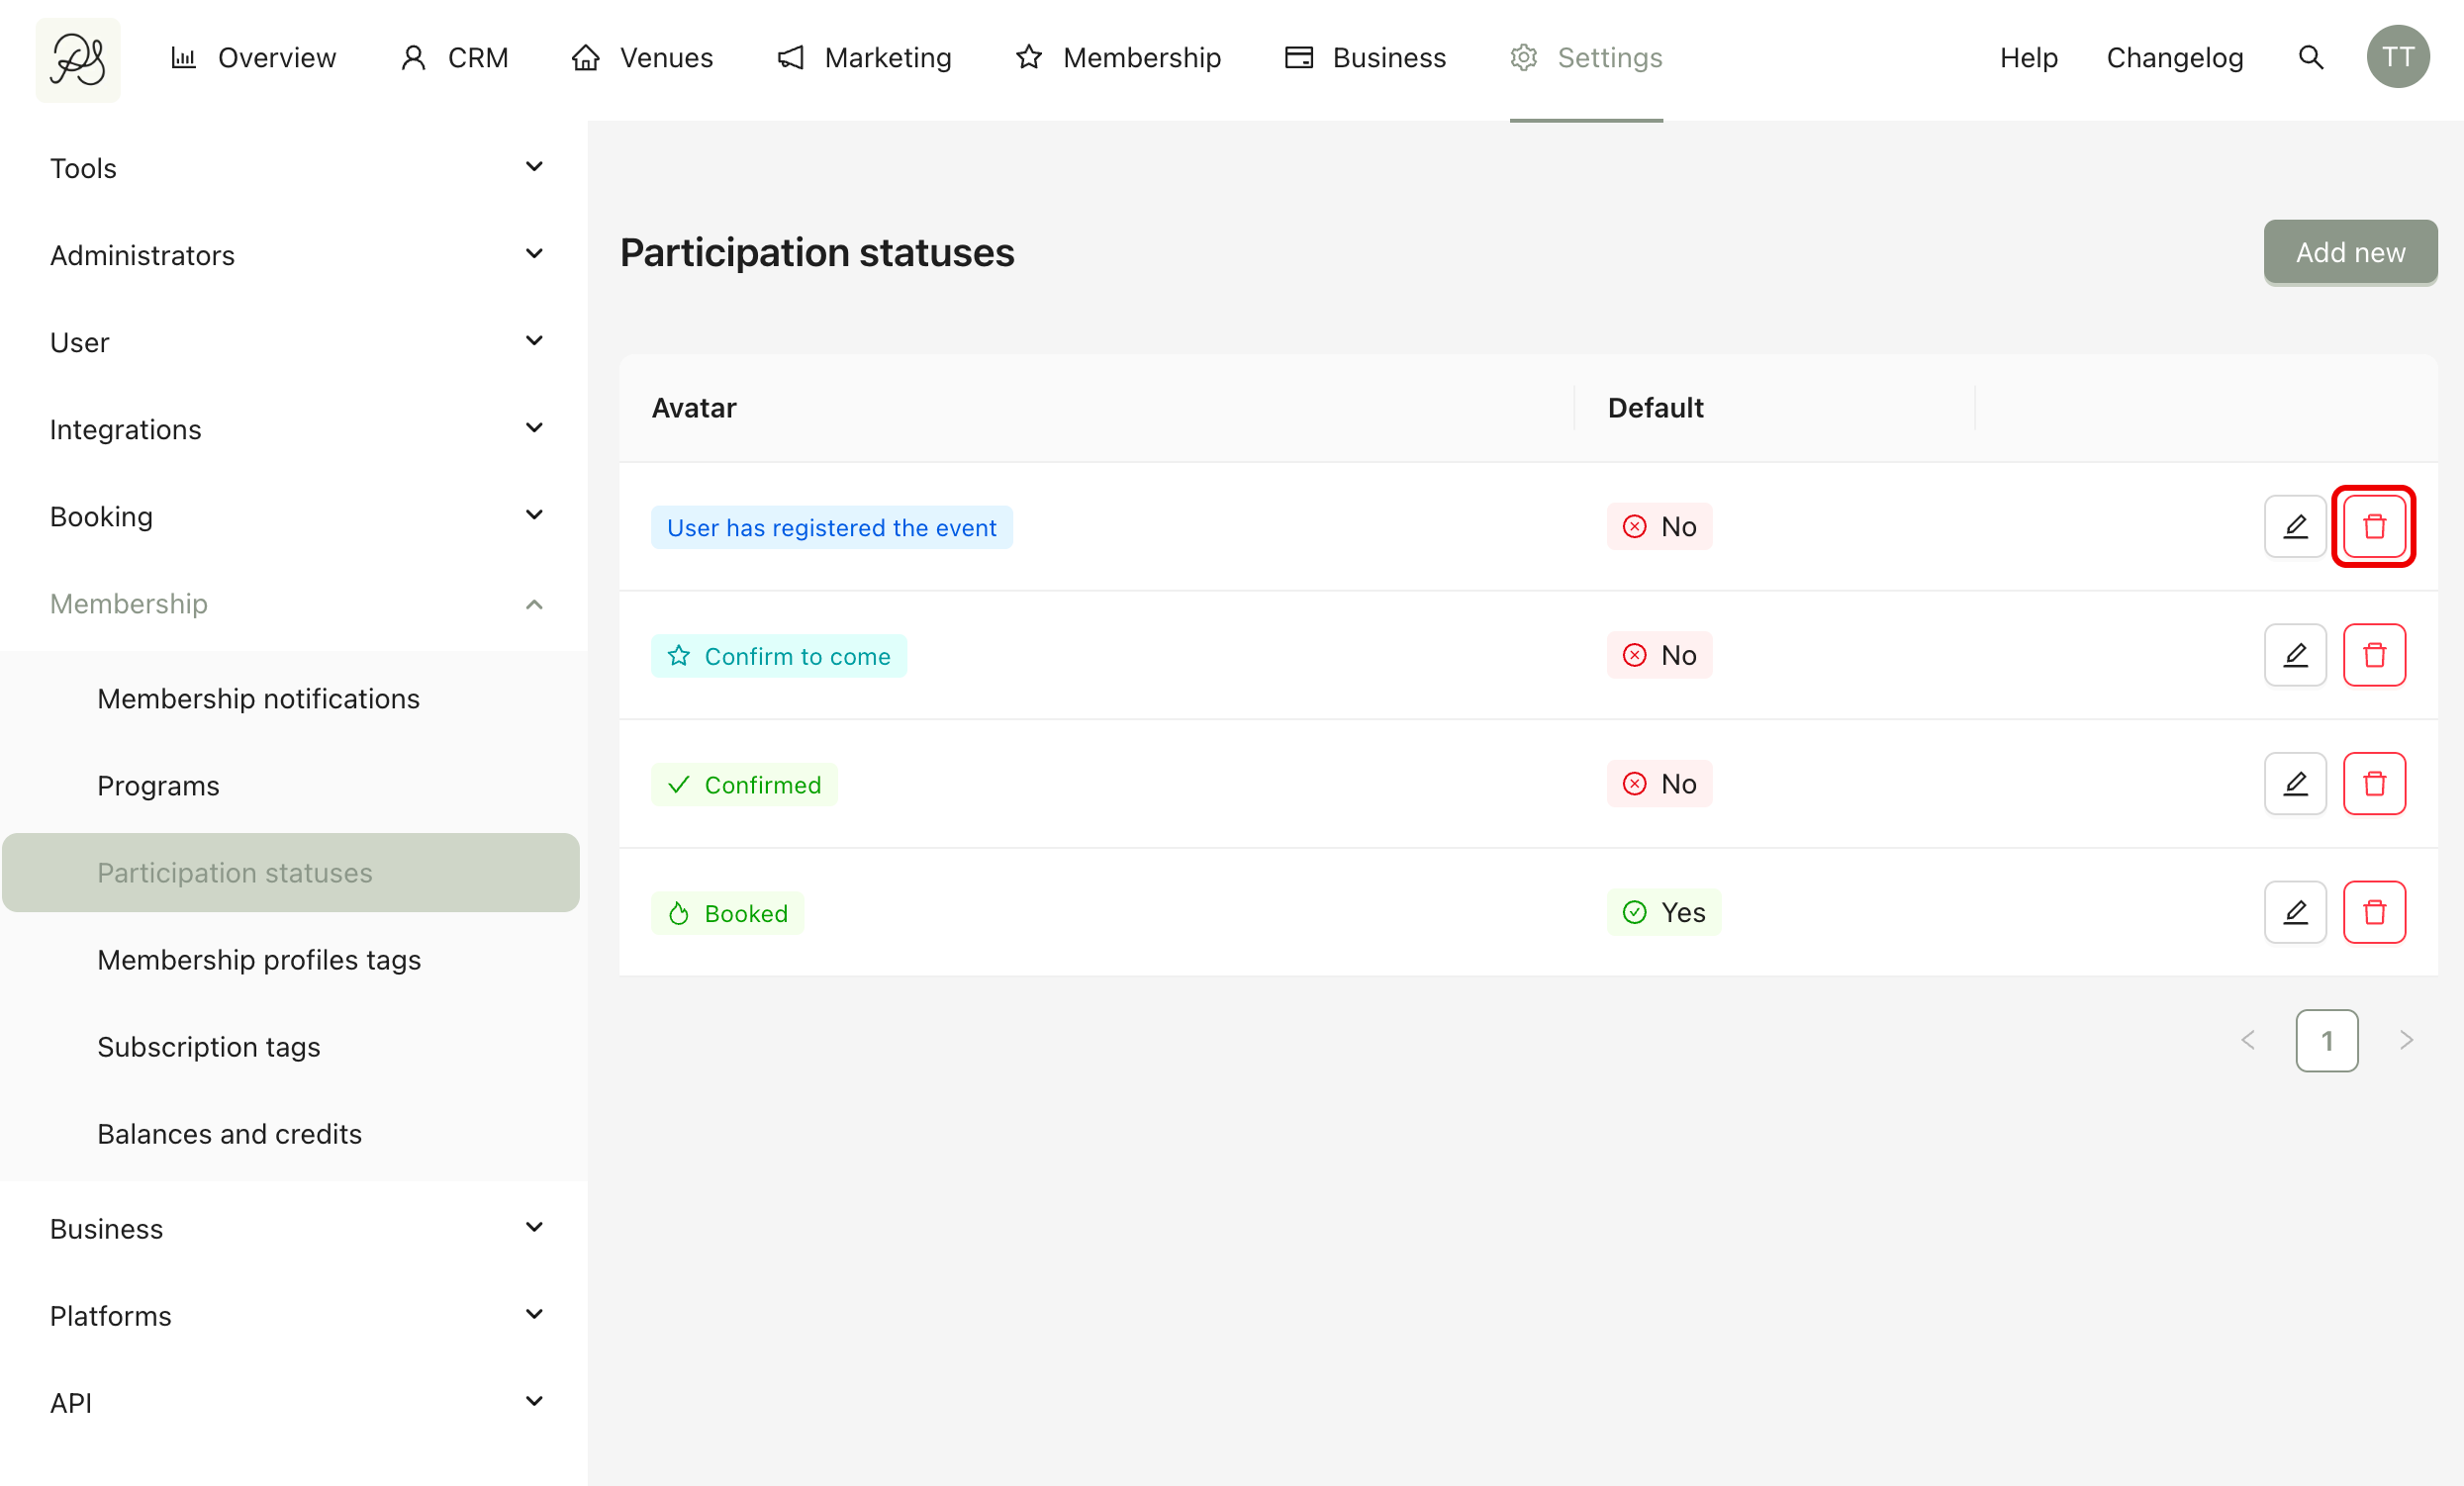
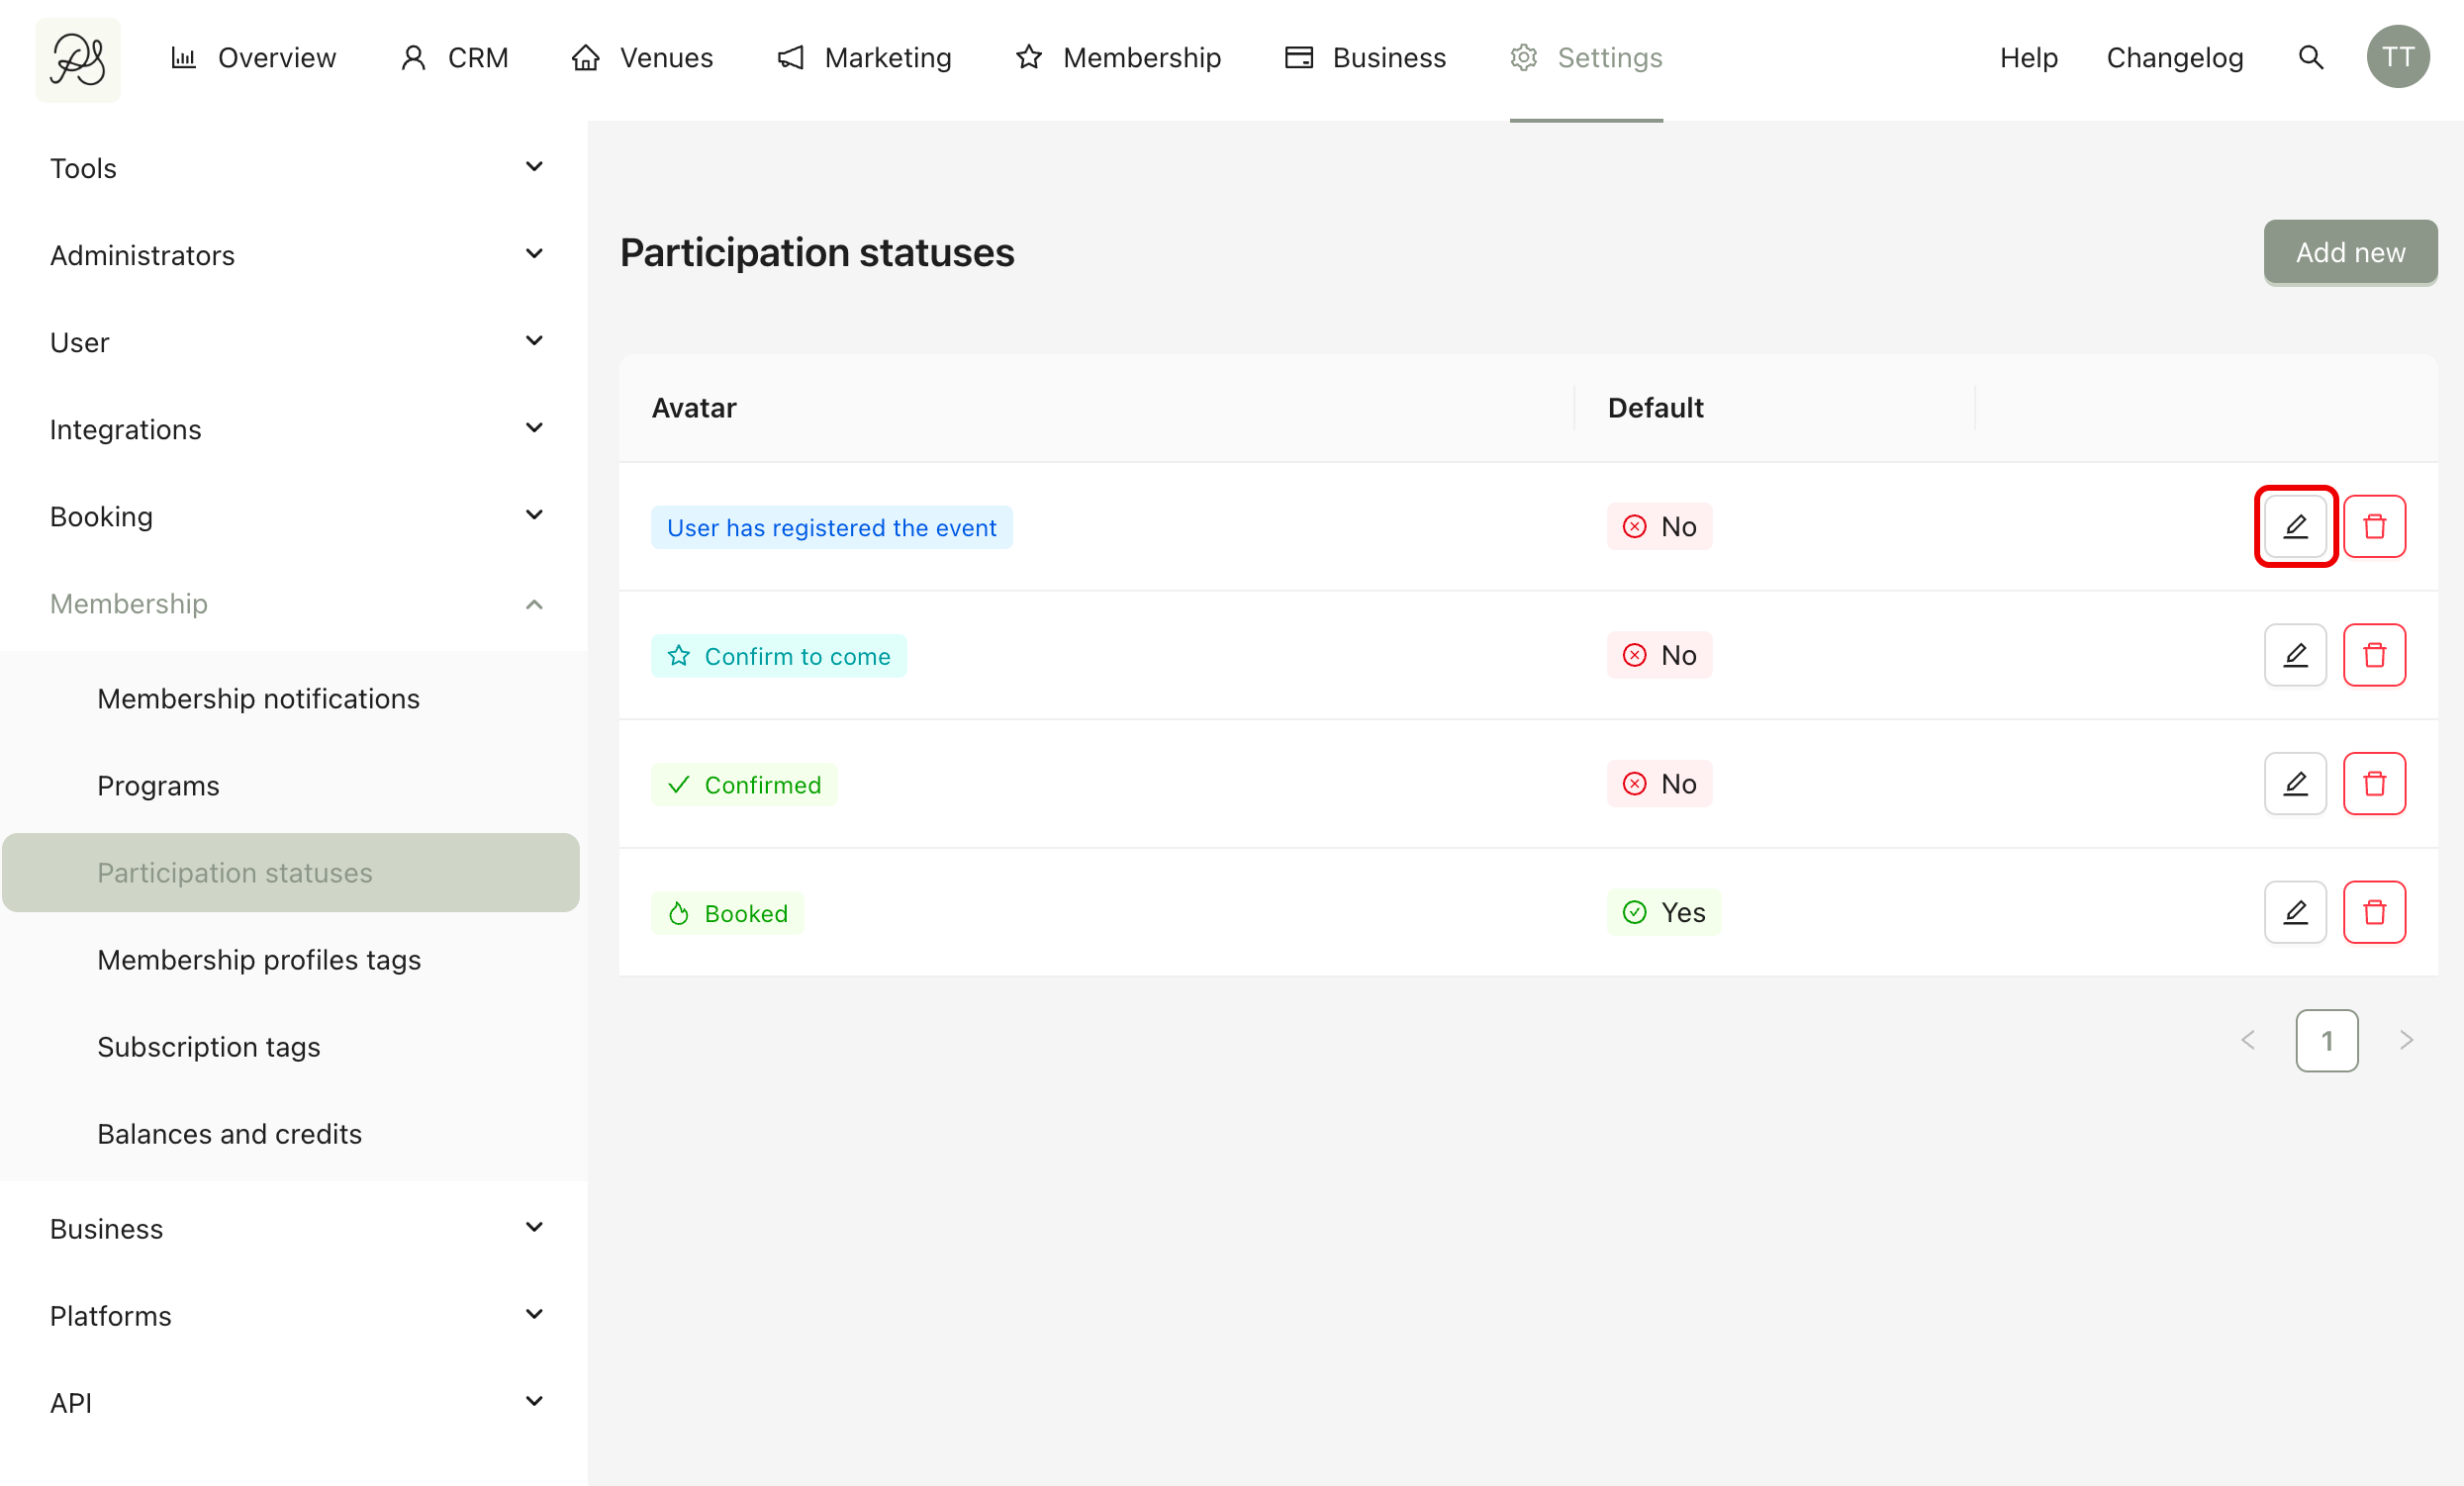
Step 1: To create a custom status, go to the tab Participation statuses (1) → Click Add New (2).
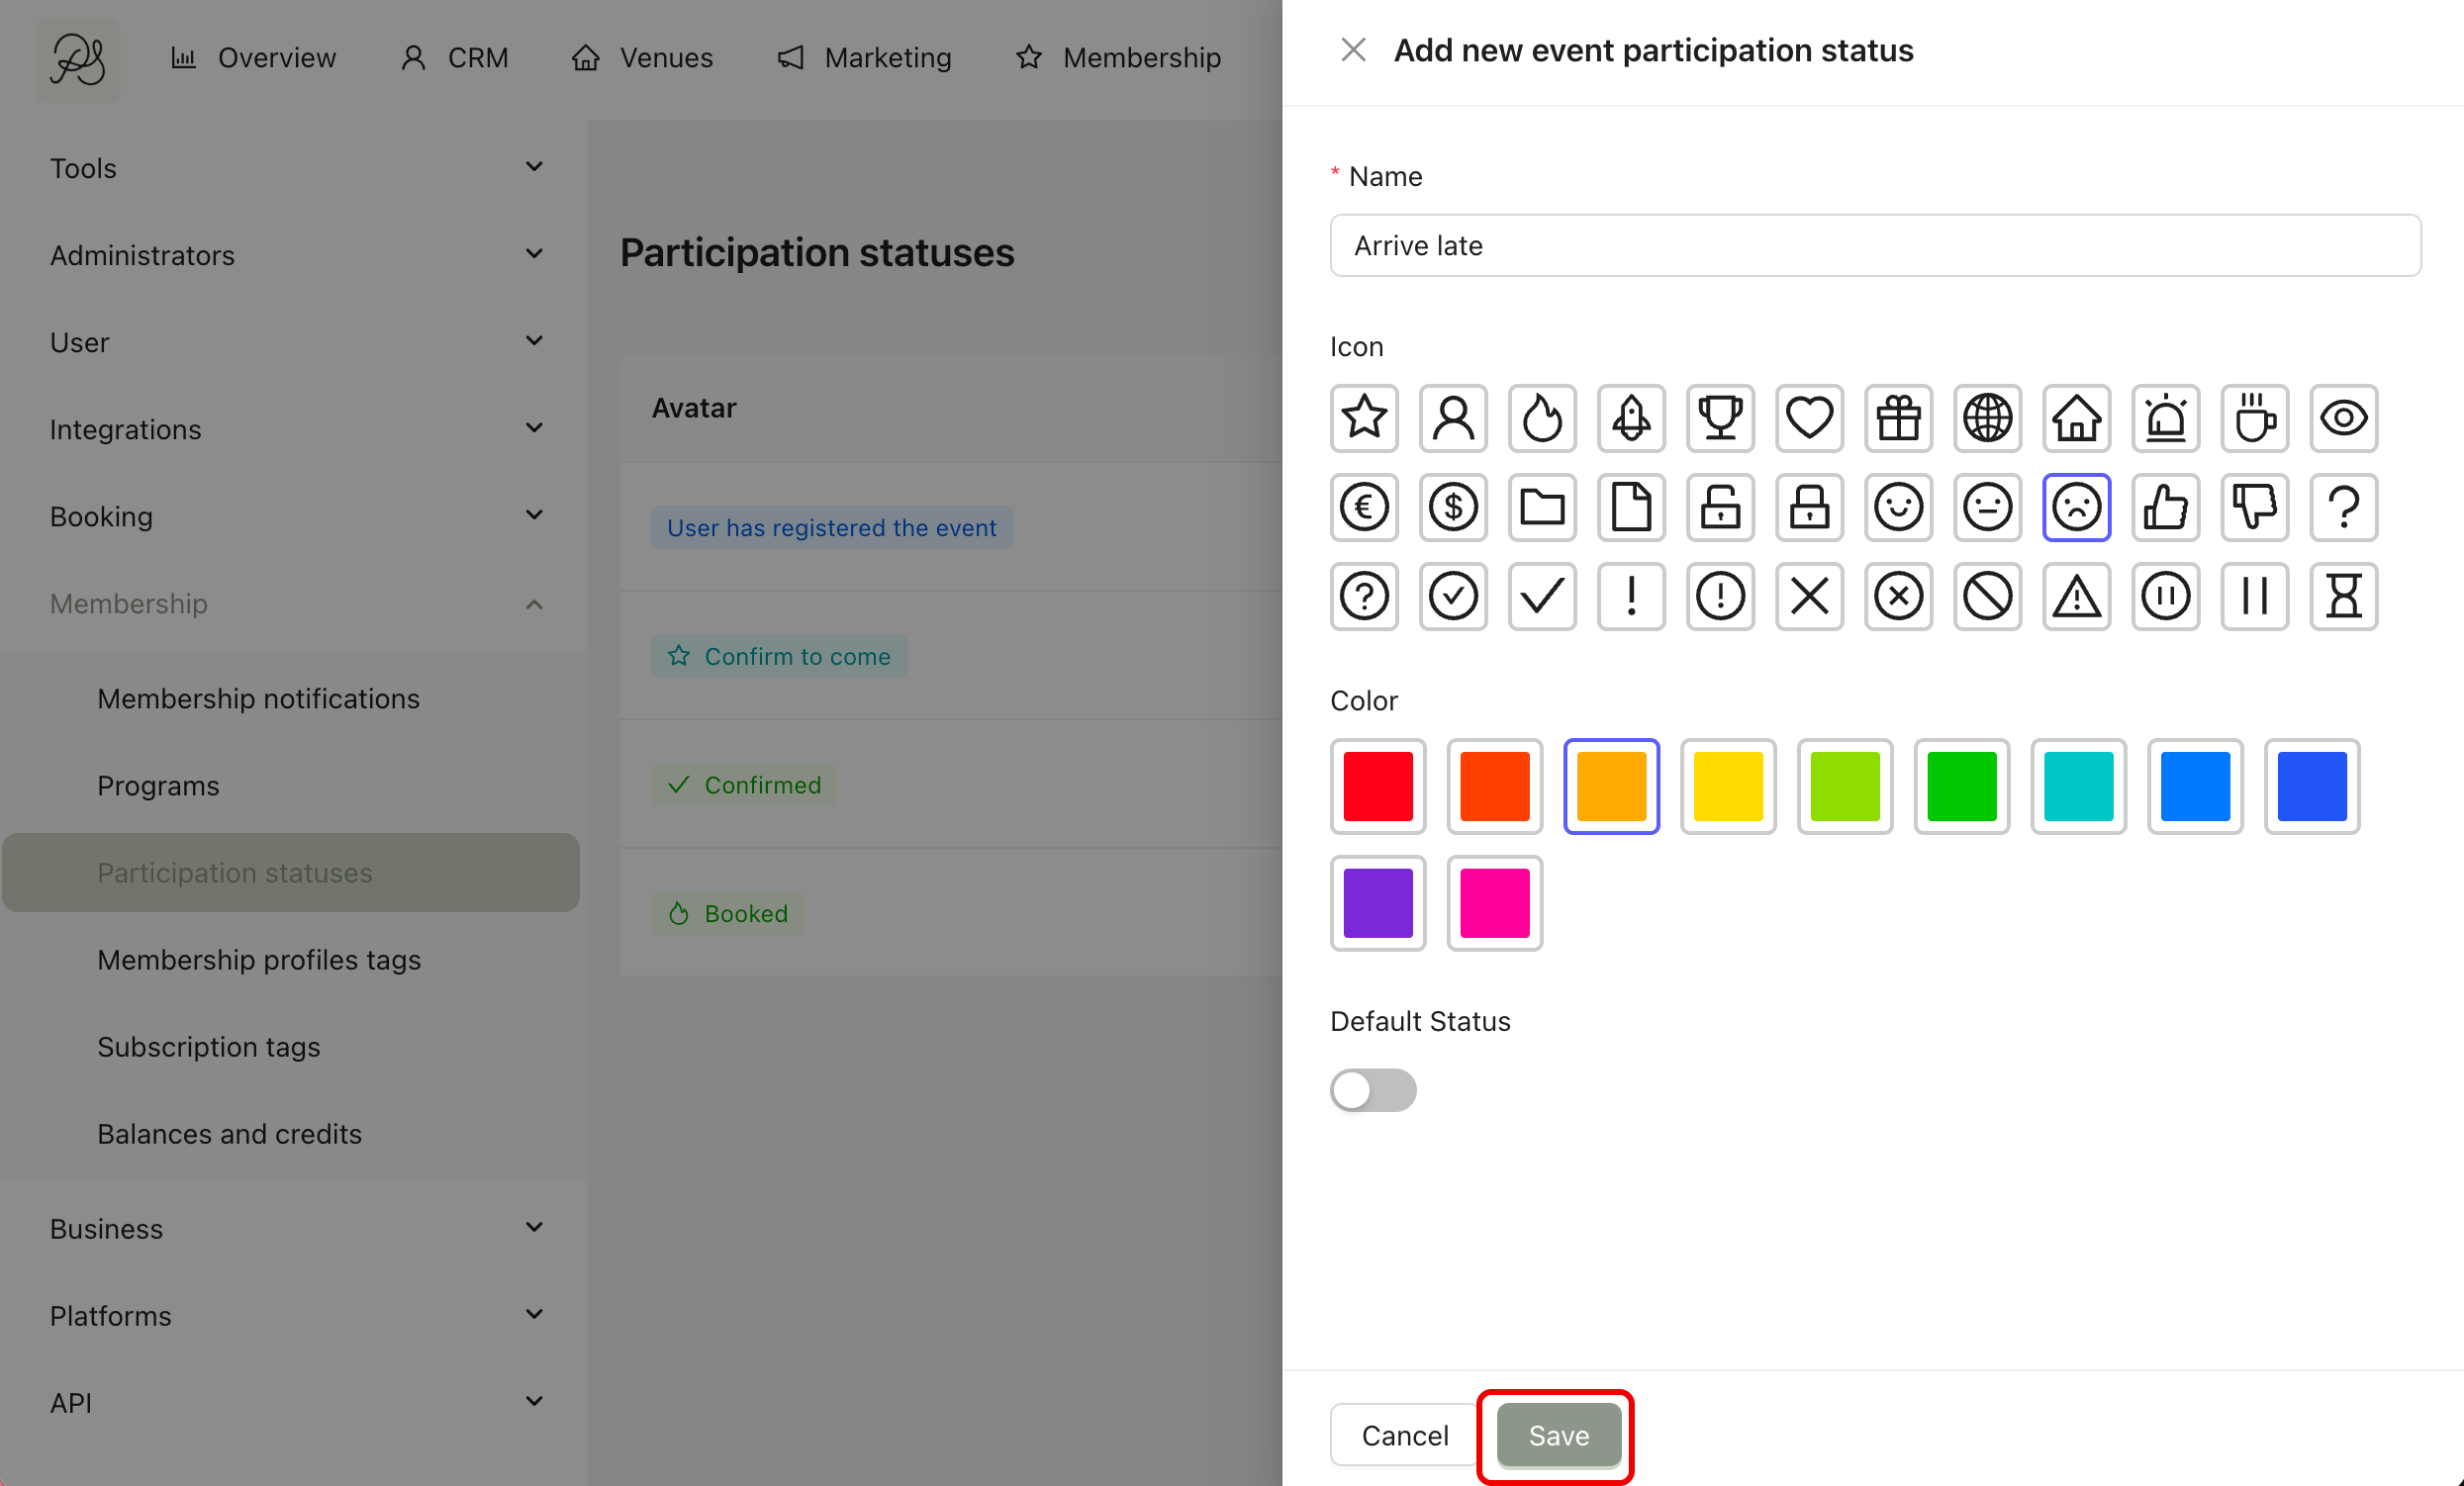
Step 2: A modal window will appear where you can enter the status name, choose an icon and select a color. After configuring the status, click Save.
The new status will now appear in your status list and can be used to manage participants.
2.2 Edit a Status
To edit a status, click the Pen icon next to the status. Modify the name, icon, or color as needed → Click Save.
2.3 Define a Default Status (Registration)
The default status is the one applied when a member registers for an event. By default, this is Booked.
To change it, click the button Edit a status. Then, enable the Default status toggle.
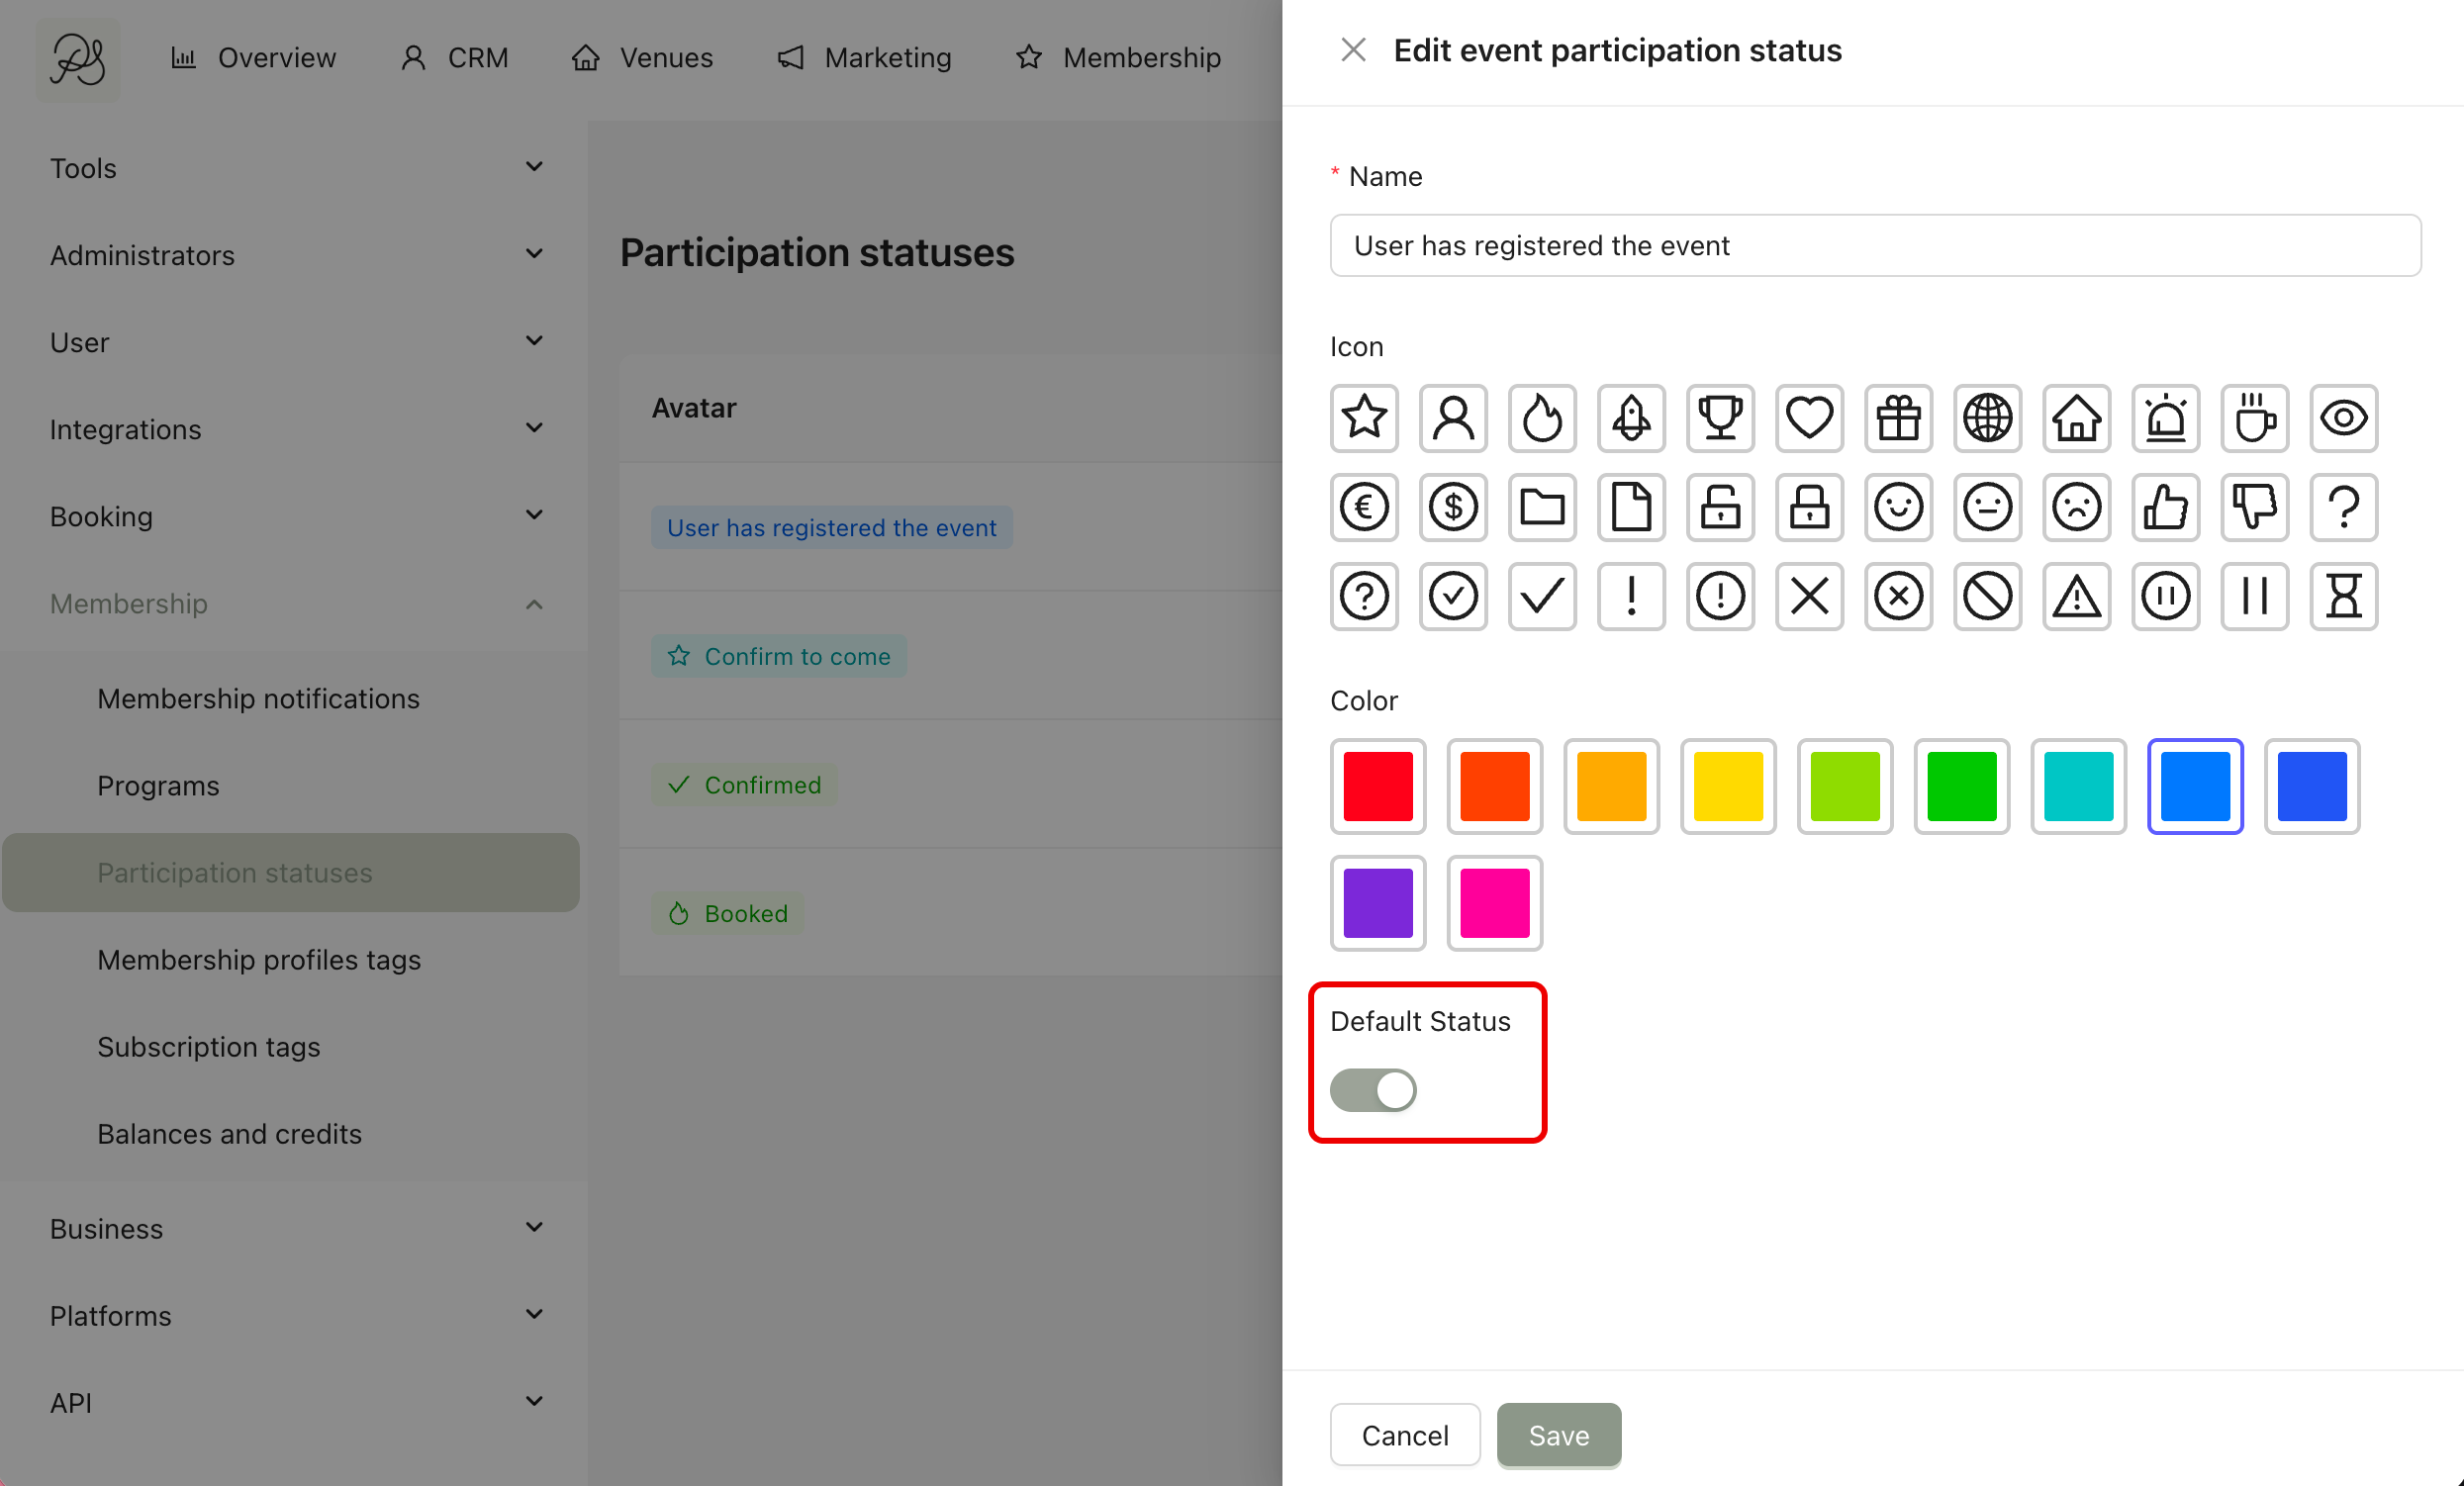
Once defined, this status replaces “Booked” for all new registrations.

2.4 Delete a Custom Status
To delete a status, click the Bin icon next to the status.