Membership program can be viewed and managed from the dashboard. You can edit its main information, design, view form questions, email notifications, and payment settings.
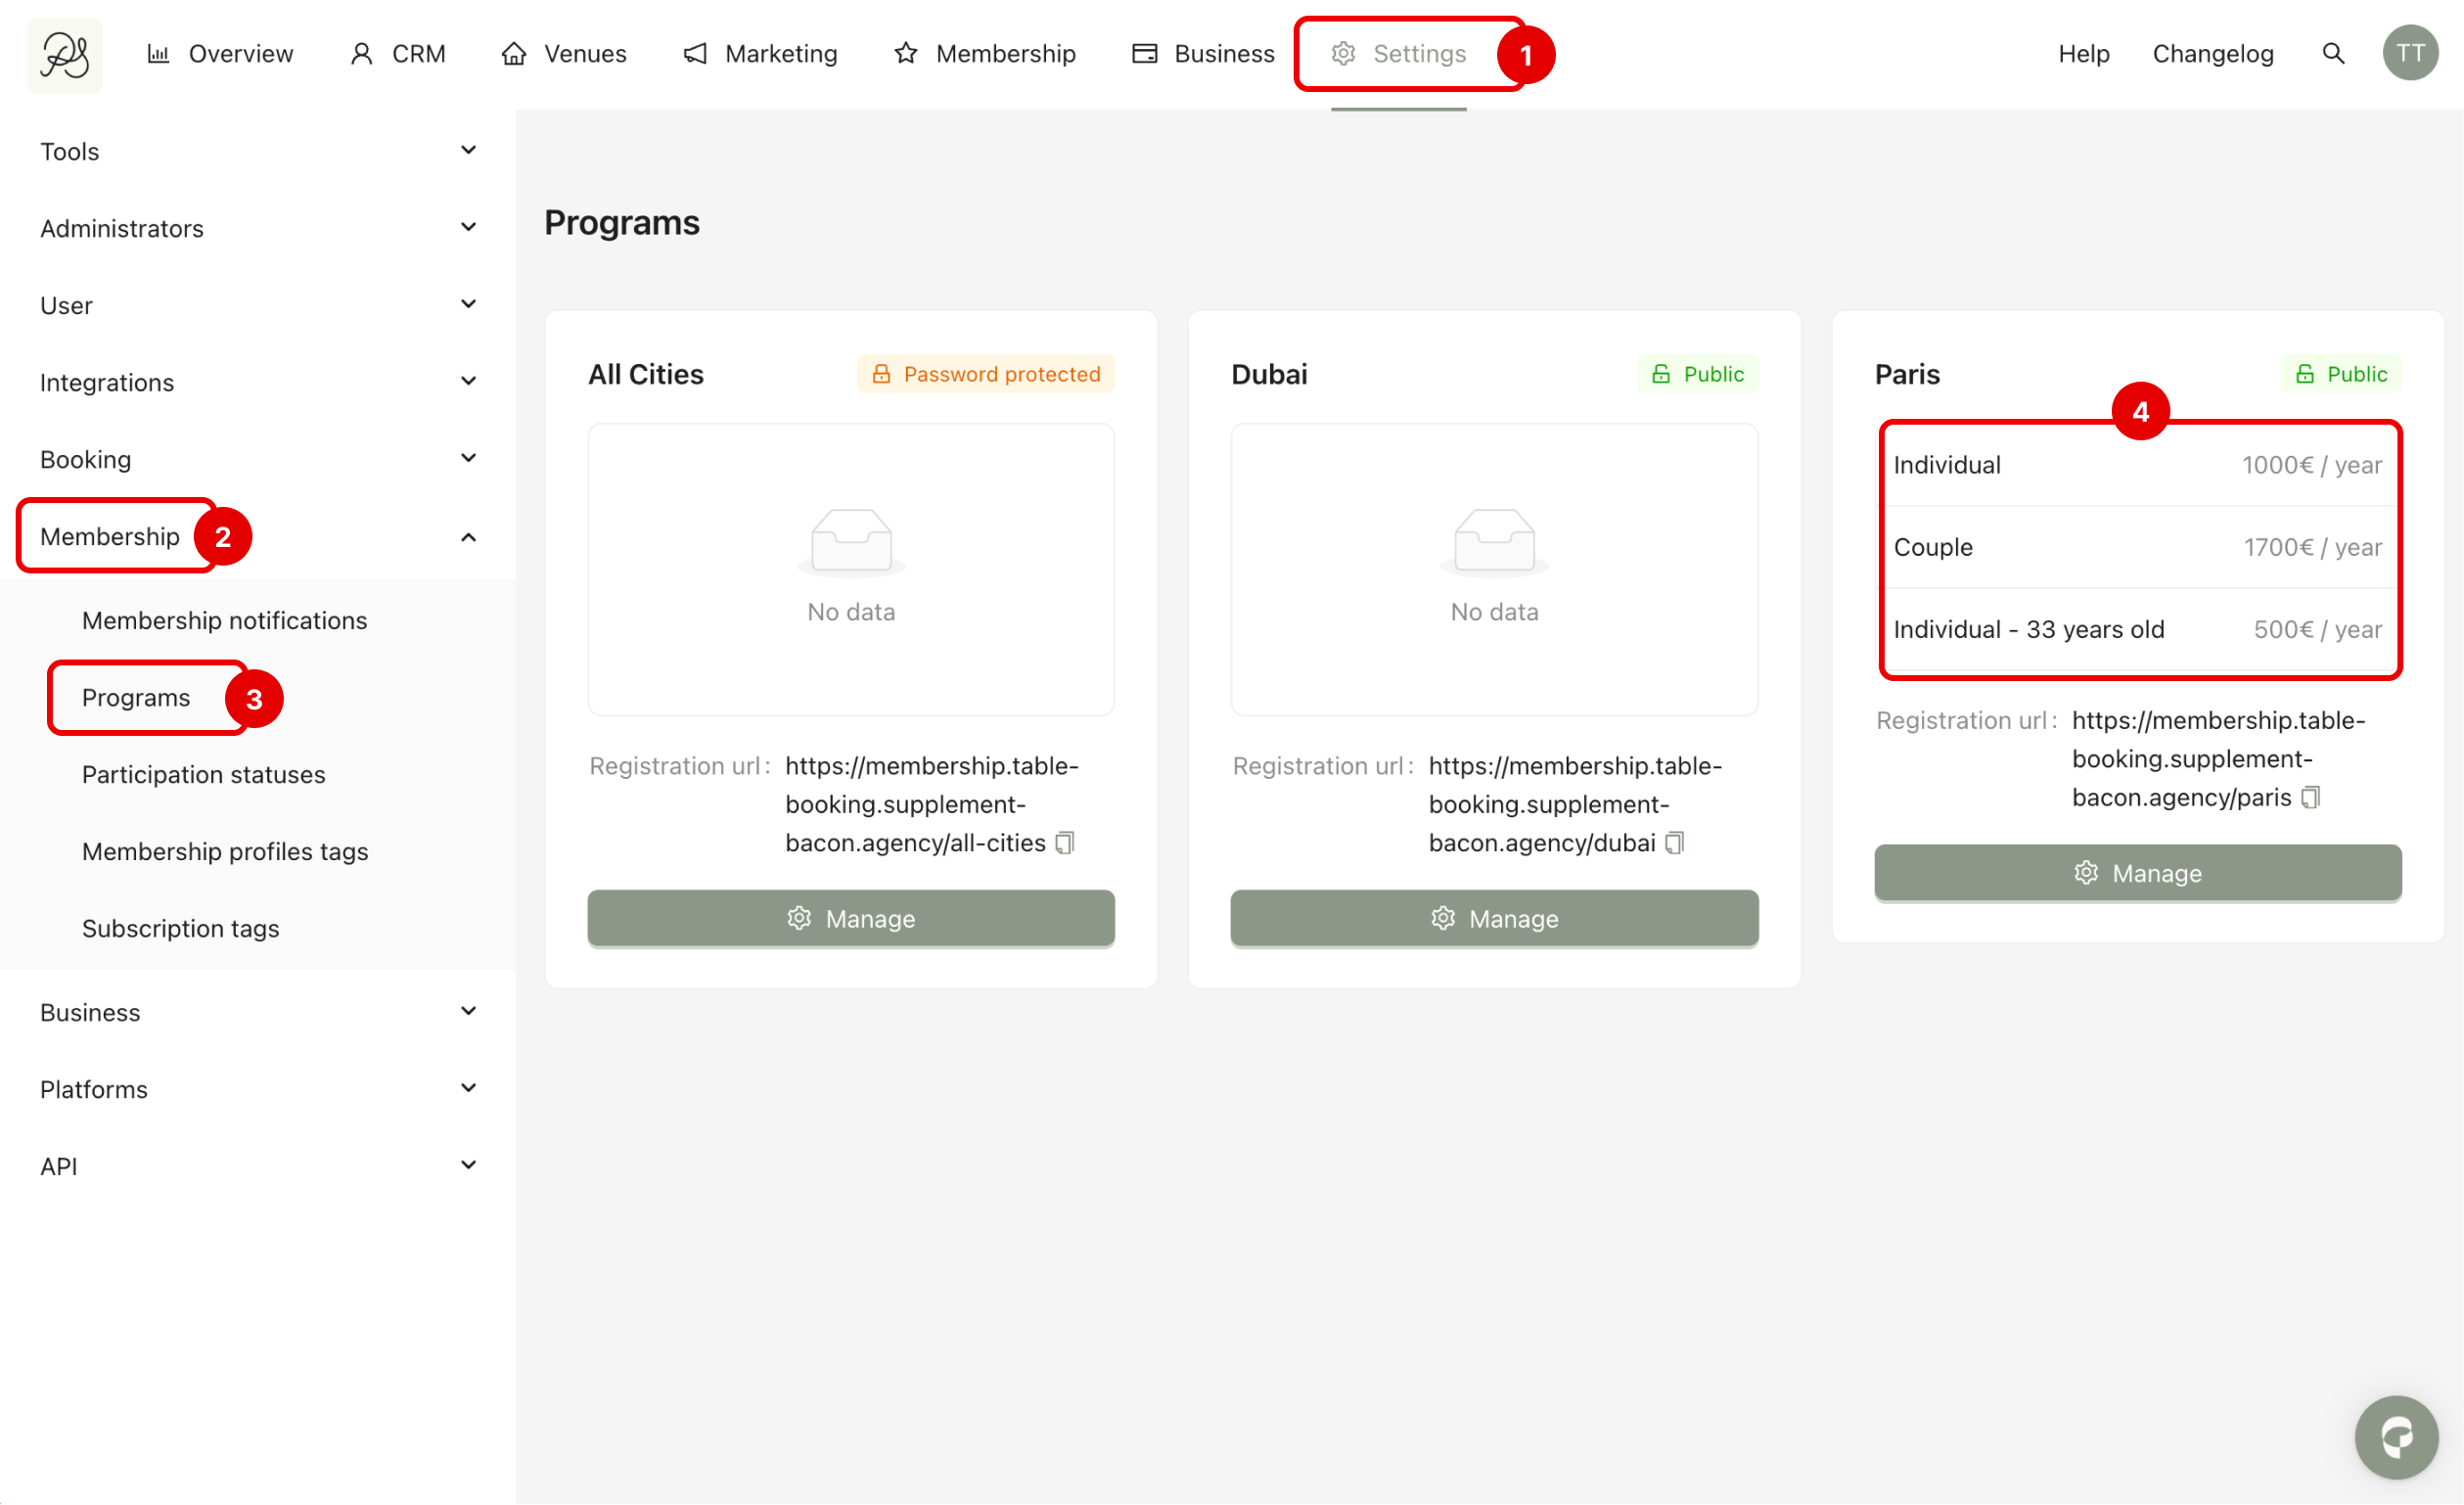
Go to Settings (1) → Memberships (2) → Programs (3). You can see all your programs with their plans here (if there are any).

To edit, click Manage to access the program details page. You will be in the tab Informations.
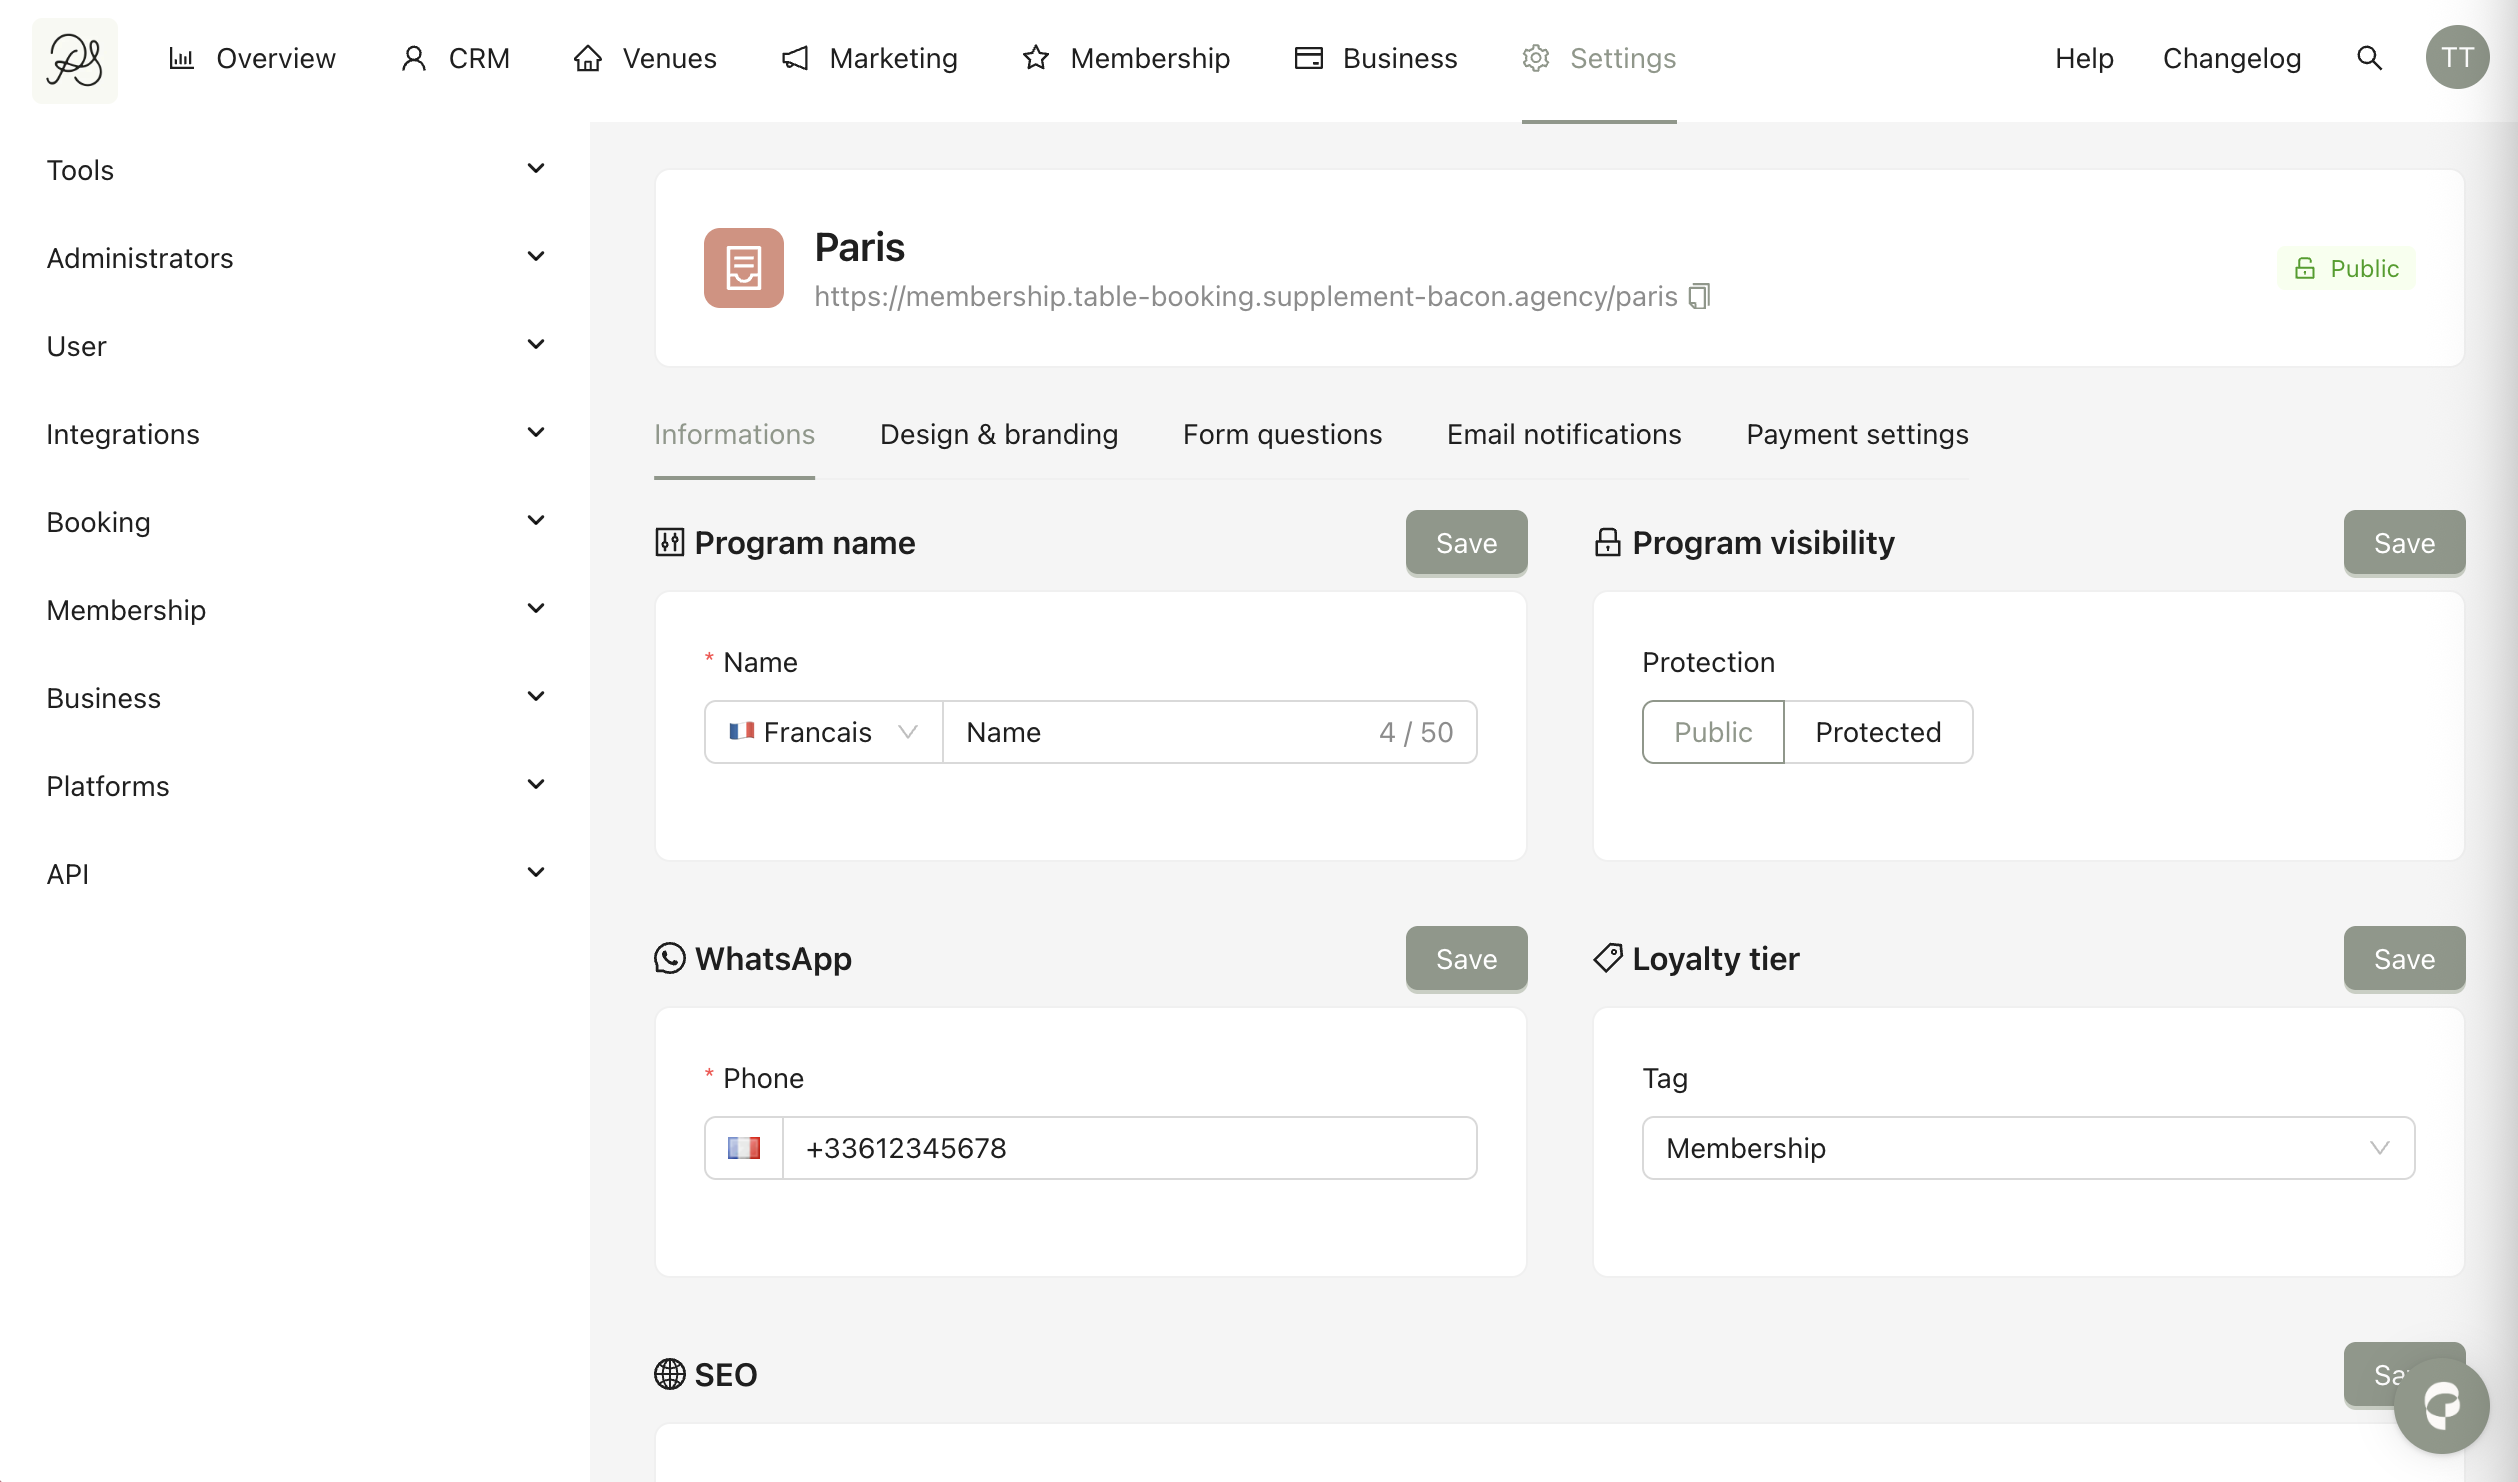
Here you can edit:
Program name: The name of the program.
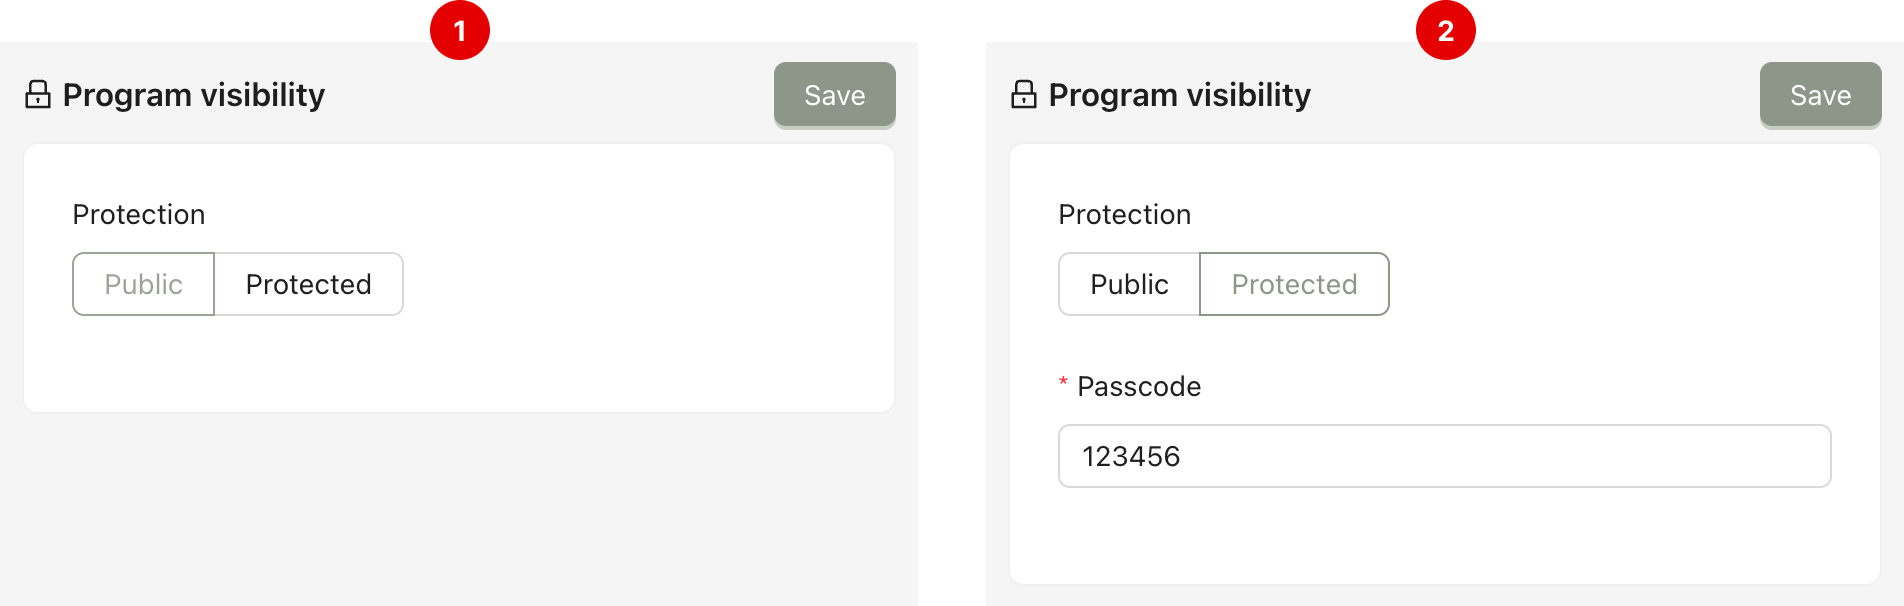
Program visibility: Configure it as protected or public.
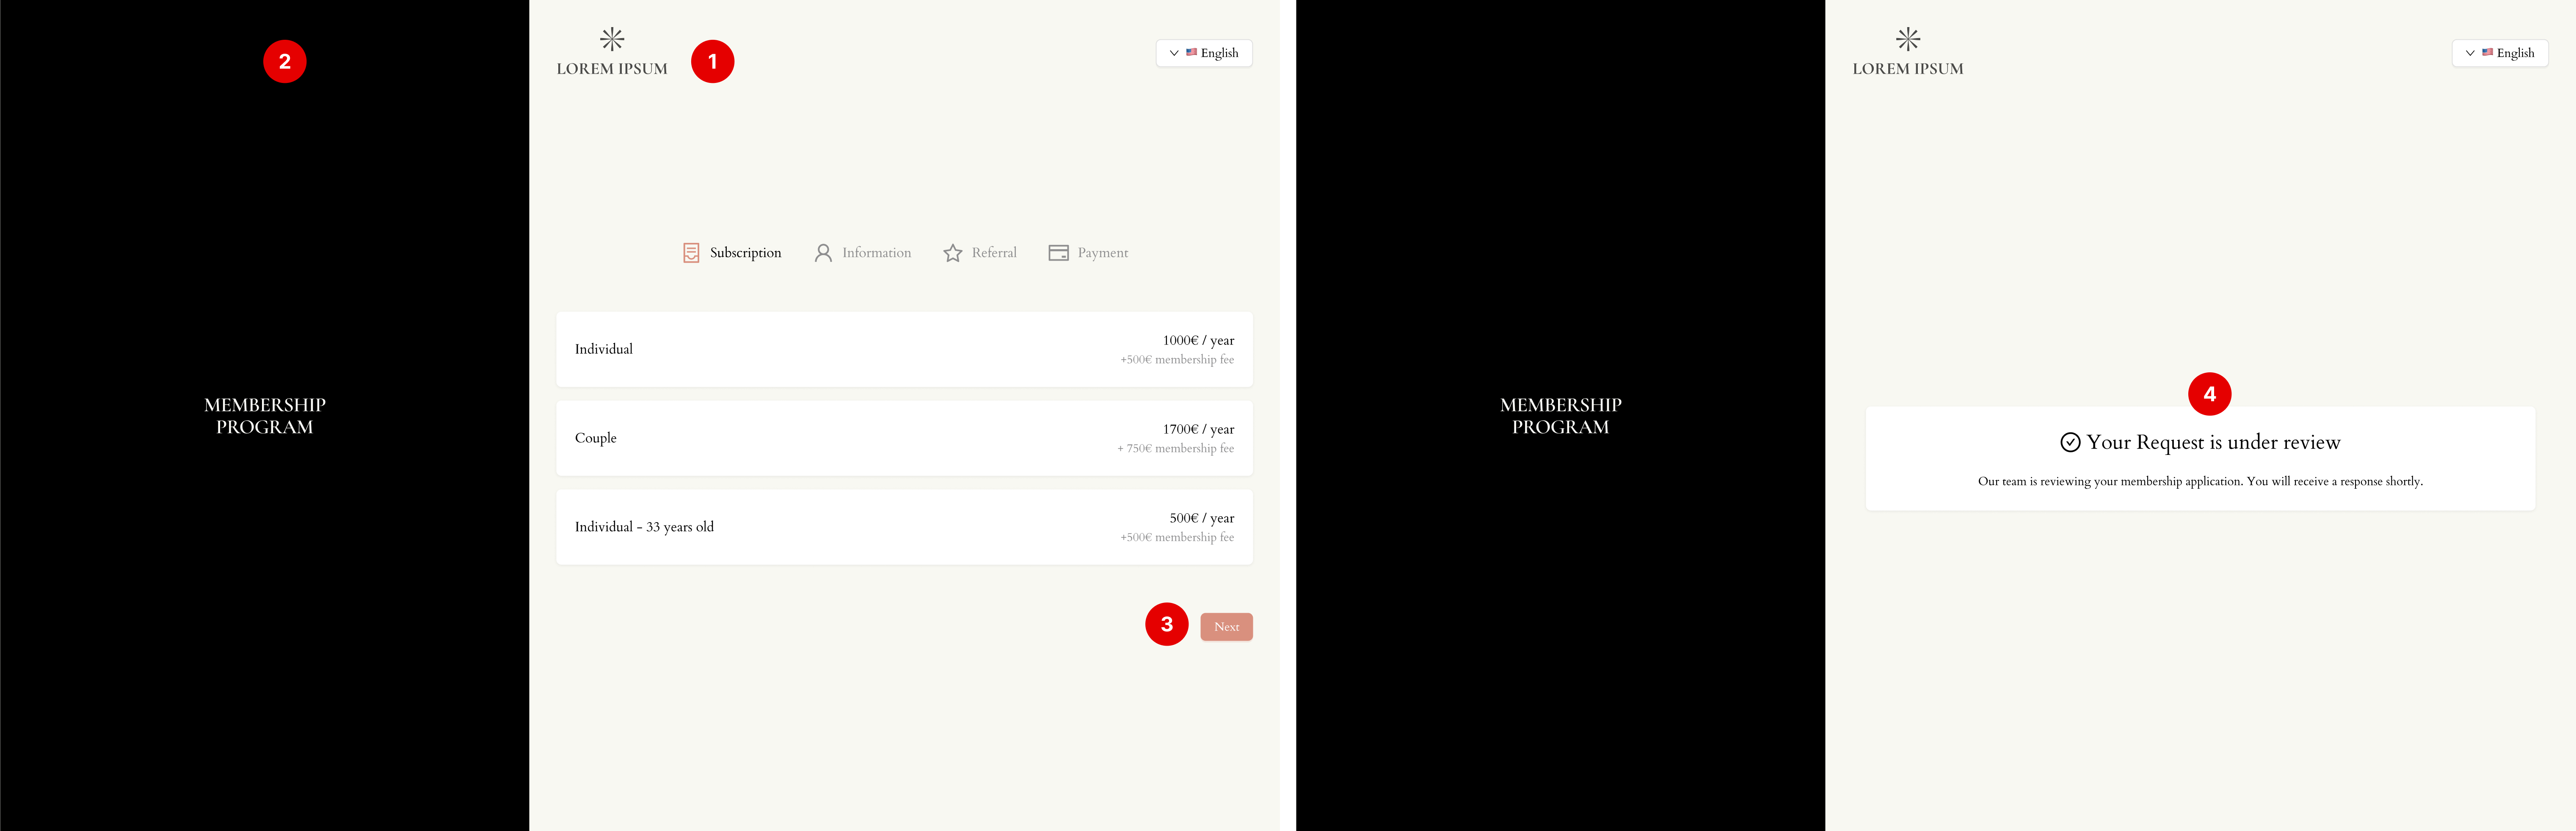
If it’s public (1), everyone can access it via the link.
If it’s protected (2), it will be protected by a password. You must enter the password. When opening the link, the customer must enter the password to go to the next steps.
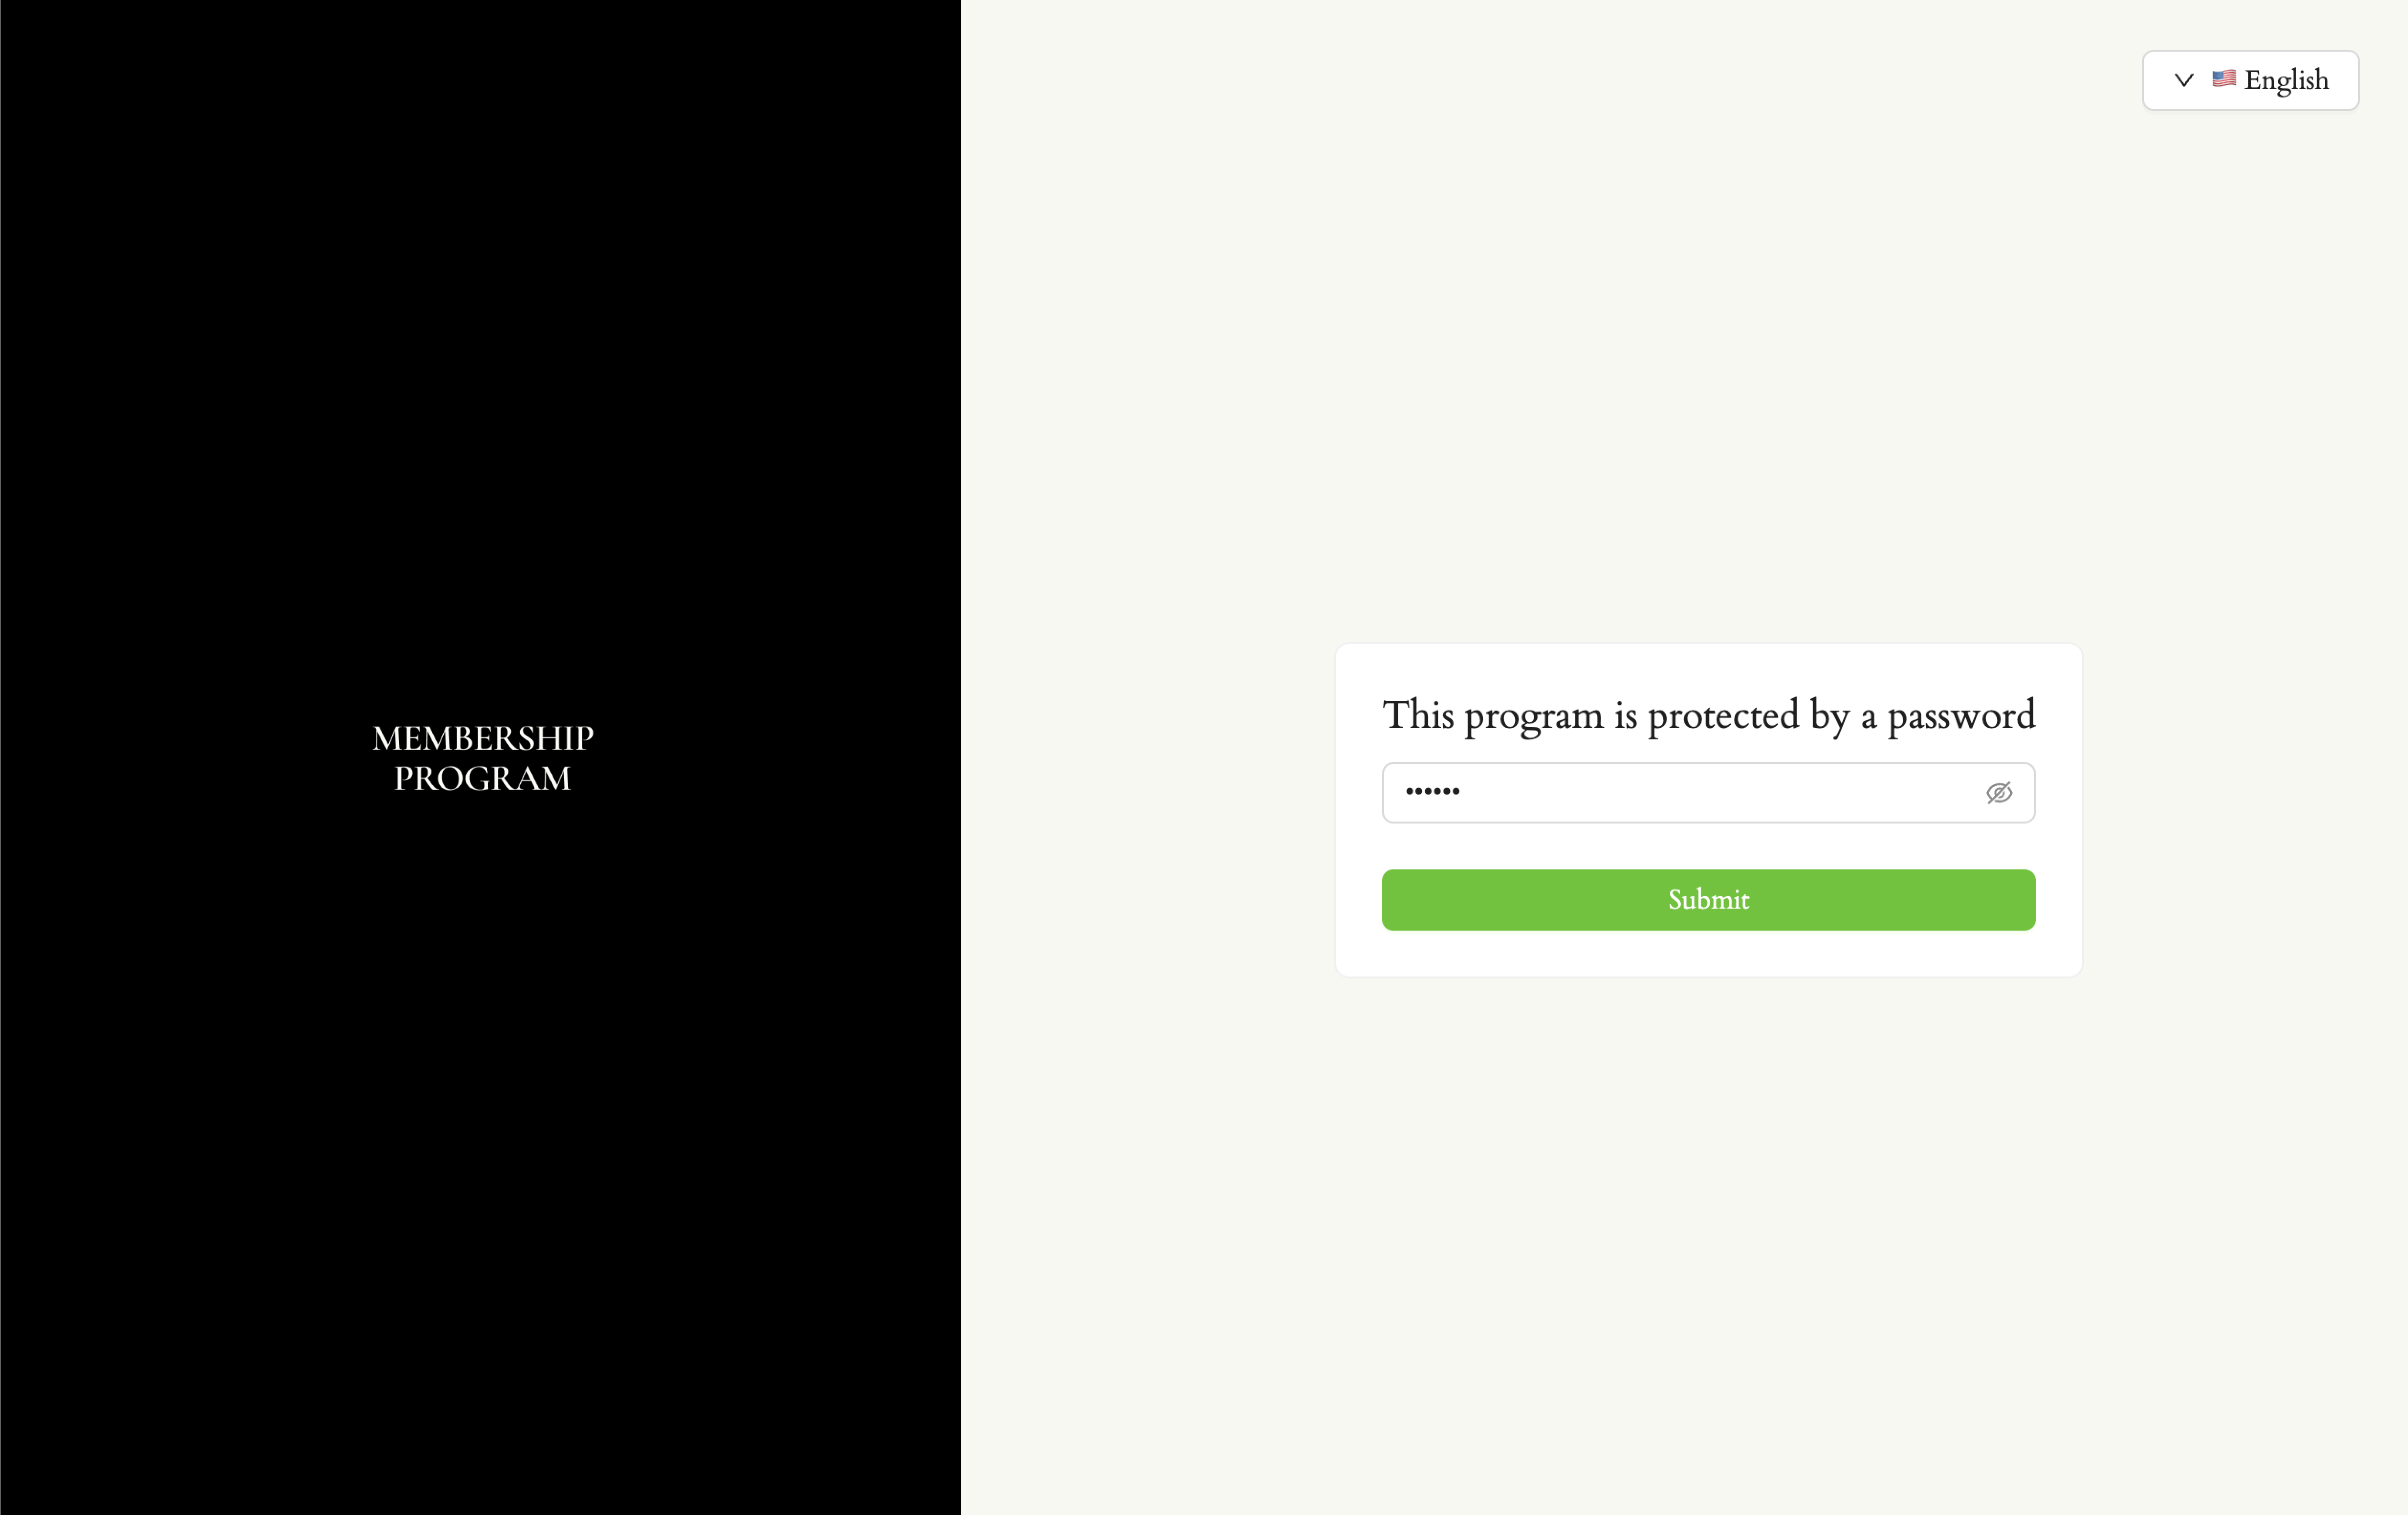
When the customer opens the link, they will be redirected to a password page. They must enter the correct password that you set in order to access the membership form.
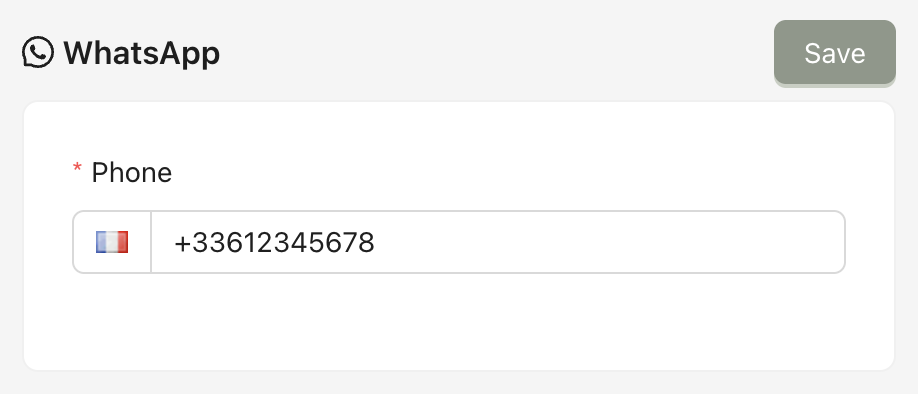
Whatsapp: The WhatsApp contact of the program when a customer books an event or open the concierge chat (when you choose the mode booking by chat message).

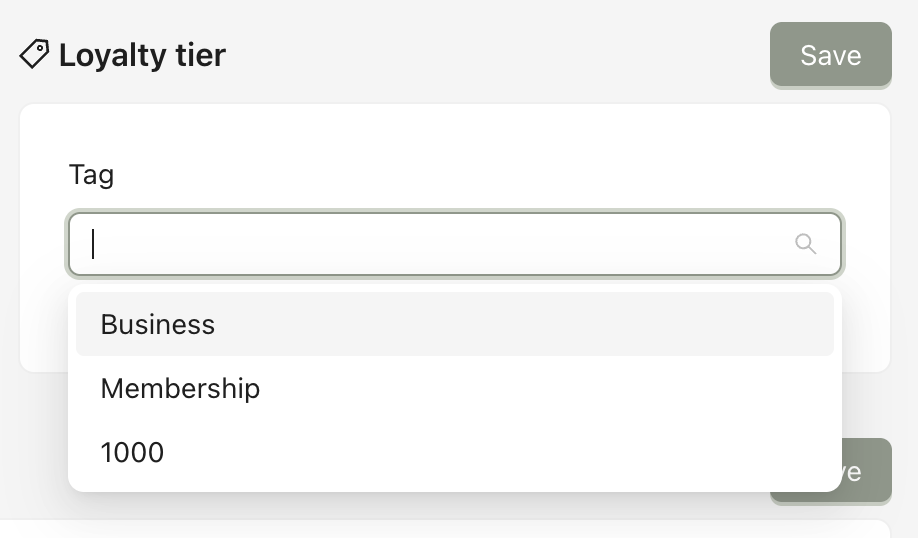
Loyalty tier: The tier that will be automatically assigned to the app profile linked to the member profile upon activation.
SEO: These define how your membership page appears in Google search results. The meta title is the clickable headline shown in search results, and the meta description is the short summary displayed below it.
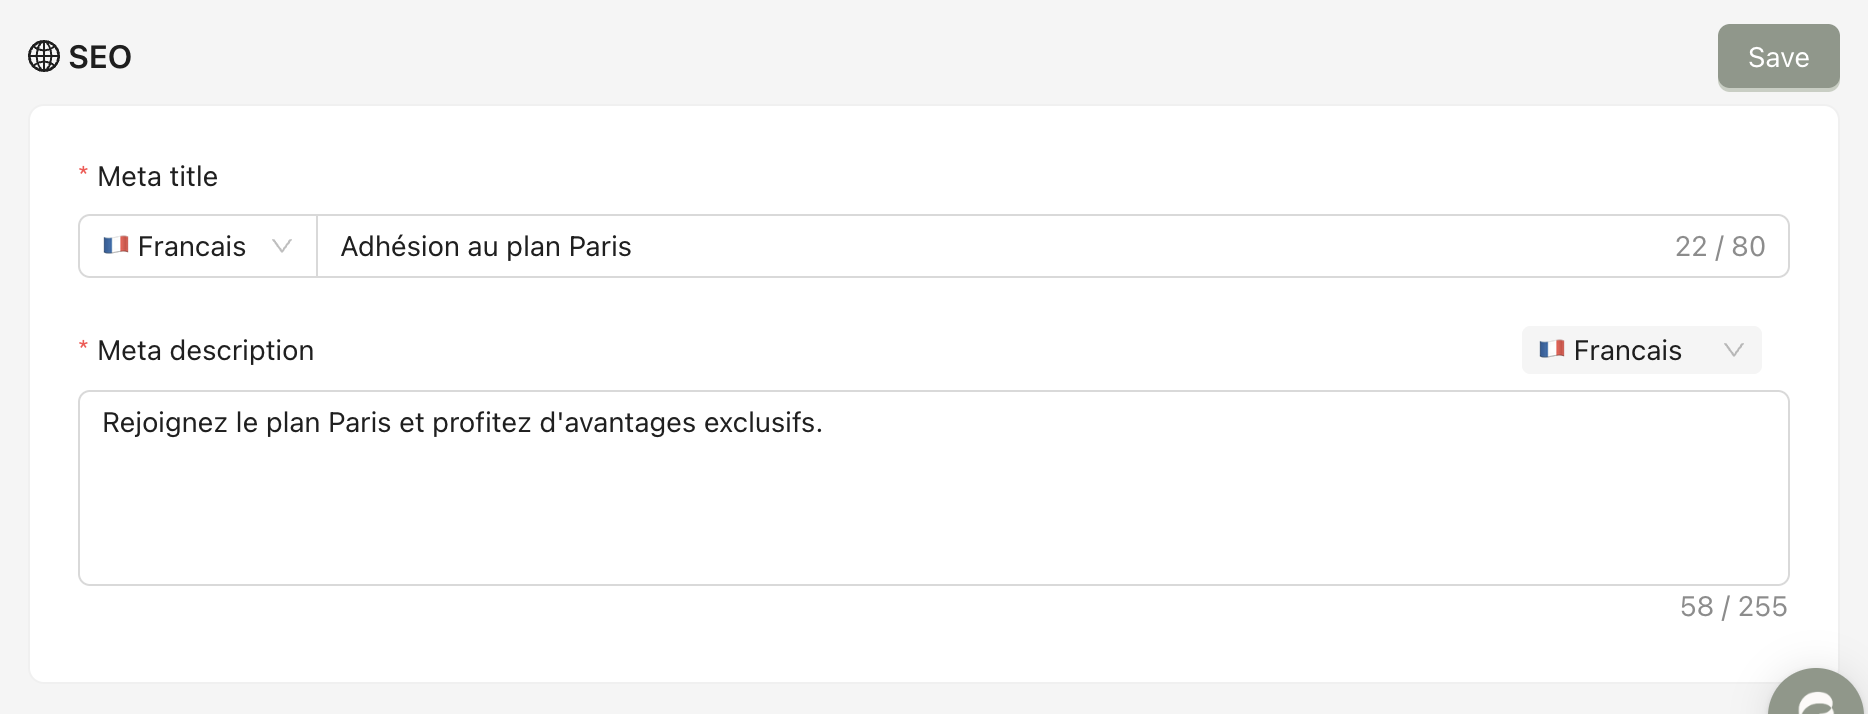
After making changes, click Save.
From the program detail page, click the tab Design & Branding.
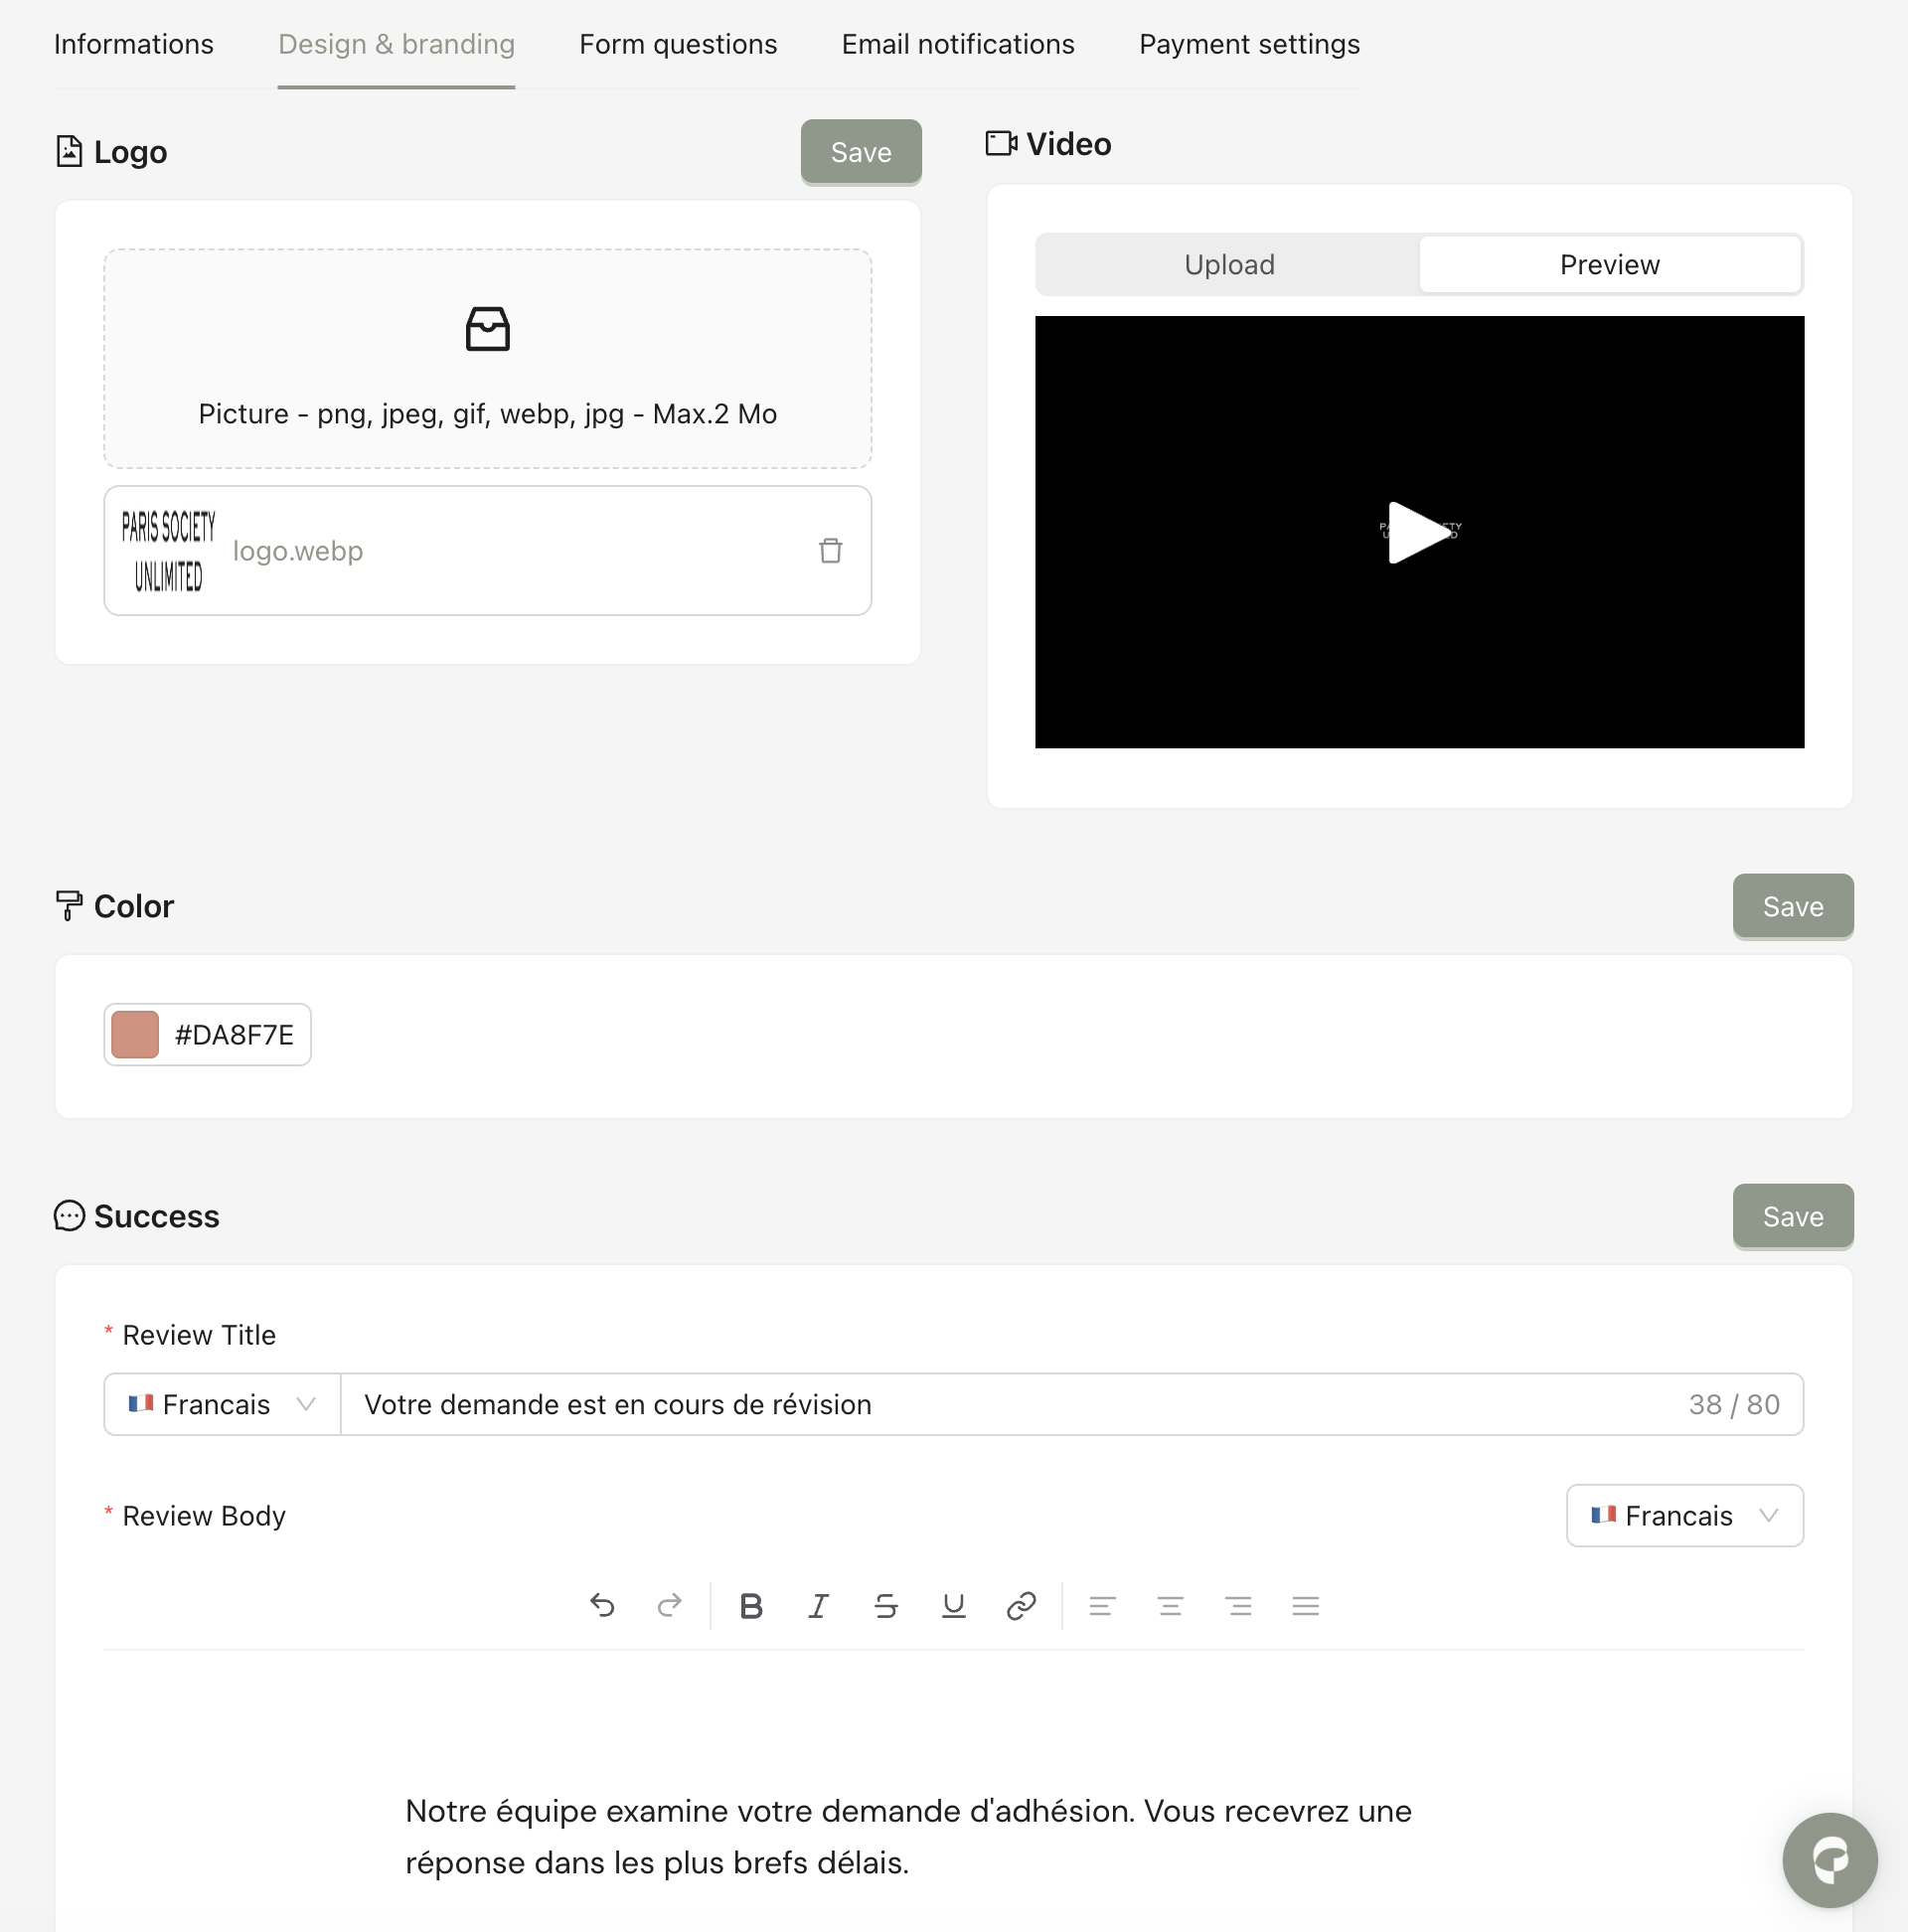
Here you can edit:
Logo (1): The logo displayed at the top of the form.
Video (2): The video on the left of the form.
Color (3): The primary color of the form in elements such as buttons, headers, etc.
Success message (4): The success message that appears after the form is submitted.
After making changes, click Save.
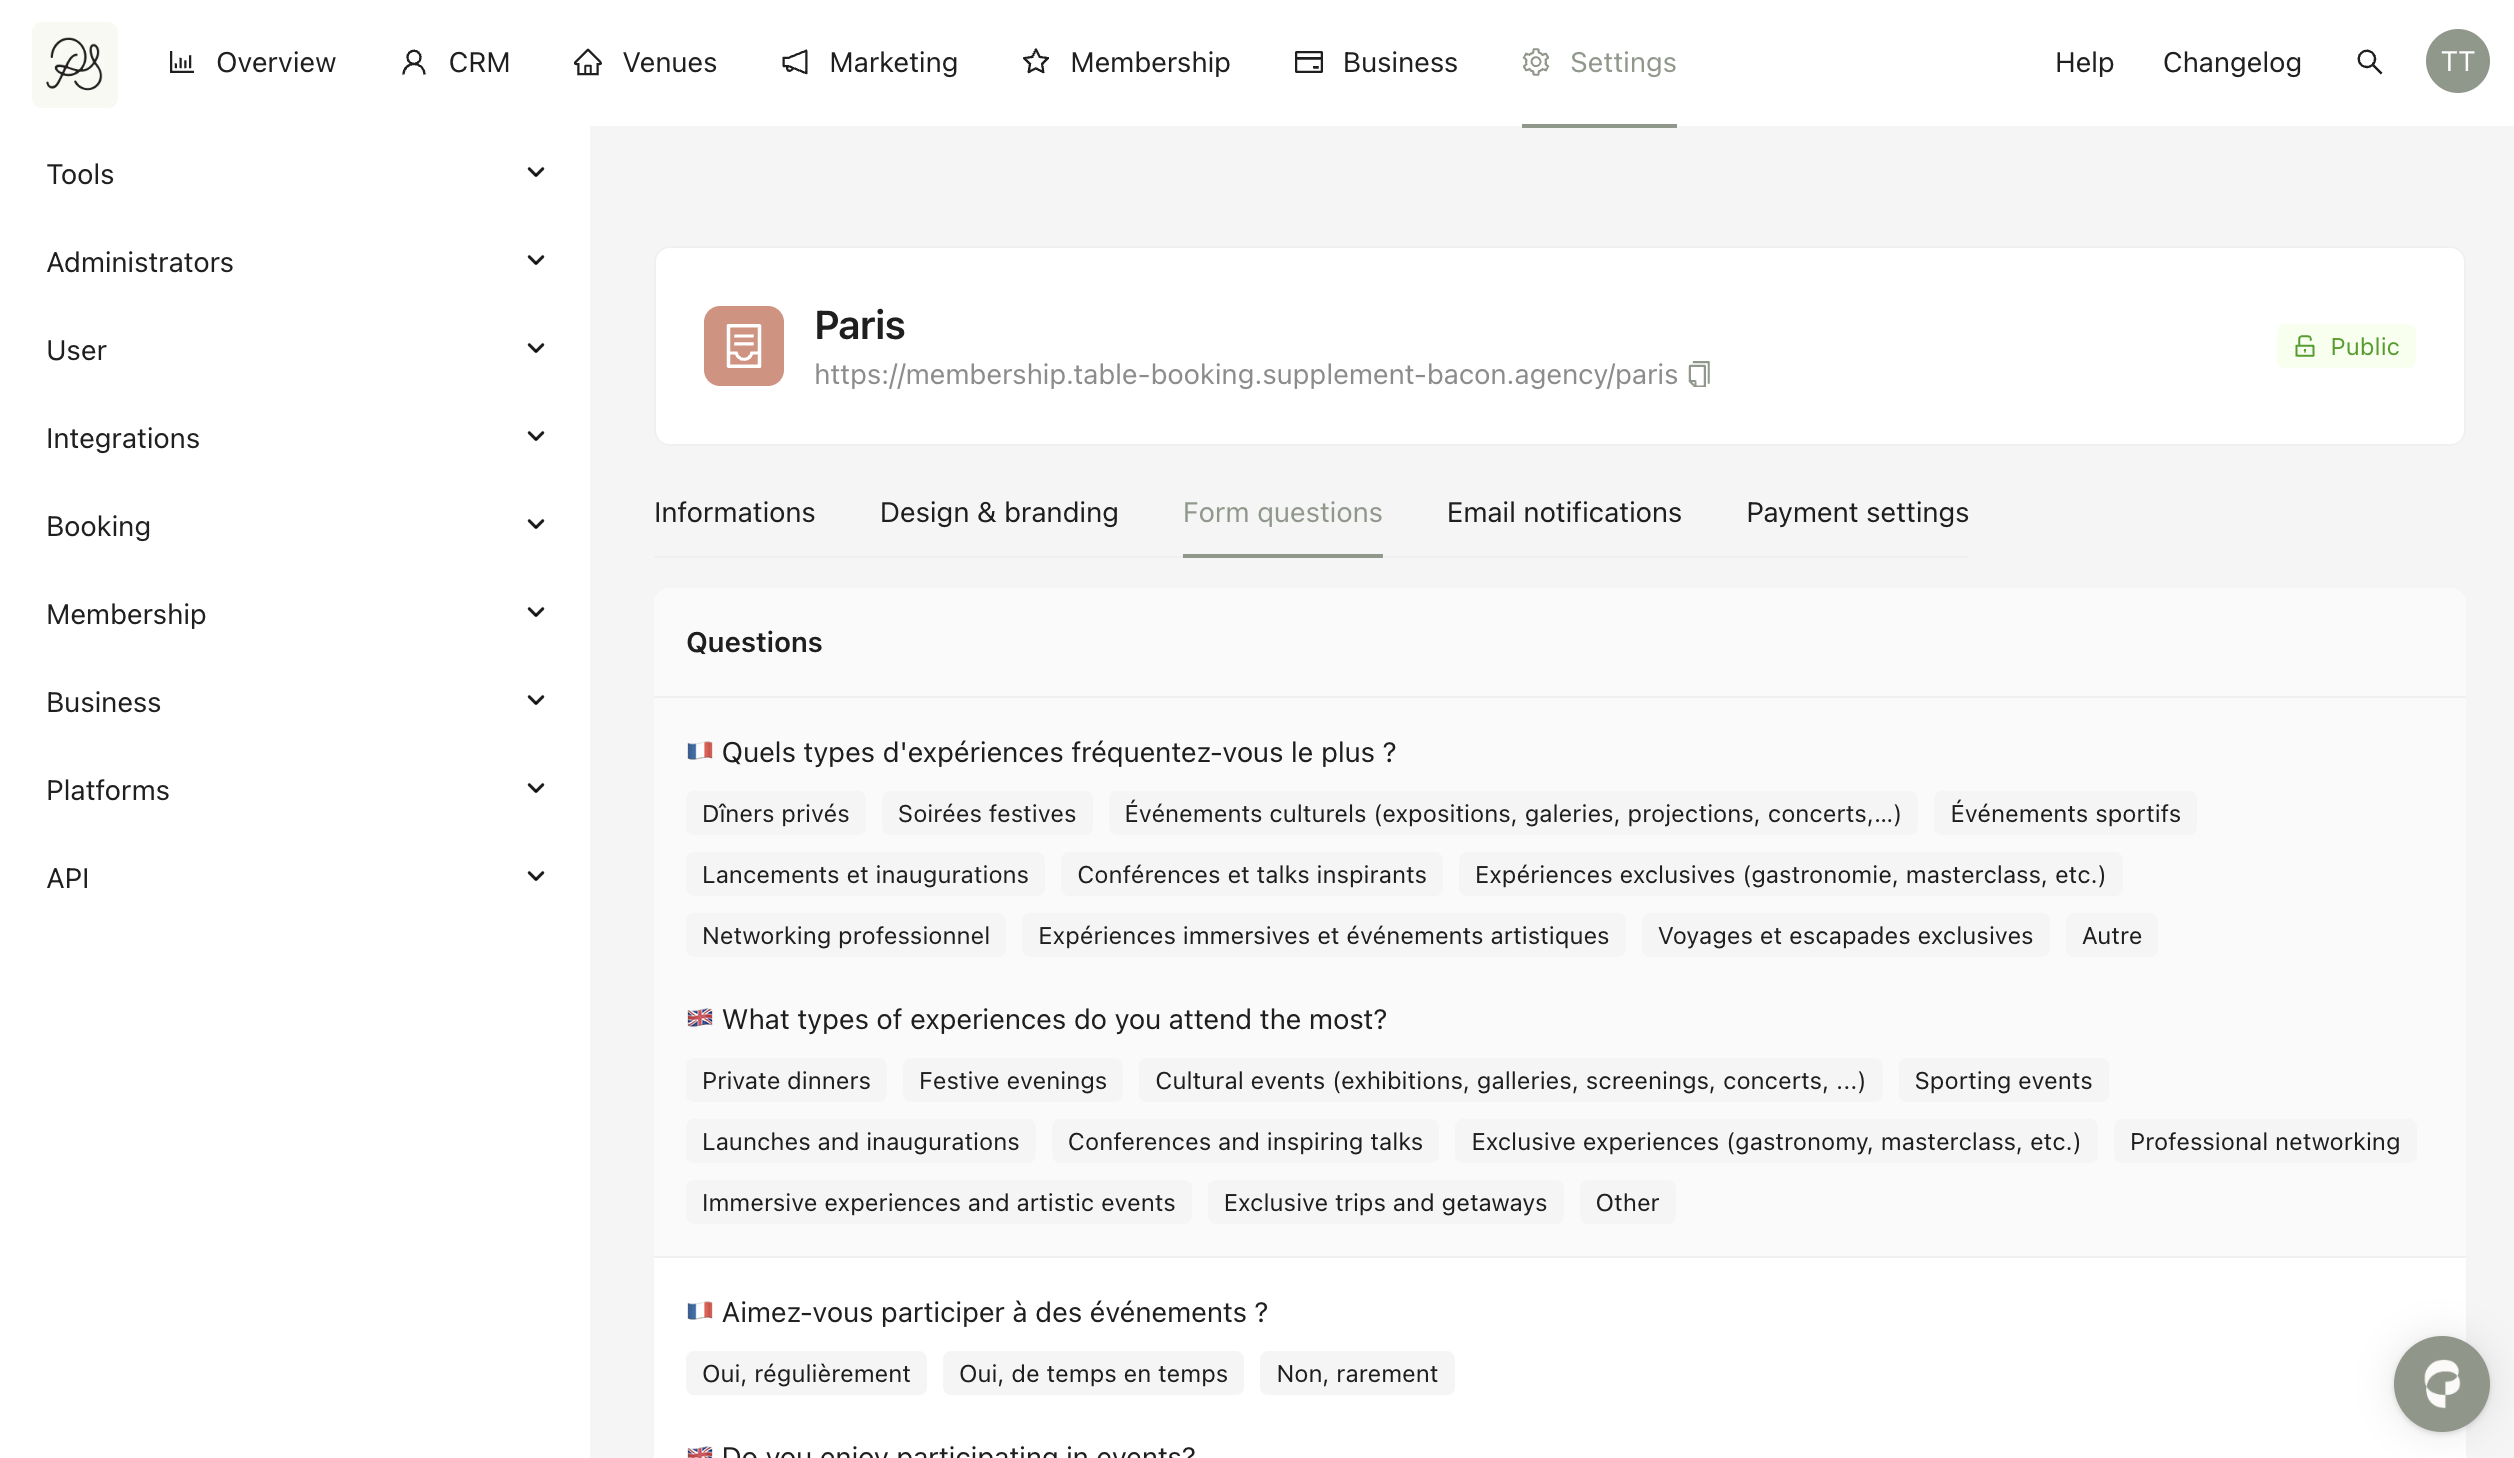
From the program detail page, click the tab Form questions. Here you can view all the questions and answer options in the form.
From the program detail page, click the tab Email notifications. You will see 5 types of email, corresponding to different periods of the onboarding process:
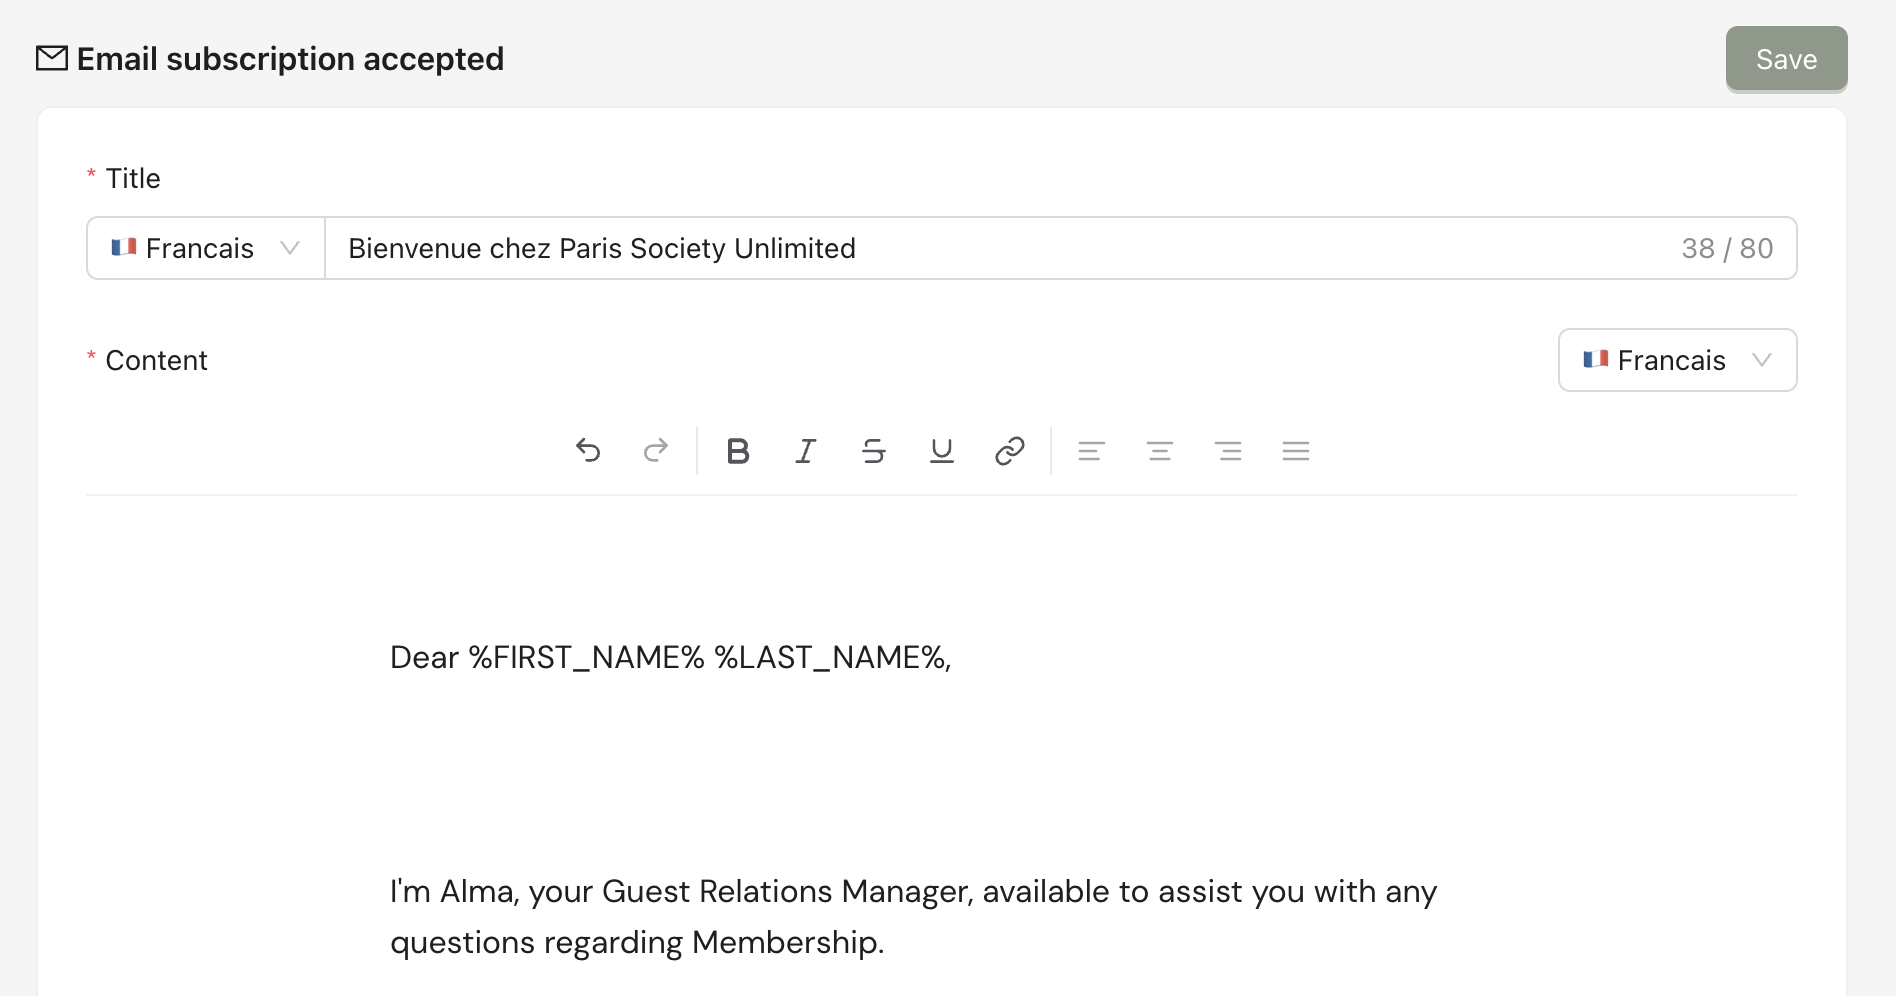
5.1. Email subscription accepted
This will be sent when the customer’s PSP finishes capturing the payment successfully, and the customer becomes a member. An automatic mail will be sent. Here you can insert dynamic variables. For example, the variable %CODE% can be used to display the recipient’s dedicated activation code.
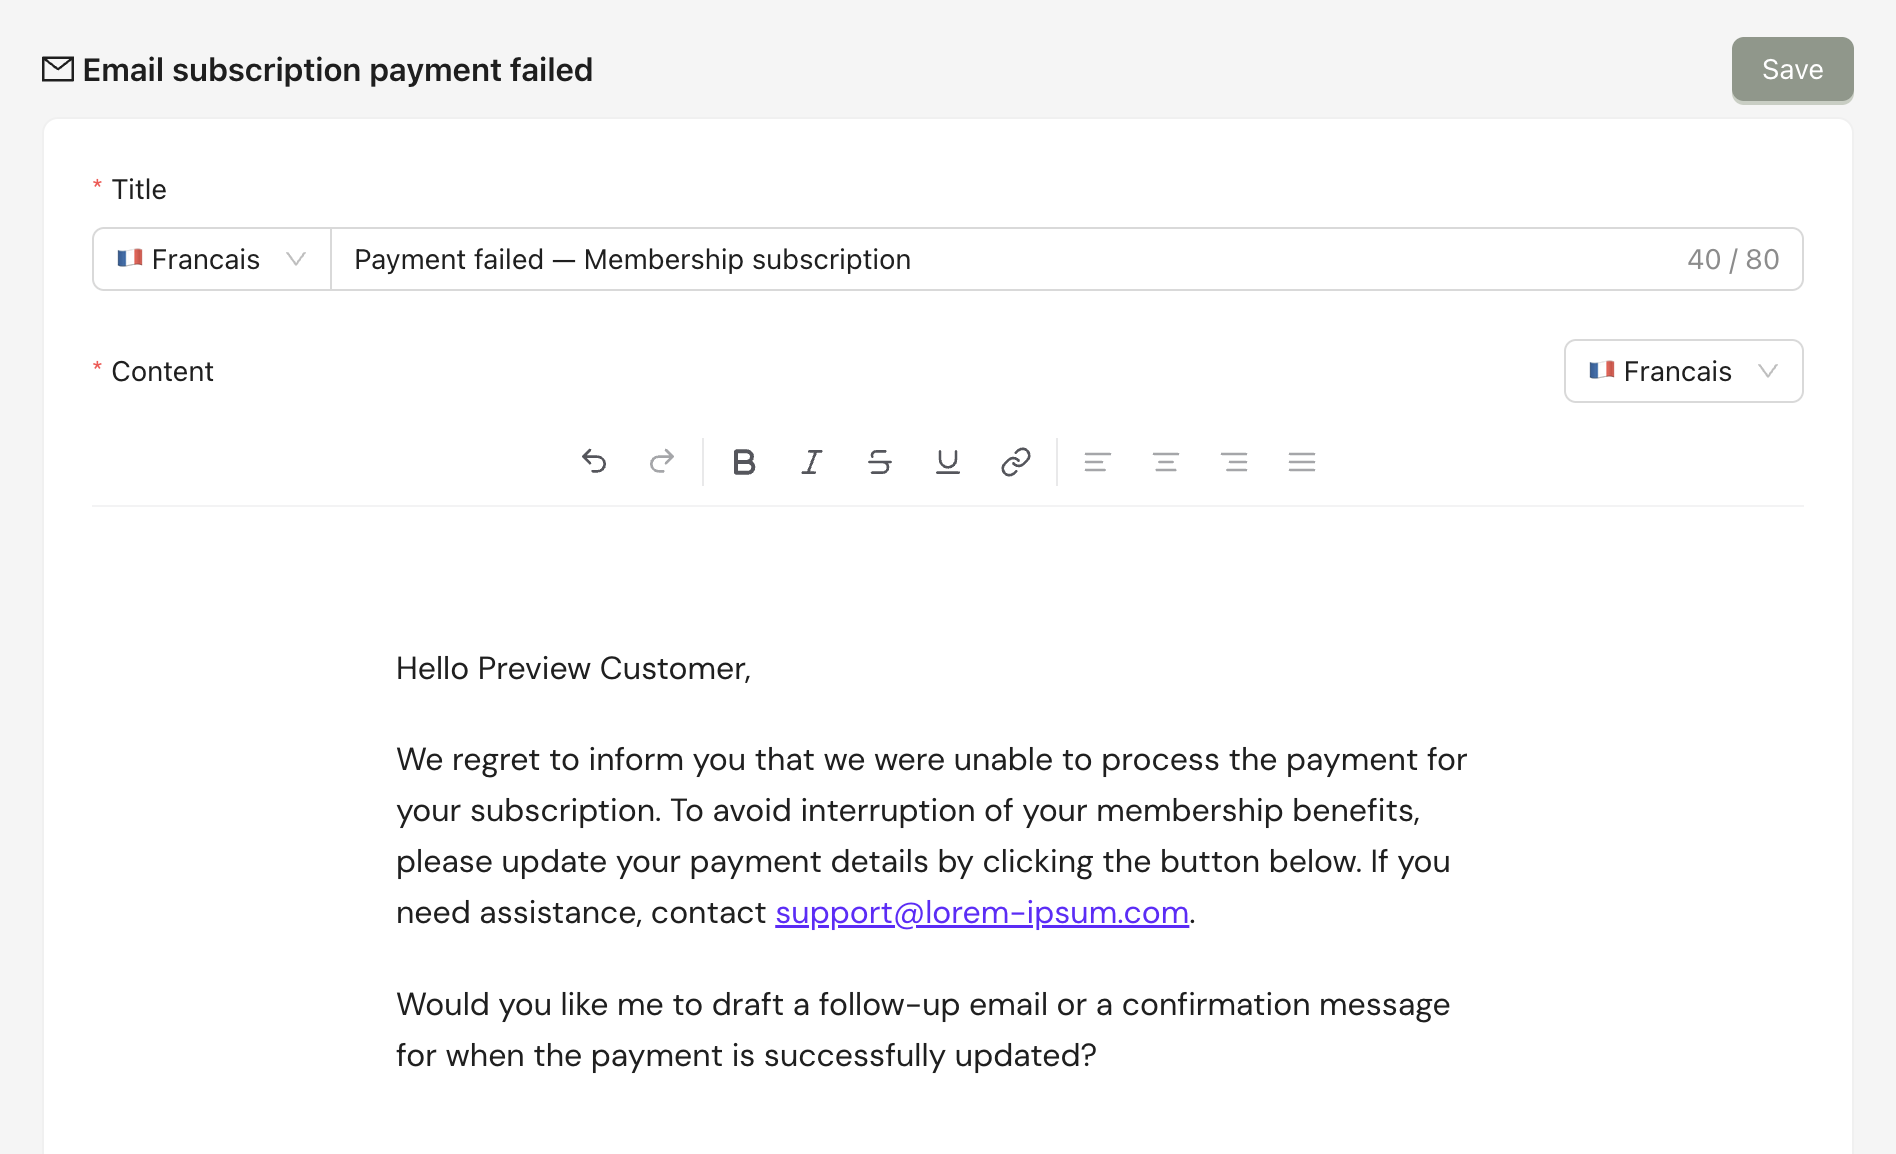
5.2. Email subscription - Payment failed
This will be sent when the PSP fails to capture the payment. The customer will receive an email announcing that the payment has failed. Here you can insert dynamic variables. For example, the variable %PAYMENT_LINK% can be used to display the recipient’s dedicated payment link so they can fill in the payment details again.
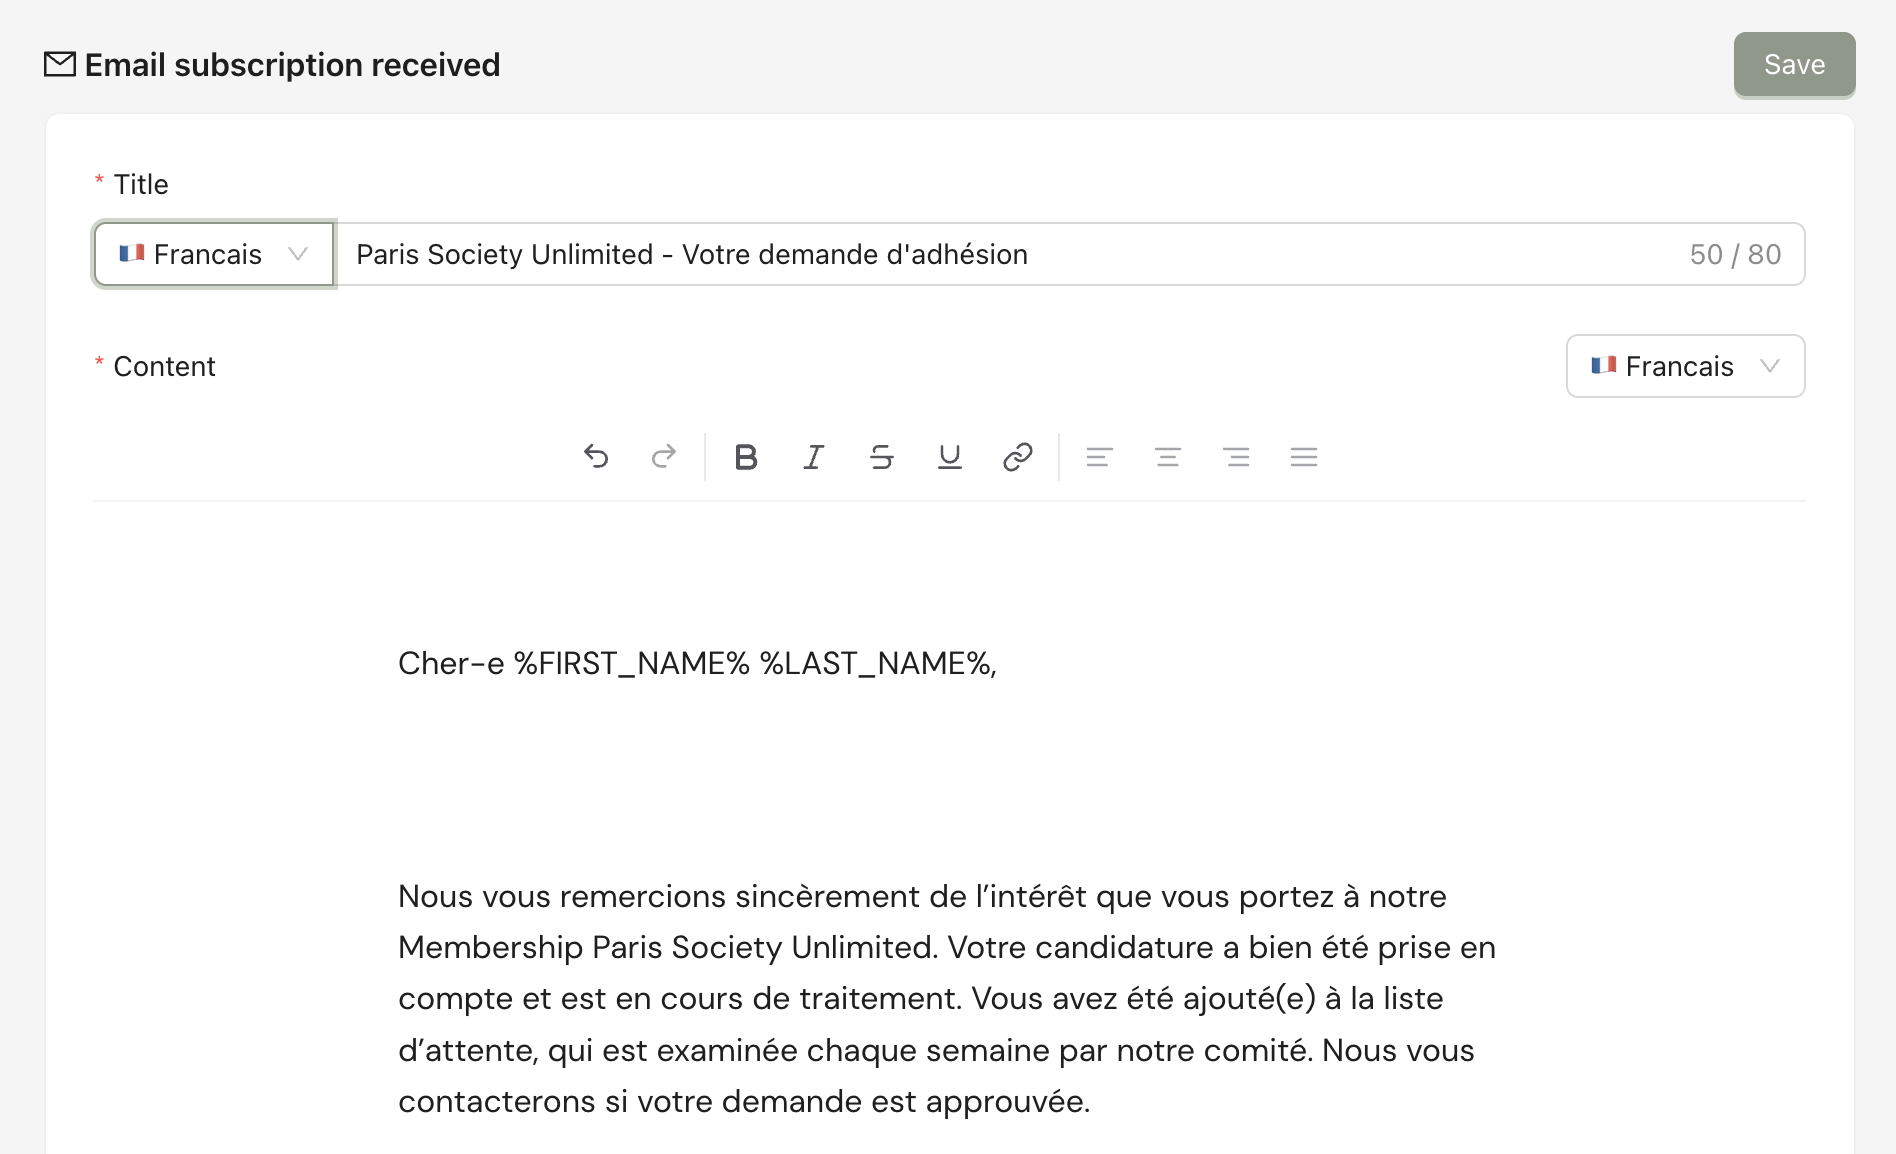
5.3. Email subscription received
This will be sent when the customer has submitted the form and is waiting for the responsible person of the brand to review it. You can use variables to customize it for each customer.
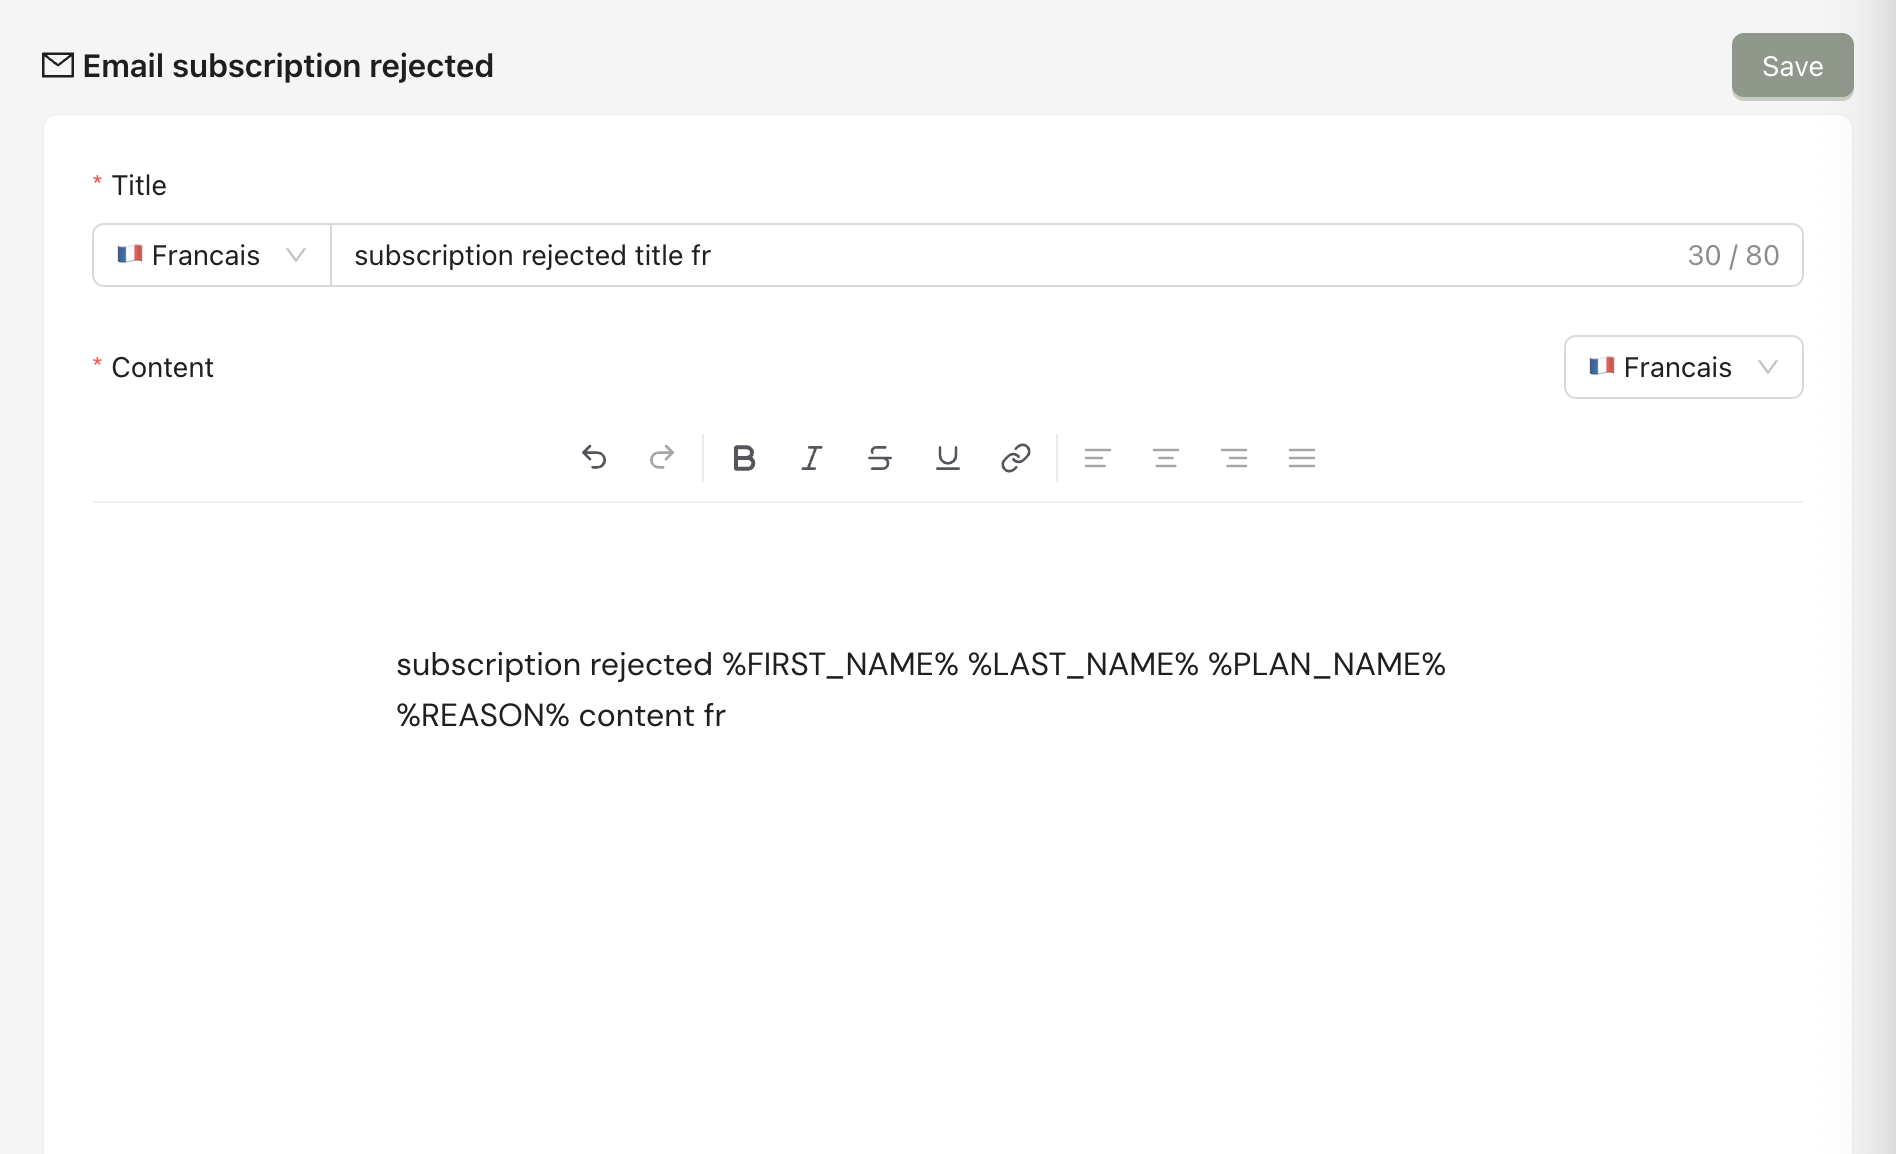
5.4. Email subscription rejected
When the admin has rejected the request, this email will be sent. You can use variables to customize it for each customer.
5.5. Email renewal failed
When the PSP tries to capture the payment at the renewal date and fails, it will be sent automatically to announce this to the client. You can use variables to customize it for each customer.
After making changes to each section, don’t forget to click Save. You have to fill in titles and content in both French and English.
Result: The email customers receive can look like this:
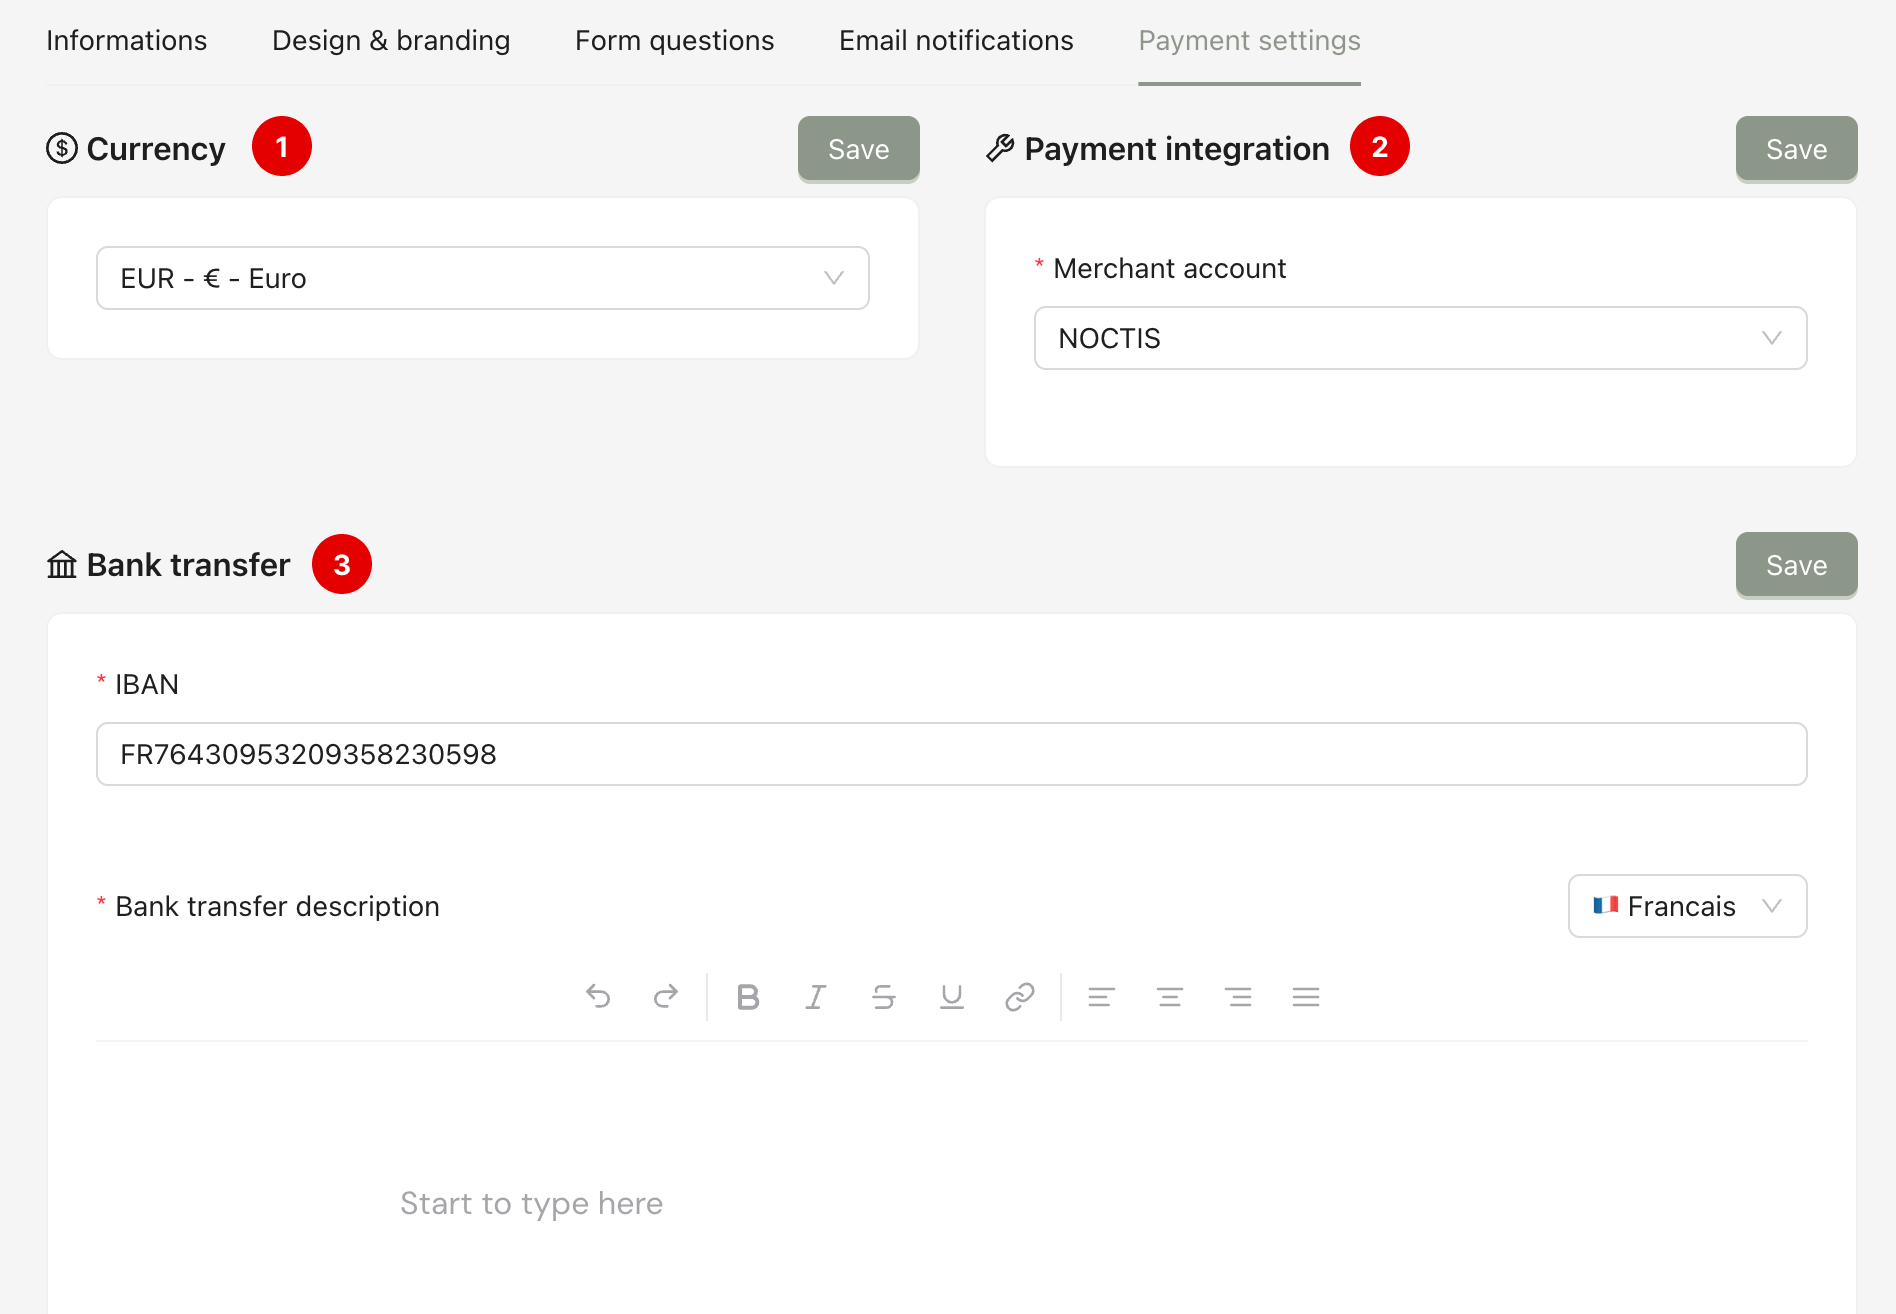
From the program detail page, click the tab Payment Settings. This page is to configure the main functions of the payment step when the customer fills in the form. You can configure these:
Currency (1): You can choose the currency of the program.
Payment integration (2): Payment integration is used to choose the PSP account for the program.
Bank transfer (coming soon) (3): If the bank transfer is filled in, it will appear on the payment portal below the credit card form to offer another payment method. This feature will be developed soon in the future.
After making changes to each section, don’t forget to click Save.